
�
�
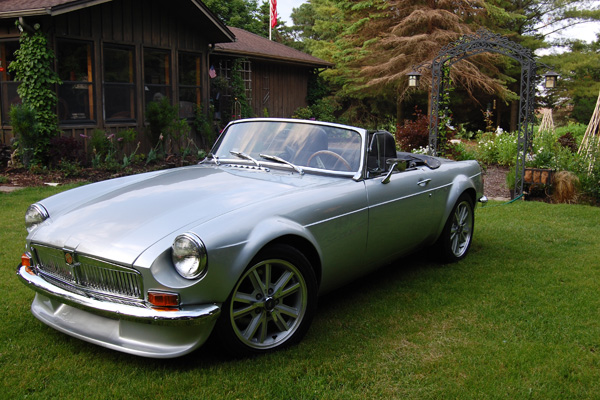
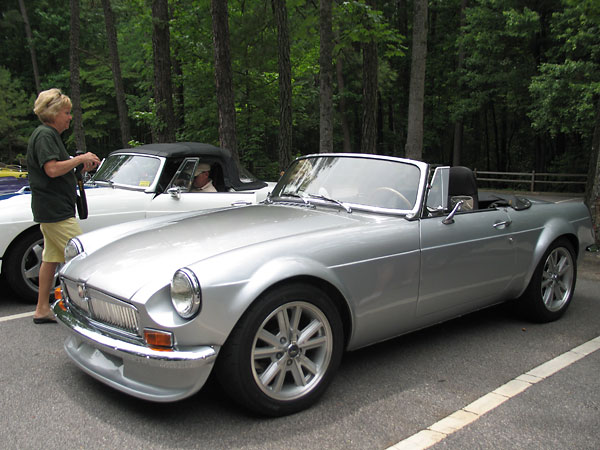
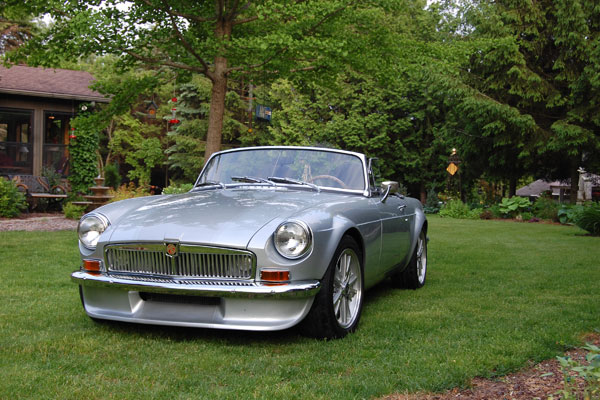
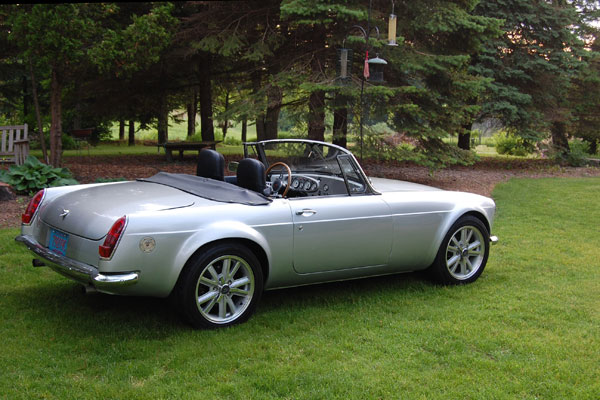
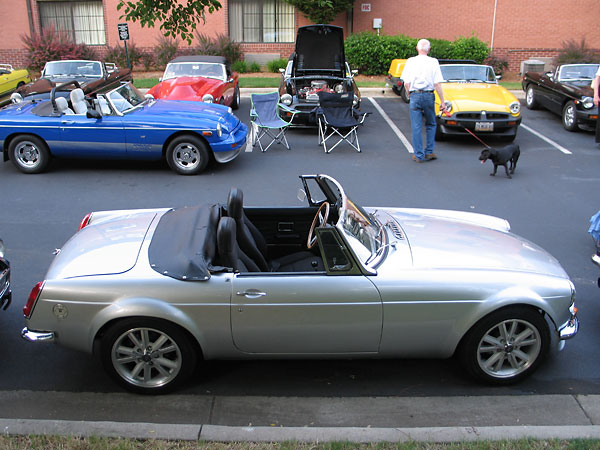
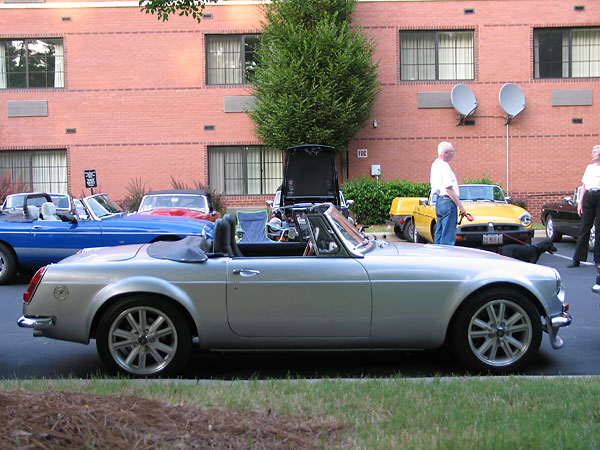
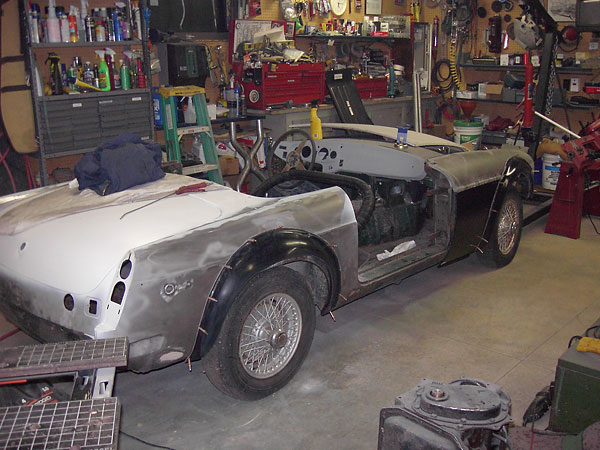
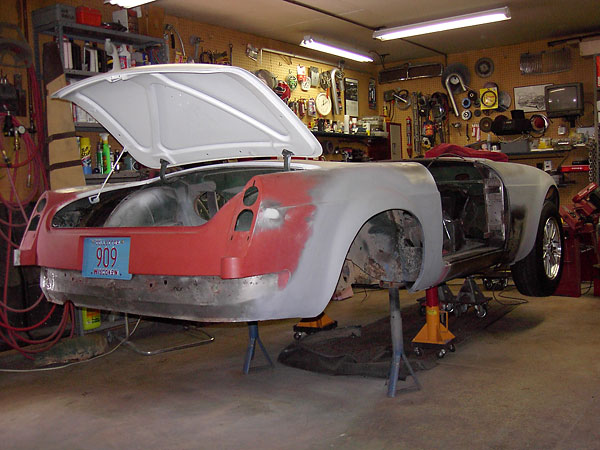
The Silver Bullet: Paul Schils' 1971 MGB with Ford 302 V8 Engine
� as published in BritishV8 Magazine, Volume XVII Issue 2, December 2009��
�
Owner: Paul Schils
�
�
City: Fredonia, WI
�
Model: 1971 MGB
�
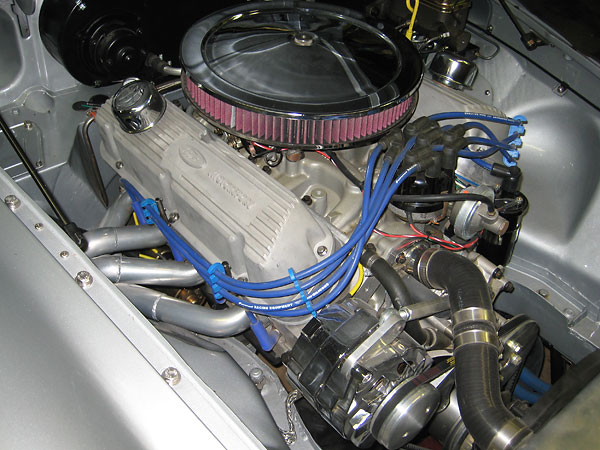
Engine: Ford 302 V8
�
Conversion by: owner.�
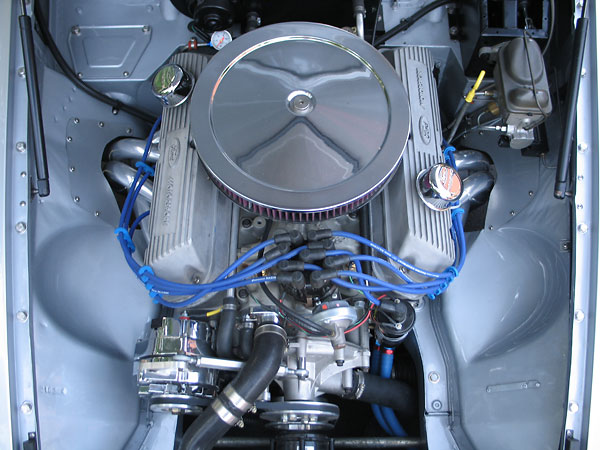
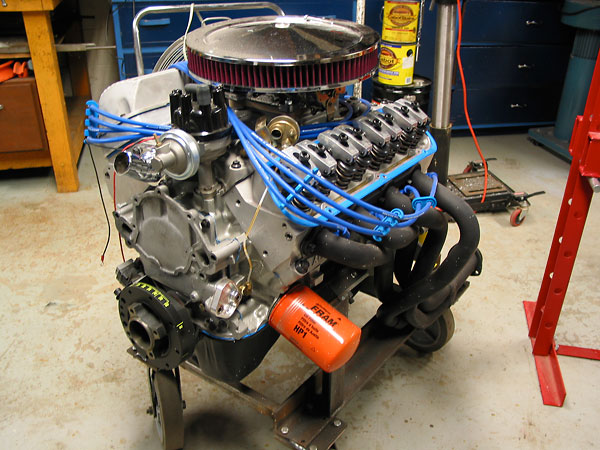
| Engine: | �Ford 5.0 H.O., bored 0.020" over. � Speed-Pro hypereutectic flat-top pistons with valve reliefs (STL-H120CP30). � Airflow Research "AFR 185" aluminum cylinder heads (2.02" intake, 1.90" exhaust.) � Comp Cams 268H "High Energy" hydraulic flat tappet camshaft (0.454" lift, 268° duration). � Scorpion roller rockers. � Ford Racing harmonic balancer (M-6316-M50), with timing tape. � Edelbrock 2121 dual plane intake manifold. � Edelbrock 1404 500cfm carburetor with electric choke. � Summit Racing drop-base air cleaner (SUM-239433), modified for choke clearance. � Summit 14x2 re-usable air filter (SUM-2391429). � Facet cylindrical electric fuel pump (FEP 87sv). � Ford distributor with Pertronix Ignitor breakerless module. � Pertronix FlameThrower II ignition coil. � Summit Racing spiro-wound 8mm silicone spark plug wires. � Ford Motorsport short nose water pump. � Dual sump oil pan from a 1984 Ford Mustang. | �
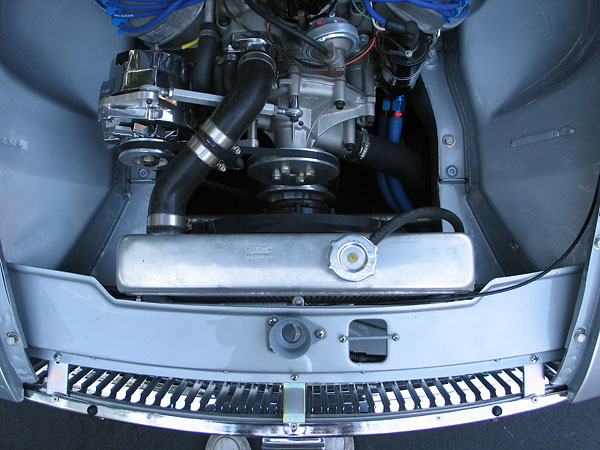
| Cooling: | �Northern aluminum radiator ('65-'66 Mustang size). � Aluminum fan shroud. � Spal electric cooling fan. | �
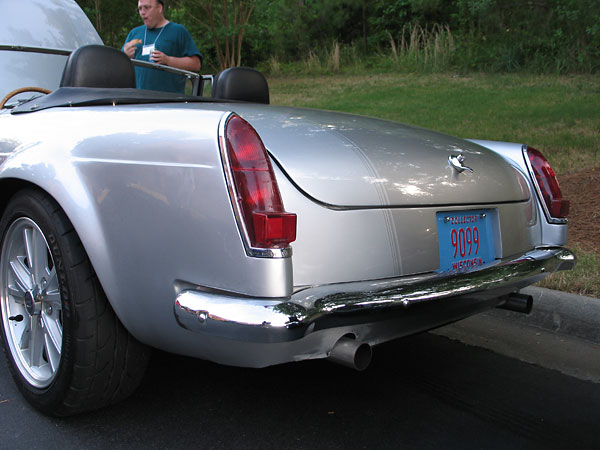
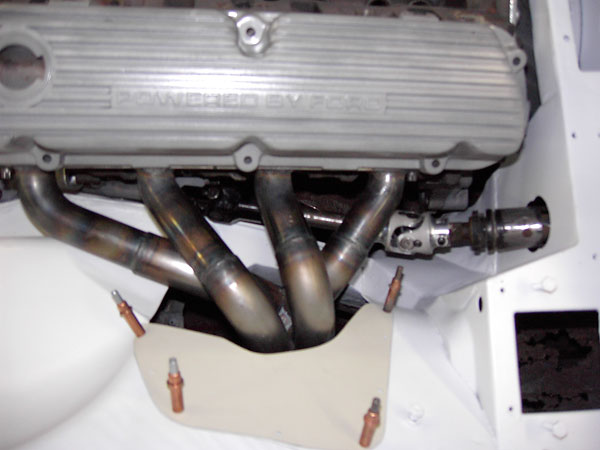
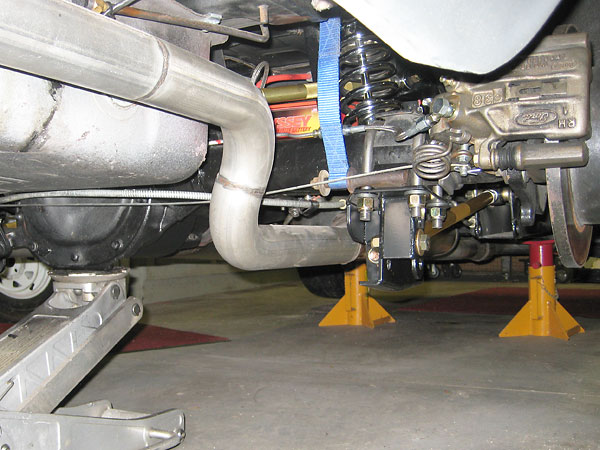
| Exhaust: | �Fast Cars "RV8-style" four-into-one headers. � X-pipe. � Dual Magnaflow mufflers. � 2.25" pipes (exiting either side of centered fuel tank). | �
| Transmission: | �Borg-Warner T5 5-speed transmission. � 2.95:1 first gear, 0.63:1 fifth gear. � Hurst short throw shifter, w/Mustang lever. � 1984 Ford Mustang bellhousing. � Centerforce 157 tooth flywheel. � Ford 10.5" clutch. � CNC slave cylinder. � Custom 2.5" driveshaft. | �
| Rear axle: | �narrowed Ford 8.8 housing. � Moser Engineering custom axles. � Limited slip differential. � 3.27:1 final drive ratio. | �
| Front Susp.: | �stock MGB geometry. � Red polyurethane bushes. � 7/8" anti-sway bar. � Classic Conversions 5-stud hub conversion kit. | �
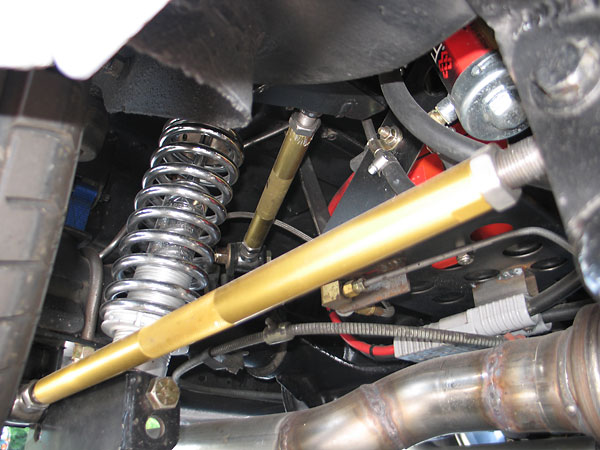
| Rear Susp.: | �Classic Conversion 4-link, coilover suspension. | �
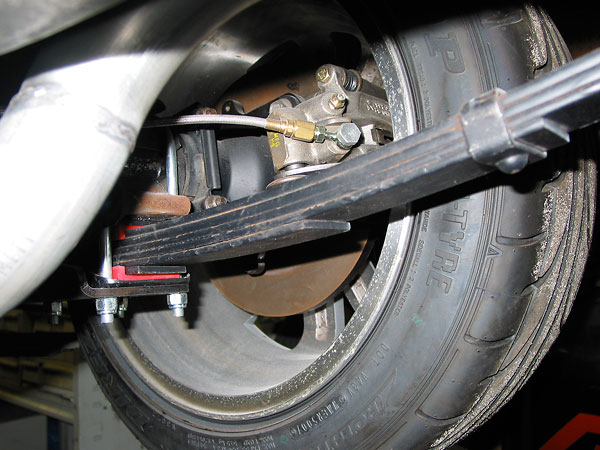
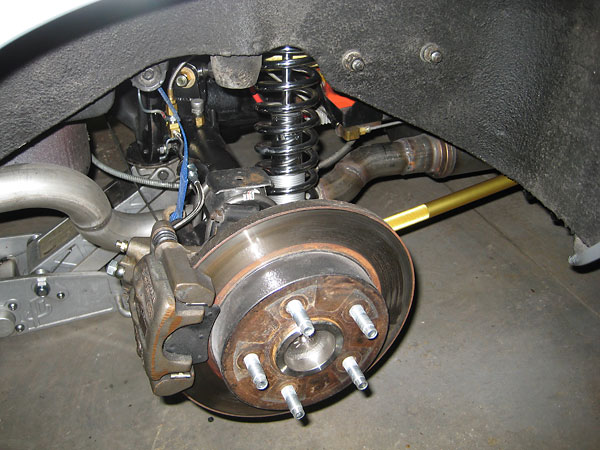
| Brakes: | �(master) Lincoln 1" master cylinder. Late model pedal box. Summit Racing adjustable brake bias valve. � (front) Wilwood calipers and 11.75" vented rotors (i.e. Classic Conversion big brake kit). � (rear) Ford (Mustang) disc brakes. | �
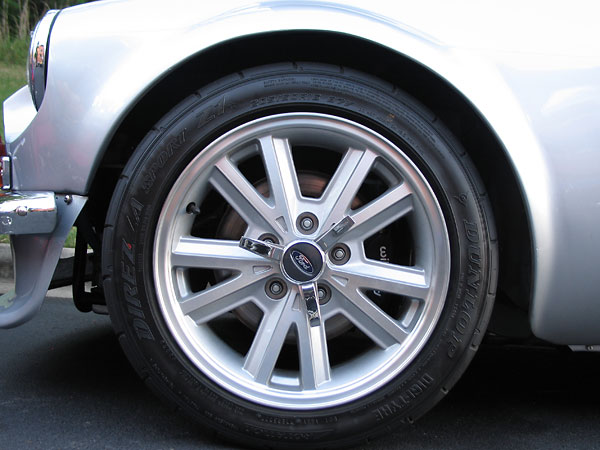
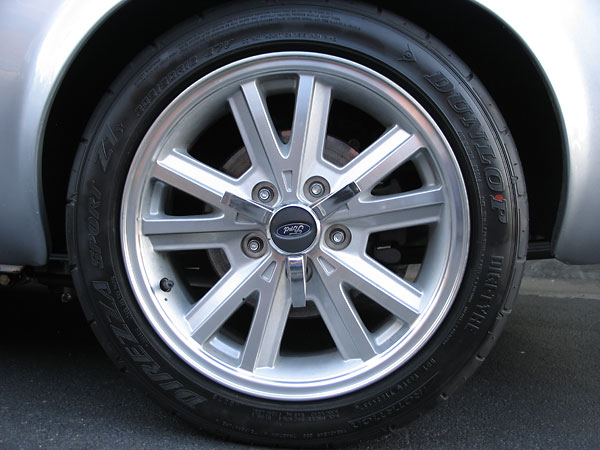
| Wheels/Tires: | �Ford Mustang GT V6 aluminum wheels (16x7, 5x4.5" lug pattern, offered 2005-2008). � Dunlop Direzza Sport Z1 tires (205/50R16, 24.1" O.D.) | �
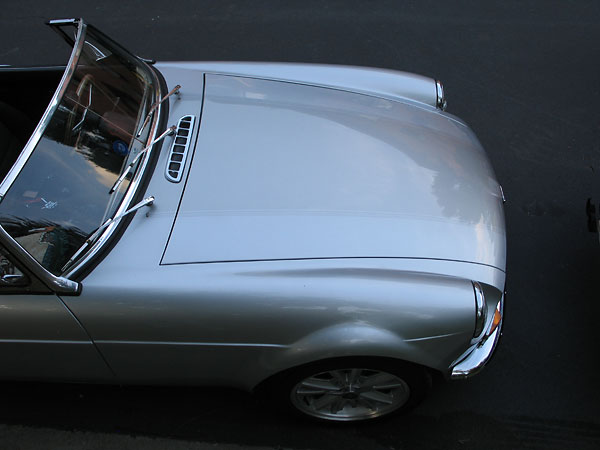
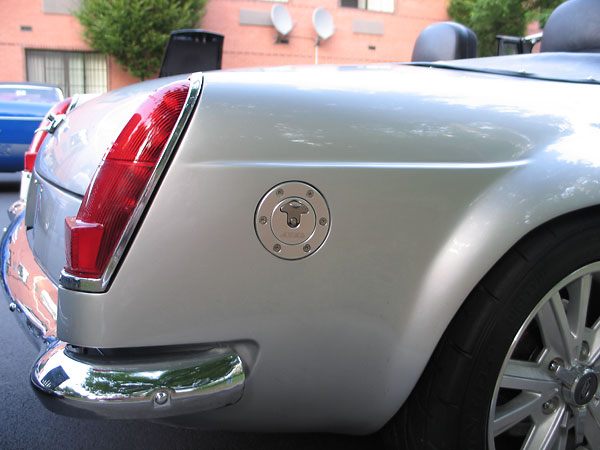
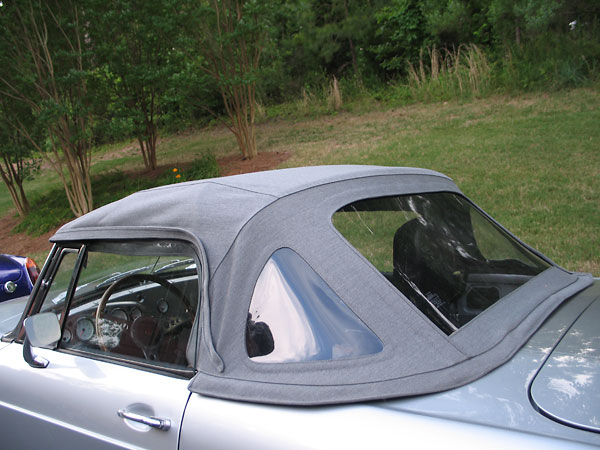
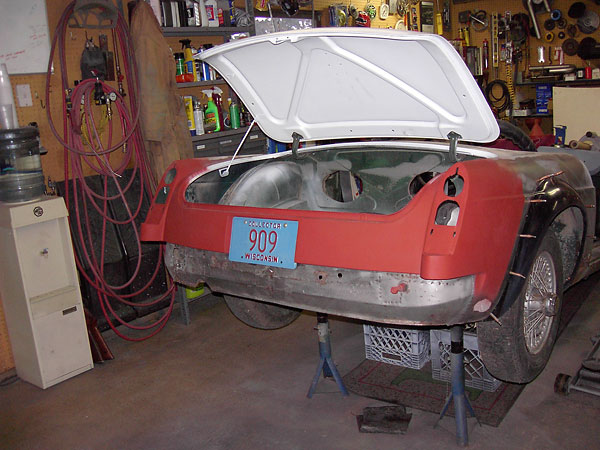
| Body: | �Huffaker fiberglass fender flares. � Special Tuning fiberglass air dam. � ATL recessed fuel filler. � Frenched license plate. � Shaved side marker lights. � Earlier model MGB (1962-69) grille and taillamps. � Pieces of Eight gas spring hood and boot props. � PPG basecoat/clearcoat paint (Mercedes "Iridium Silver" with tinted racing stripes.) � EZ Softtops three-window convertible top, made from Haartz Stayfast canvas cloth. | �
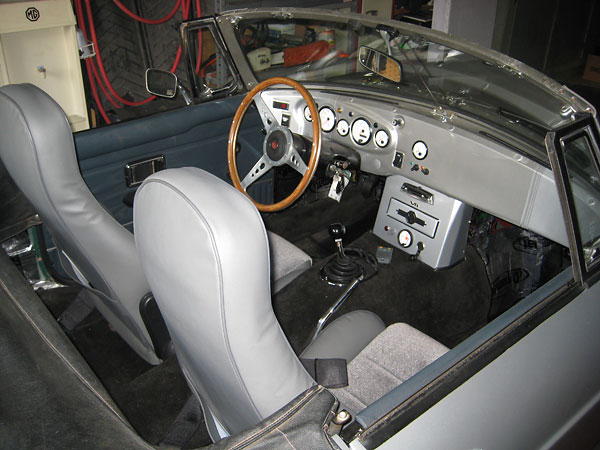
| Instruments: | �VDO "Cockpit White" gauges (left to right): fuel level (E-F), �
tachometer (0-7000rpm),�
oil pressure (0-80psi),�
speedometer (0-120mph),�
coolant temperature (0-250F),�
voltmeter (0-16V). � AutoGauge fuel pressure gauge (mounted in engine compartment.) | �
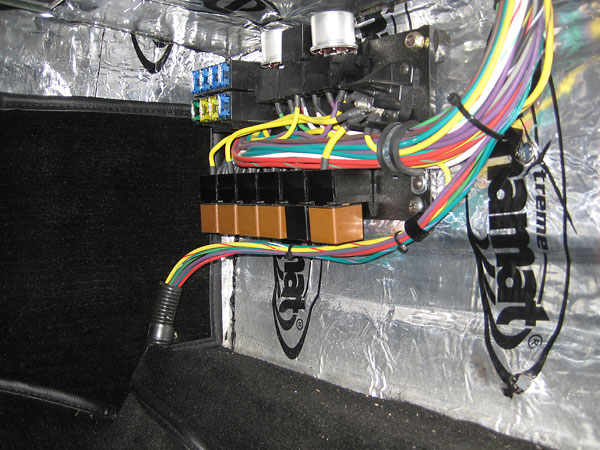
| Electrical: | �Odyssey PC925 dry cell battery. � Delco-style one-wire alternator. � Advance Auto-Wire wiring harness. | �
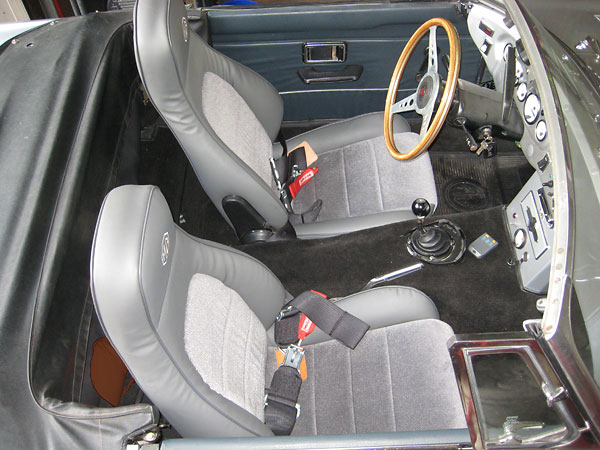
| Interior: | �stripped, filled, and painted "Abingdon pillow" dashboard. � Custom fabricated center console. � Mazda Miata seats with Mr Mike's upholstery. � Simpson three inch wide seat belts. � LeCarra wood-rimmed steering wheel. � Dynamat insulation. | �
| Completed: | �June 2009. (Have driven 1500 miles as of December 2009.) | �
| Comments: | �After driving my 215 powered MGB GT and feeling very comfortable, getting �
used to the Ford powered roadster for the first time was an interesting �
experience. This car is scary at first! Incredible acceleration. Awesome �
sound. Getting used to it was a lot of fun.�
Thank you to all the BritishV8 members who contribute and share their �
ideas and solutions on this website. | �
Please support the sponsoring companies who make BritishV8 possible, including:
�
 �
�
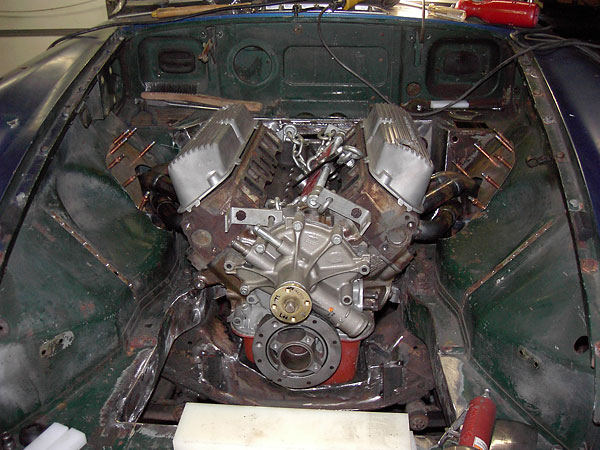
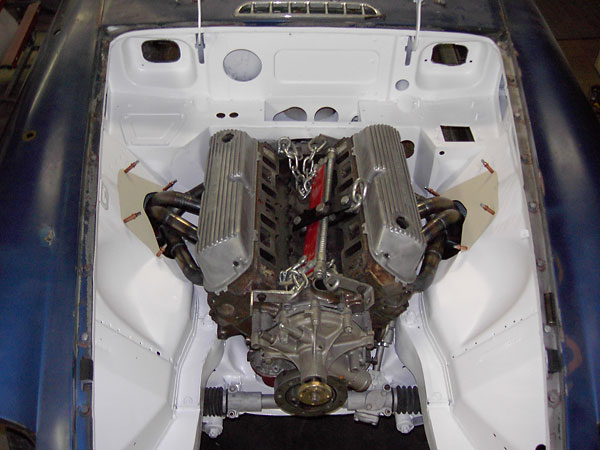
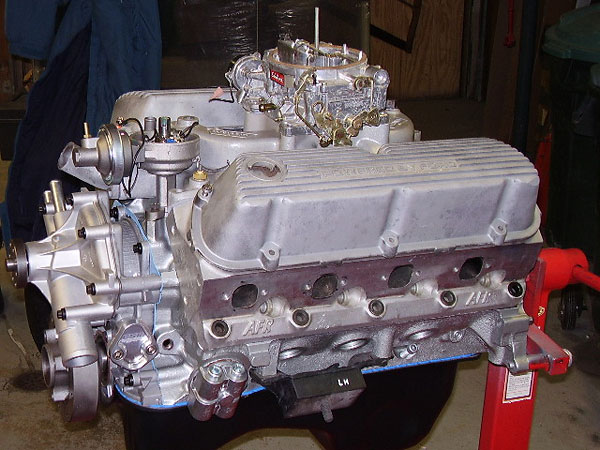
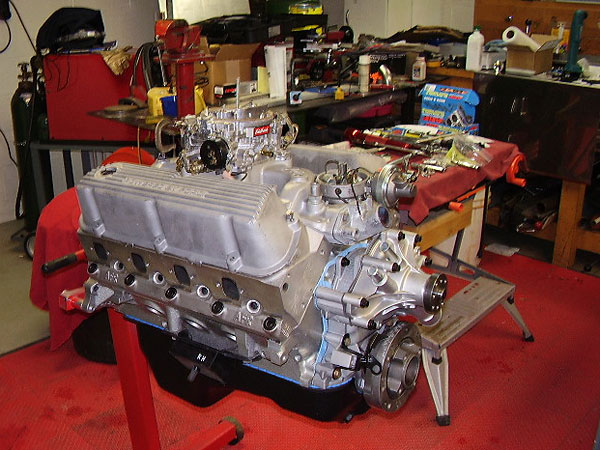
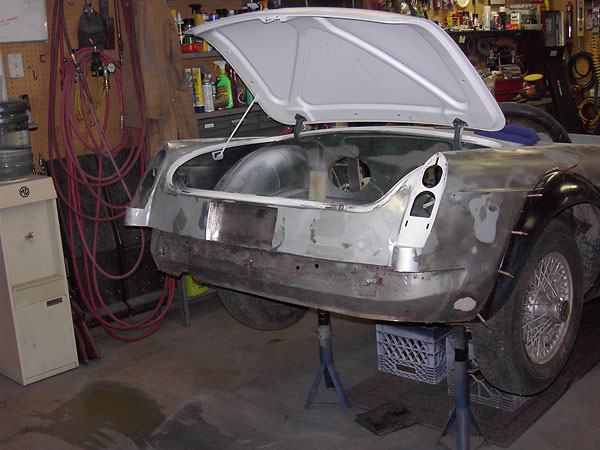
Engine Installation
��
�
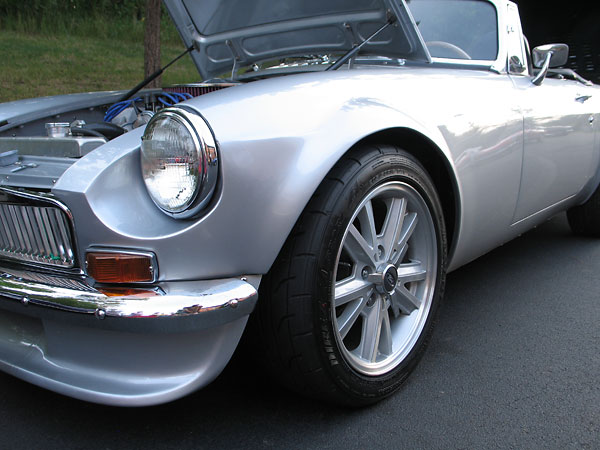
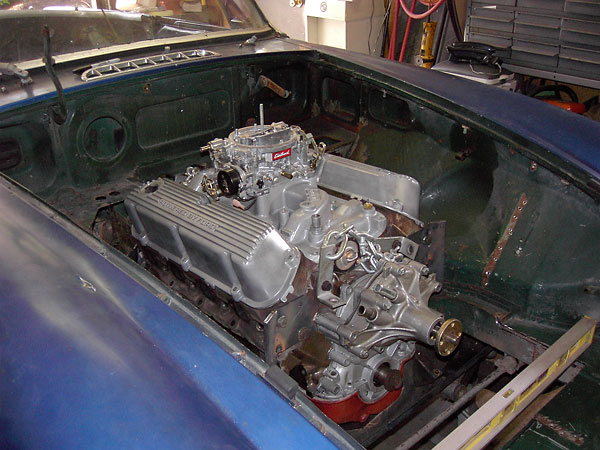
Ford 5.0 H.O., updated with "AFR 185" aluminum cylinder heads (2.02" intake, 1.90" exhaust.)
�
�
Ford offered "High Output" versions of their 5.0L V8 engine from 1982 through 1993. Specifications
�
varied widely over that era. Ford initially used a new thin-wall engine block that weighed only 120#,
�
cast pistons, two barrel carburetors and a compression ratio of only 8.4:1 to produce a claimed 157hp.
�
1983 and 1984 engines came with a four barrel intake manifold and carburetor; they were rated 175hp.
�
For 1985, the High Output engine variant got improved cylinder heads, roller rockers, forged pistons,
�
and tubular exhaust manifolds; they were rated 210hp. From 1986, the High Output variant included
�
fuel injection. Various other changes were made and rated horsepower ultimately grew to ~235hp.
�
�
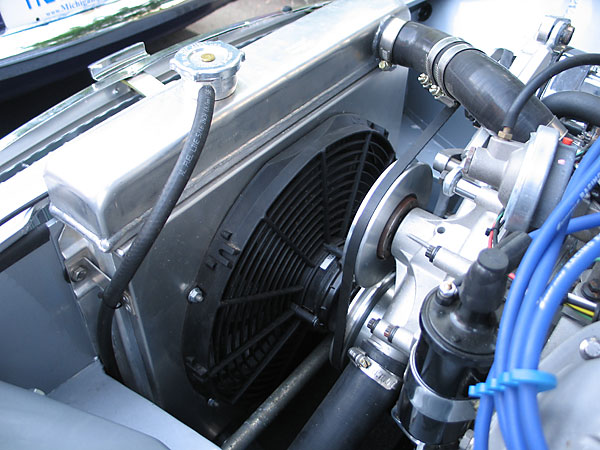
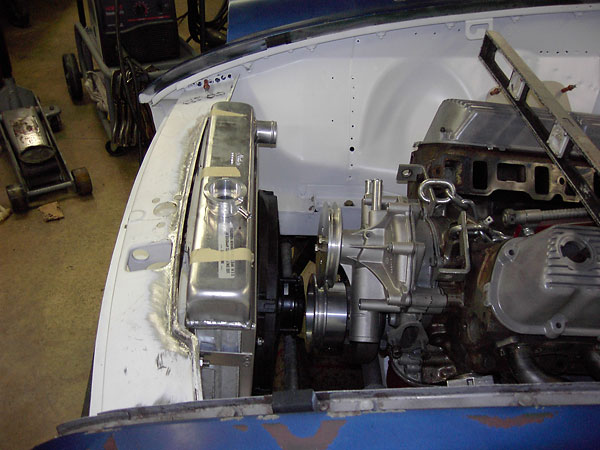
This Northern aftermarket aluminum radiator was built for a 1965-66 Mustang.
�
�
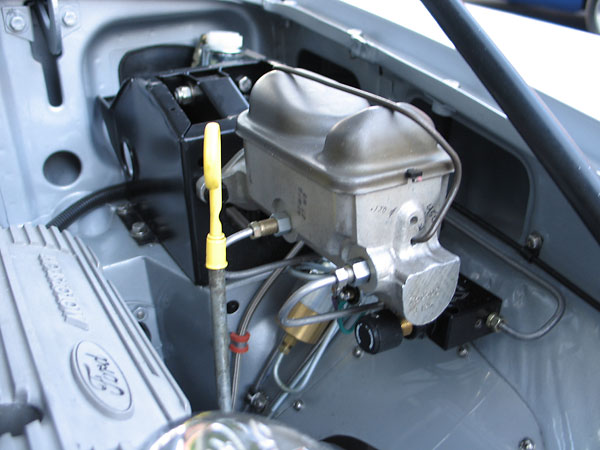
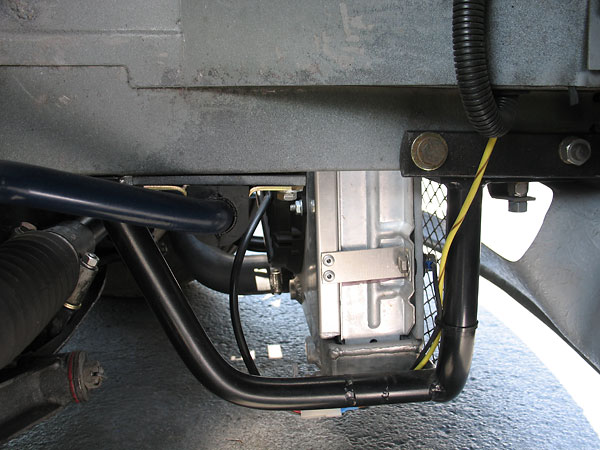
Lincoln 1" master cylinder. Late model pedal box. Summit Racing adjustable brake bias valve.
�
(Between the bias valve and the firewall you can just see a solenoid operated line lock.)
�

�
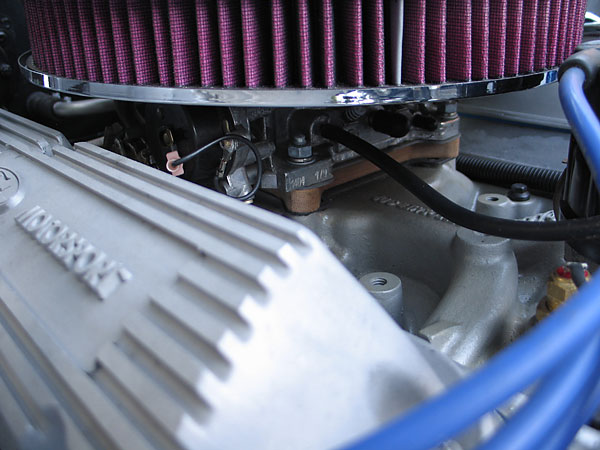
Summit Racing drop-base air cleaner (SUM-239433), modified for choke clearance.
�
�
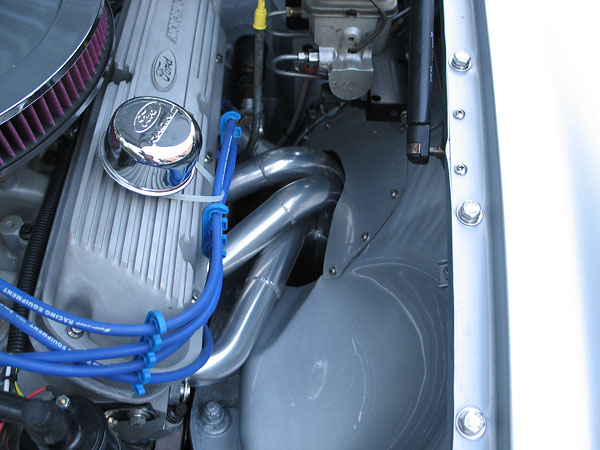
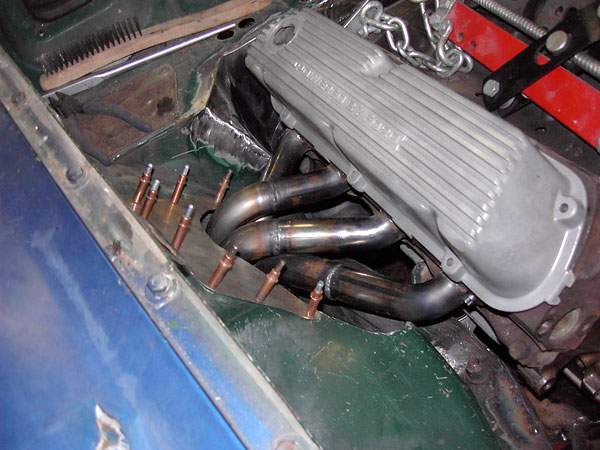
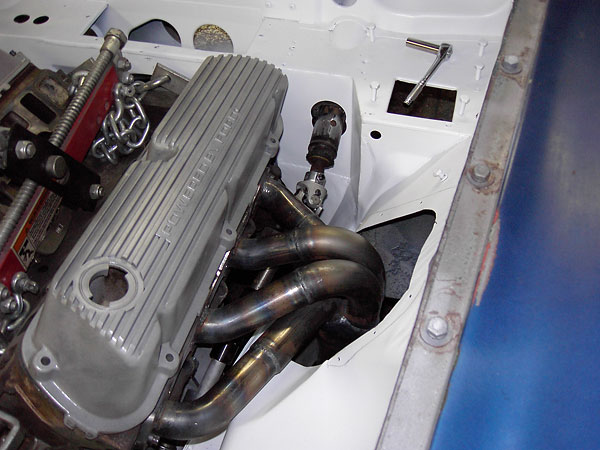
Fast Cars "RV8-style" (through the fender apron) four-into-one headers.
�
�
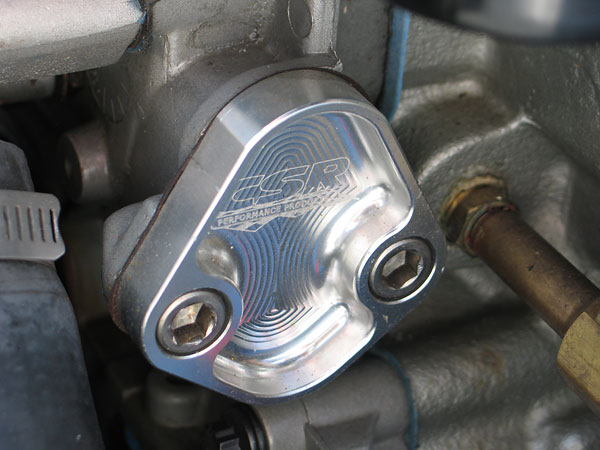
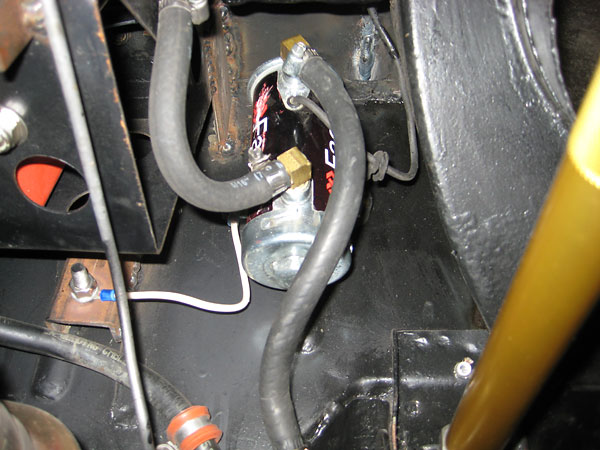
CSR billet aluminum mechanical fuel pump block-off plate.
�
�
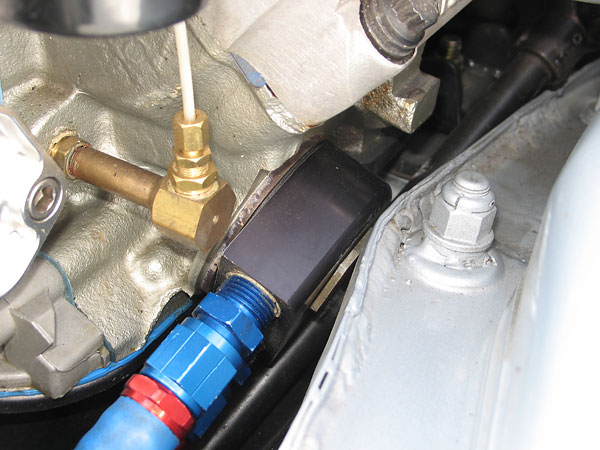
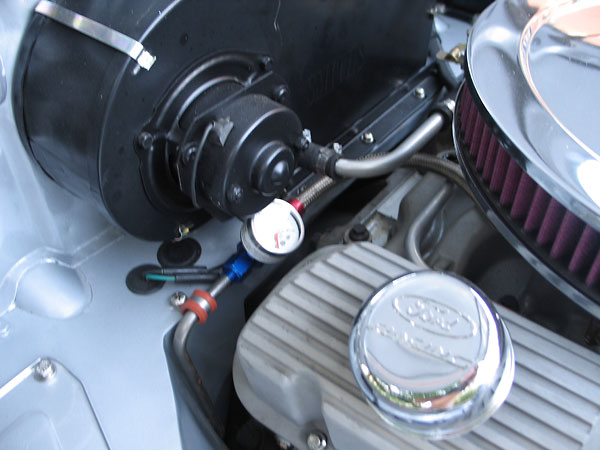
Oil pressure gauge connection.
�
�
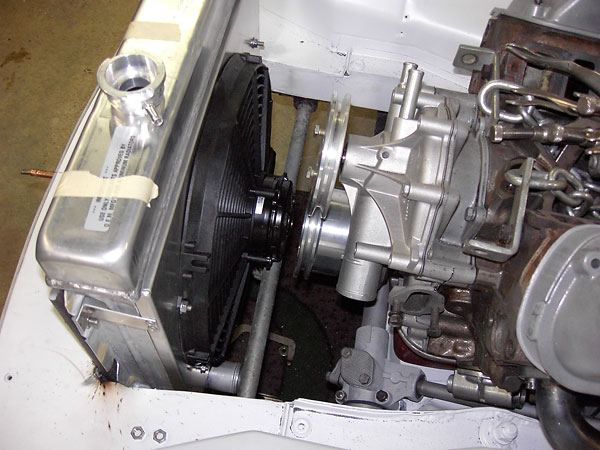
Aluminum fan shroud and Spal electric cooling fan.
�
�
Recirculation shields keep air from bypassing the radiator core.
�

�
Ford distributor with Pertronix Ignitor breakerless module. Pertronix FlameThrower II ignition coil.
�
�
Edelbrock 1404 500cfm carburetor with electric choke. A phenolic spacer helps keep the float bowls cool.
�
�
AutoGauge fuel pressure gauge.
�
�
Facet cylindrical electric fuel pump (FEP 87sv).
�
�
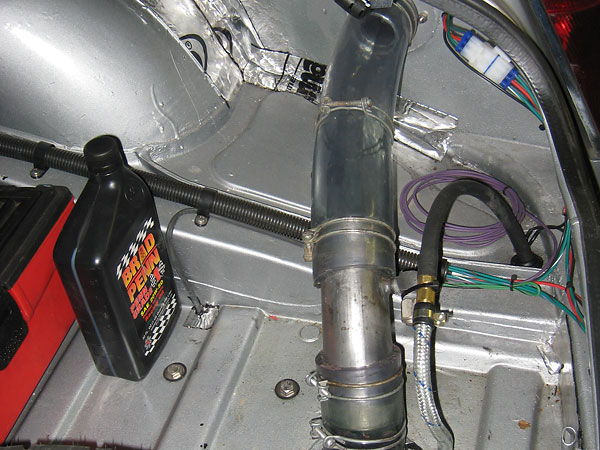
Relocated fuel filler tube.
�
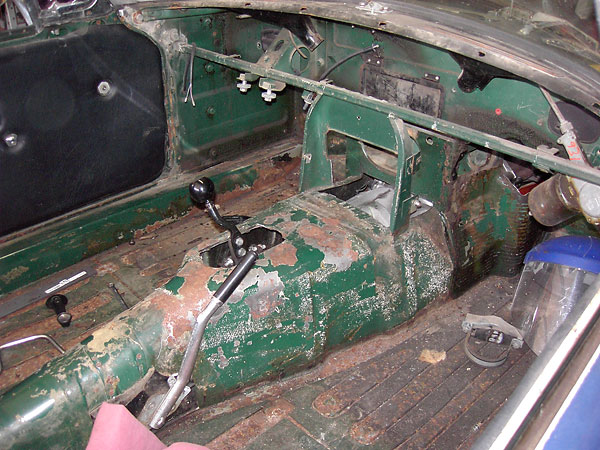
Interior
��
�
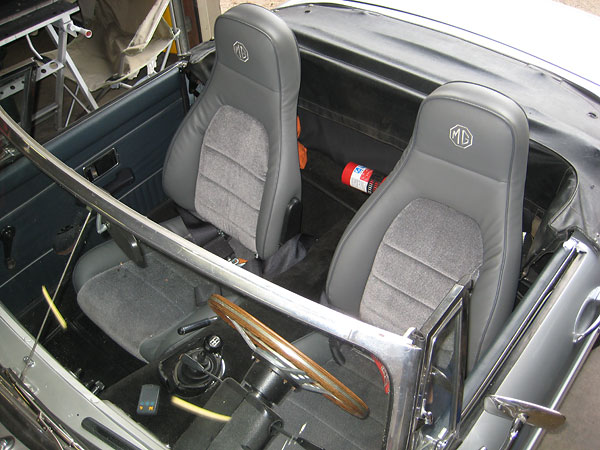
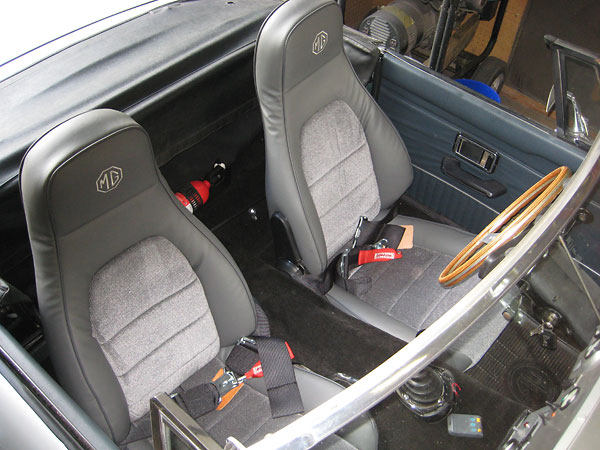
Mazda Miata seats with Mr Mike's upholstery.
�
�
Simpson 3"-wide latch-and-link seat belts.
�
�
LeCarra wood-rimmed steering wheel.
�
�
Stripped, filled, and painted "Abingdon pillow" dashboard. Custom fabricated center console.
�
�
The Advance Auto-Wire wiring system features a modernized fuse and relay block.
�
Exterior
��
�
Huffaker fiberglass fender flares. (See below of detailed installation photos!)
�
�
Fiberglass "Special Tuning" air dam.
�
�
BritishV8 2008 meet attendees will recognize Mary's lovely garden.
�
�
Tinted racing stripes.
�
�
Shaved front marker lights.
�
�
Frenched license plate.
�
�
Recessed ATL fuel cap (moved from rear of car to the right quarter-fender).
�

�
EZ Softtops three-window convertible top, made from Haartz Stayfast canvas cloth.
�
�
Haartz Stayfast is a canvas that is tightly woven from solution-dyed yarn for uniform color throughout.
�
�
The convertible top folds down flat, and stows behind the seats under a zippered cover.
�
�
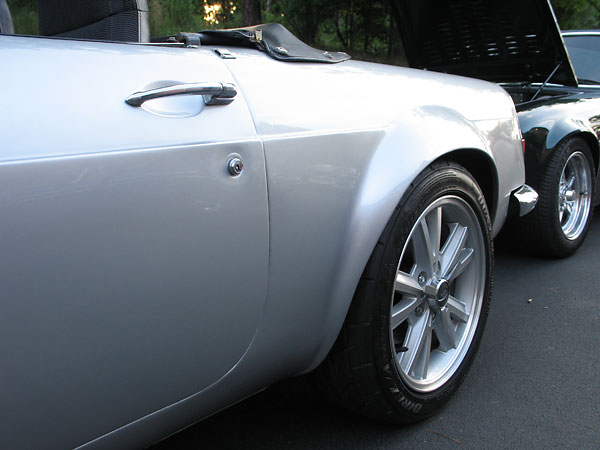
Just one glance at these wheels and any "car guy" should know this MG has a Ford engine!
�
�
Ford Mustang GT V6 aluminum wheels (16x7, 5x4.5" lug pattern, offered 2005-2008).
�
�
Dunlop Direzza Sport Z1 tires (205/50R16, 24.1" O.D.)
�
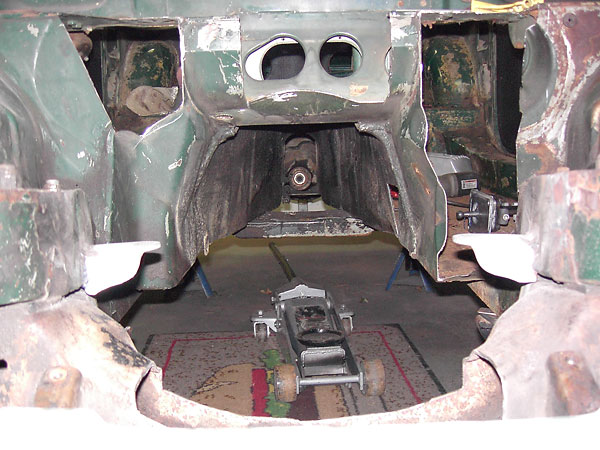
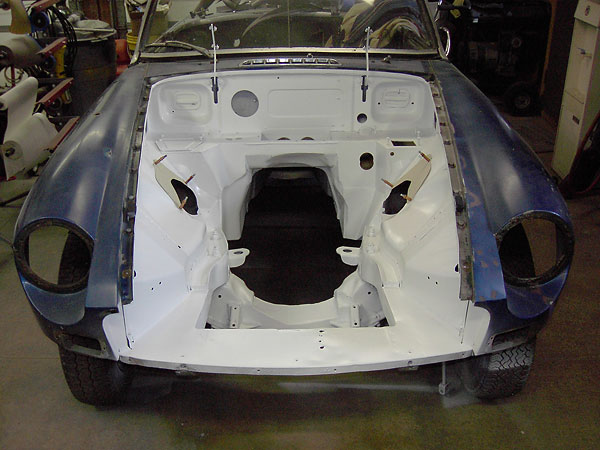
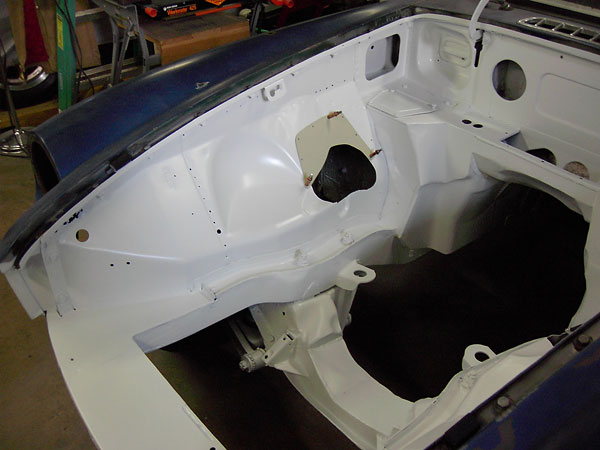
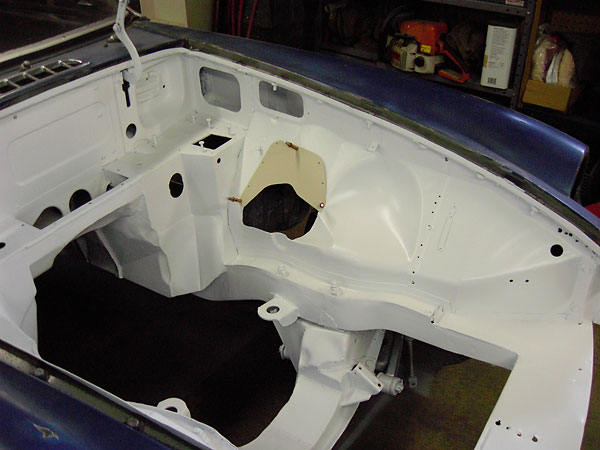
How It Was Done
��
�
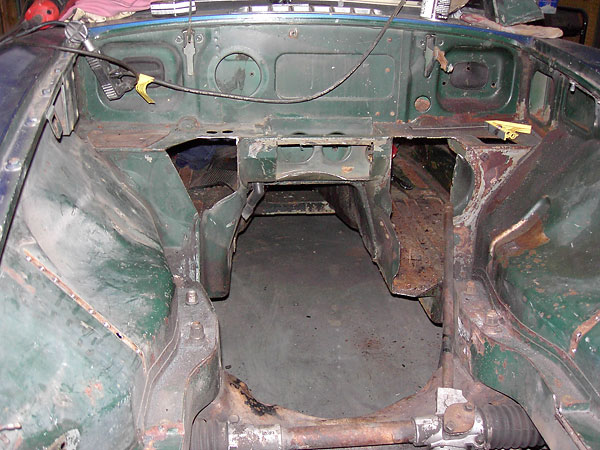
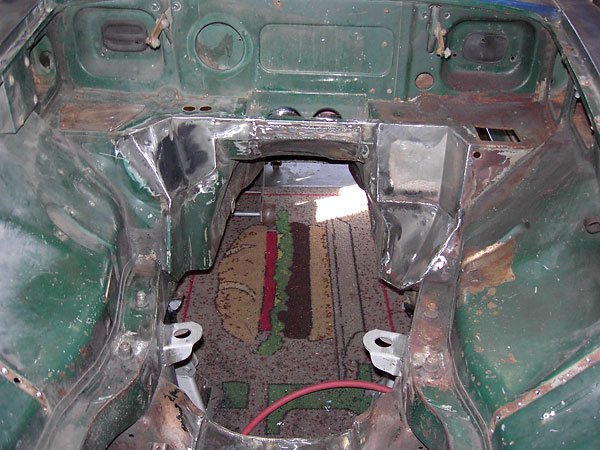
Slam panel removed, and radiator shelf cut for relocation of the radiator.
�
�
Firewall and transmission tunnel cuts.
�
�
Measuring to see how much modification of the front crossmember will be required.
�
�
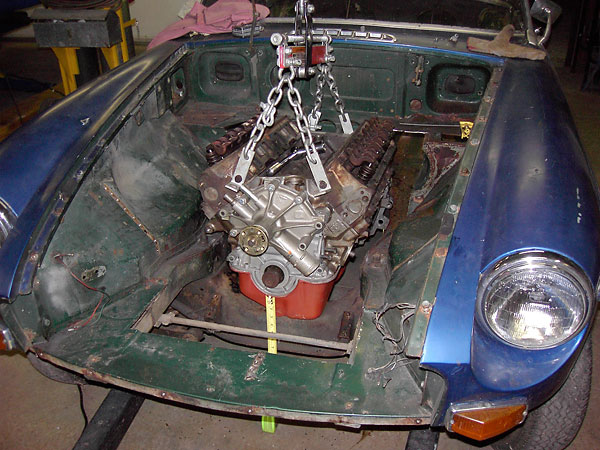
With the front crossmember sectioned, the engine is again test-fitted. Once the engine fits
�
neatly, the necessary location of motor brackets on the chassis can be determined.
�

�
Prototype motor mounting brackets can be helpful at this stage.
�
�
With the engine temporarily bolted down and the intake manifold and carburetor in place,
�
clearance to the bonnet may be verified, and final motor mounts can be precisely located.
�
�
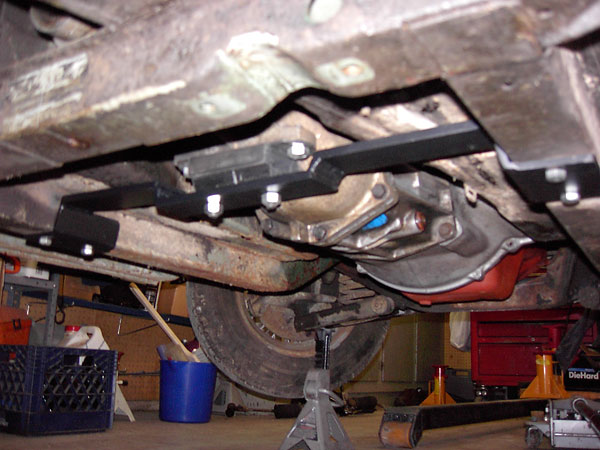
Here you can see the final motor brackets and get a good feel for how far back they're mounted.
�
�
In this view, you can better see the installed height of the motor brackets.
�
�
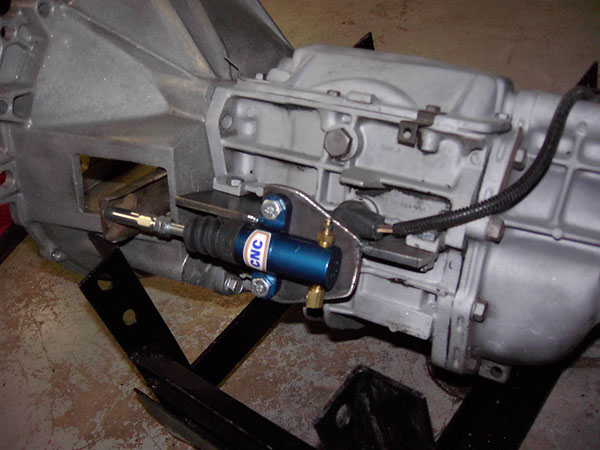
Borg-Warner T5 transmission from an '84 Ford Mustang 5.0 (so, it's the earlier "non-World Class" version).
�
This photo shows its Hurst short throw shifter, with Ford Mustang lever.
�
�
CNC clutch slave cylinder. Notice its very stiff mounting bracket.
�
�
Custom fabricated transmission mounting bracket.
�
�
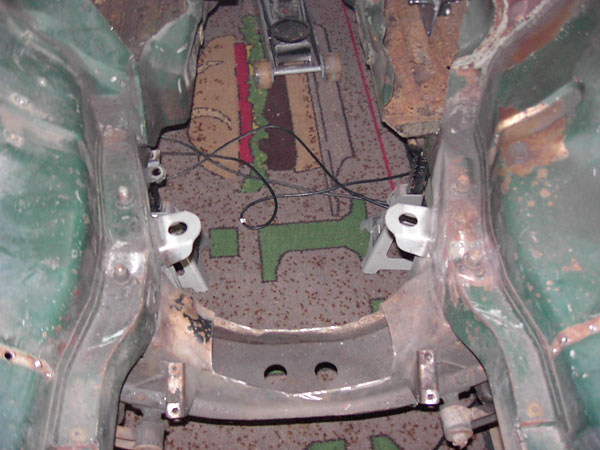
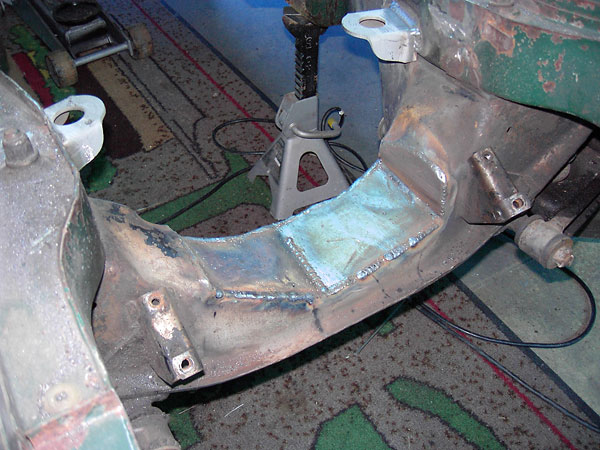
Completed modification of the front crossmember, as viewed from the front.
�

�
Completed modification of the front crossmember, as viewed from the rear.
�
�
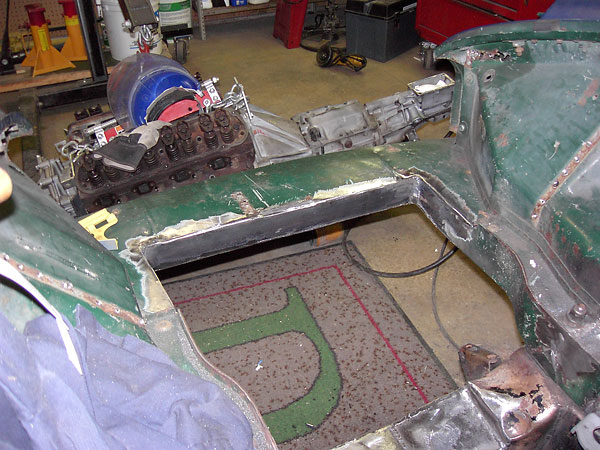
With engine and transmission clearance verified, its time to start closing up holes in the sheetmetal.
�
Here, the reinforcement under the radiator shelf is boxed back in.
�
�
Piece by piece, the firewall is rebuilt with new sheet metal.
�
�
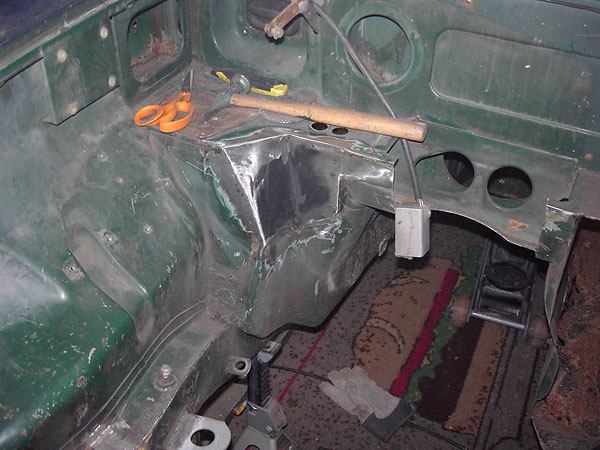
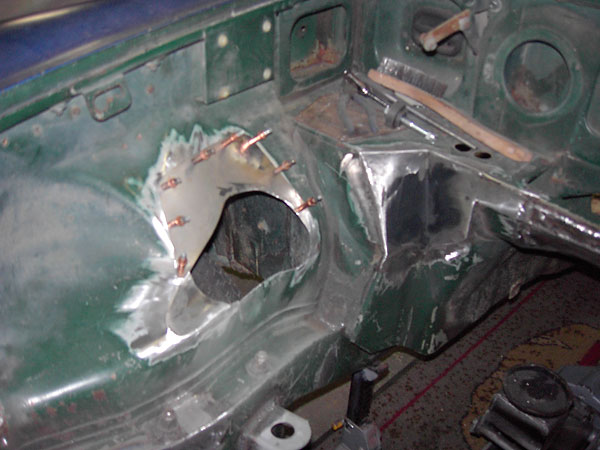
Here you can see the driver's side, where a hole will be cut for the steering shaft to come through.
�

�
Corresponding modifications, viewed from the interior of the footbox.
�
�
The next step is to make provisions for Fast Cars through-the-fender headers.
�
�
Cut-outs in the inner fenders need to be fairly large if the headers will be easily serviceable later
�
(i.e. removeable without lifting the engine.) Easily removeable shields reduce the hole size.
�
�
Below the headers, Paul has sectioned the aprons and spliced back in custom-contoured new metal.
�
�
With fabrication completed, its time for a tough coat of epoxy primer.
�
�
Passenger side inner wing.
�
�
Driver side inner wing.
�
| �
Enjoying this article? Our magazine is funded through the generous support of readers like you! � To contribute to our operating budget, please click here and follow the instructions. � (Suggested contribution is twenty bucks per year. Feel free to give more!)� |
�
�
�
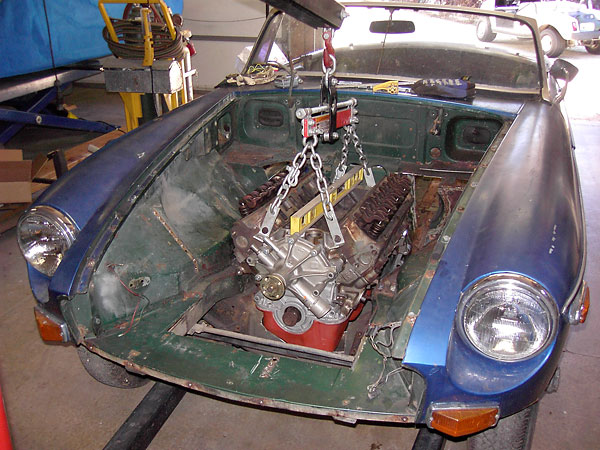
Many test fittings of the engine are required...
�
�
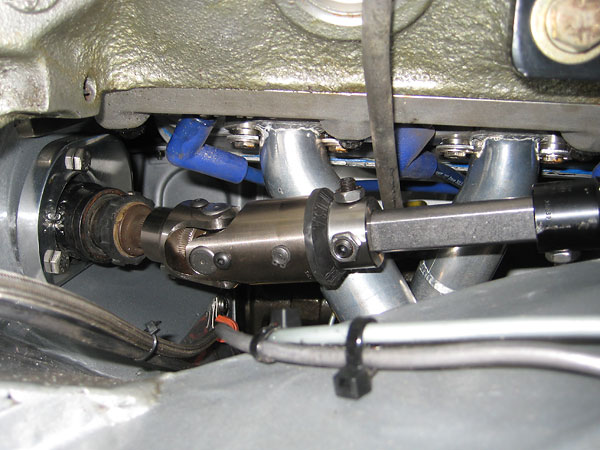
Here the steering column is trial fitted, and the steering universal joints are checked out too.
�
�
Note that the headers haven't been ceramic coated yet. It's better that way, since they'd surely
�
be scuffed up if they had been. Note also the clearance between cylinder head and heater shelf.
�
�
Looking up from underneath the completed car, you can better see the vibration dampening
�
upper steering universal joint of the double-jointed steering shaft.
�
�
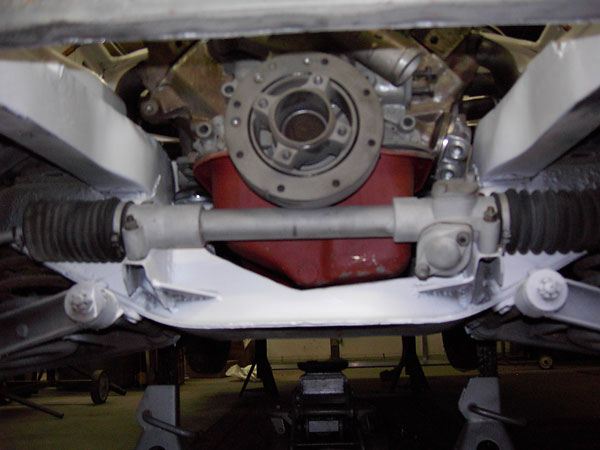
Clearance between the engine's front oil sump and the modified MGB front crossmember.
�
�
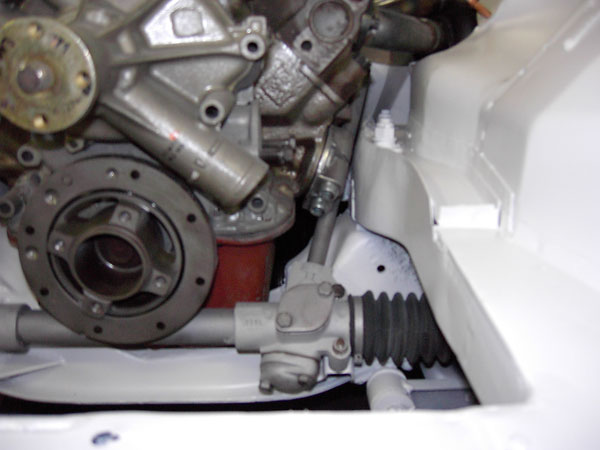
Spatial relationship of the engine's harmonic balancer and the steering rack.
�
�
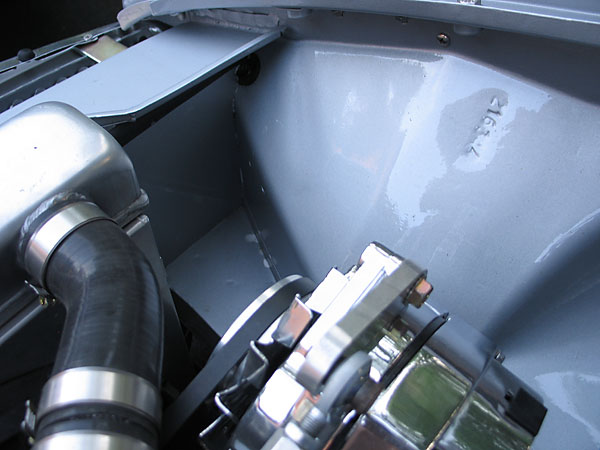
Modified MGB slam panel to suit the relocated radiator.
�
�
Ford Motorsport short nose water pump.
�
�
Clearance between the crankshaft pulley and the electric cooling fan.
�

�
Protective structure around the new radiator, and remote oil filter installation.
�
�
Finished radiator protection.
�
�
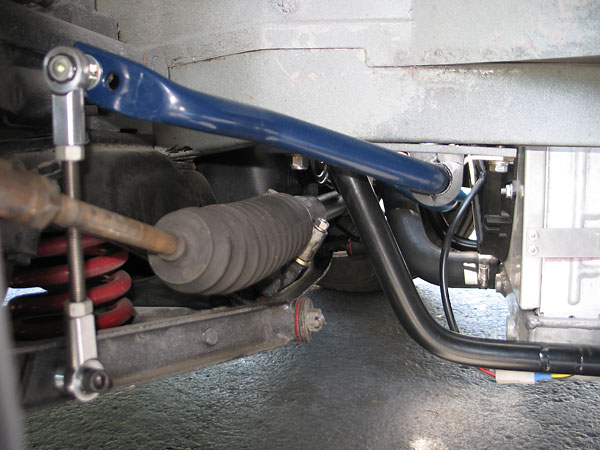
Moss Motors adjustable anti-sway bar.
�
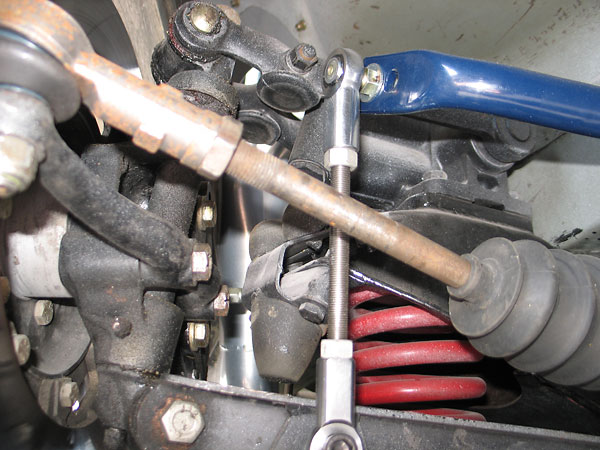
�
(The sway bar is tubular, and relatively lightweight.)
�
�
Test fitting the new Special Tuning fiberglass air dam.
�
�
Airflow Research "AFR 185" aluminum cylinder heads (2.02" intake, 1.90" exhaust.)
�
�
Ford dual-sump oil pan from a 1984 Mustang.
�
�
Ford Racing harmonic balancer (M-6316-M50) with timing tape.
�

�
Scorpion roller rockers.
�
�
1984 Mustang bellhousing.
�
�
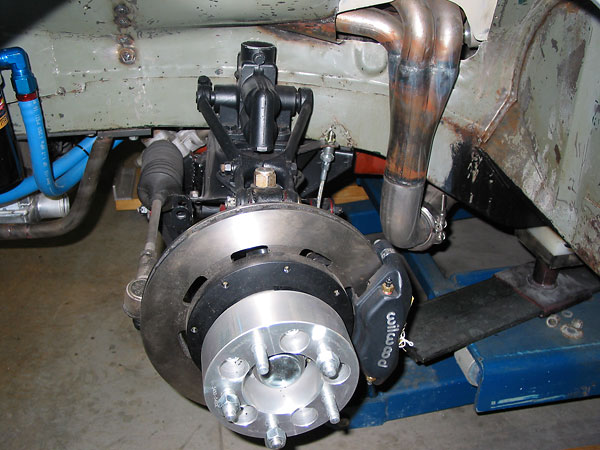
Classic Conversions Engineering big brake and 5-lug hub conversion kits.
�
�
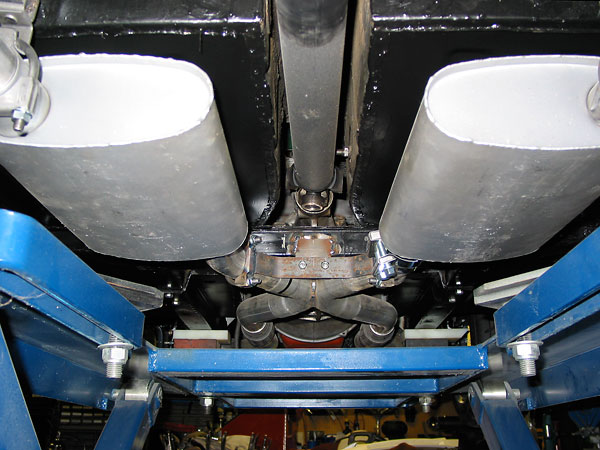
X-pipe and dual Magnaflow mufflers.
�
�
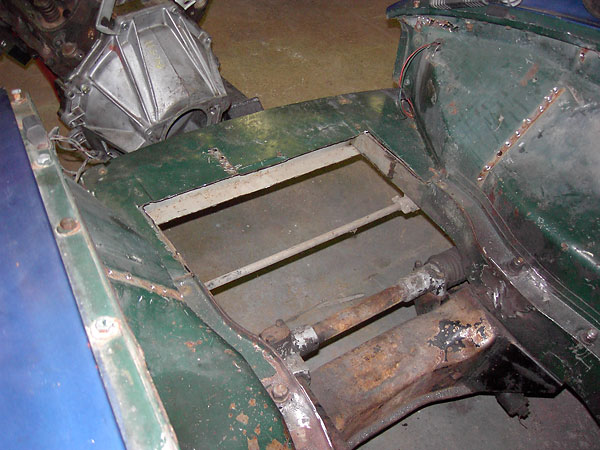
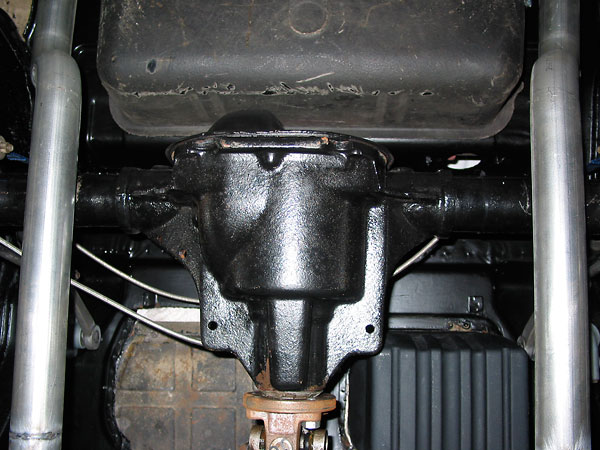
Ford 8.8 rear axle, narrowed to suit the MGB.
�
�
Paul initially installed the axle on MGB leaf springs, but later decided to install a
�
4-link rear suspension with coilover shock absorbers.
�
�
Installation of the Classic Conversions Engineering 4-link rear suspension.
�
�
More rear suspension details...
�
�
More rear suspension details...
�
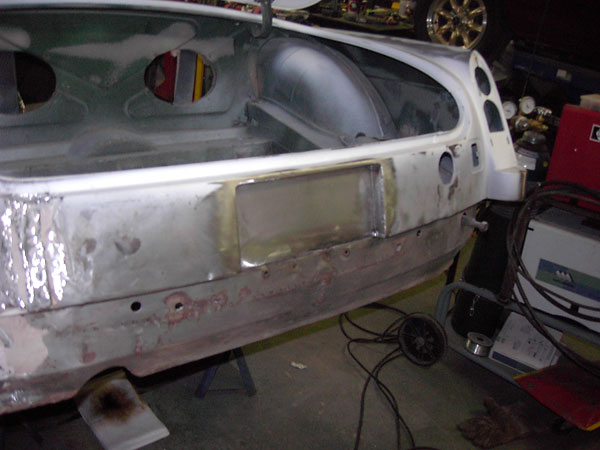
Frenched-In License Plate
��
�
Creating a frenched-in license plate box.
�
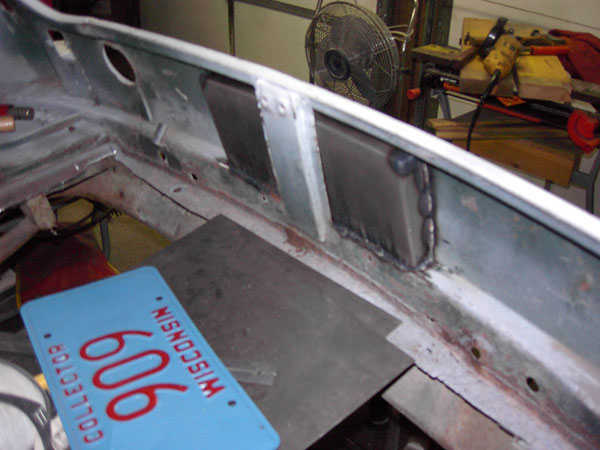
(Note that the trunk floor has been cut out. A new one will be spliced in.)
�
�
The frenched license plate box, as viewed from the rear.
�
�
A modest amount of plastic body filler finishes the job.
�
�
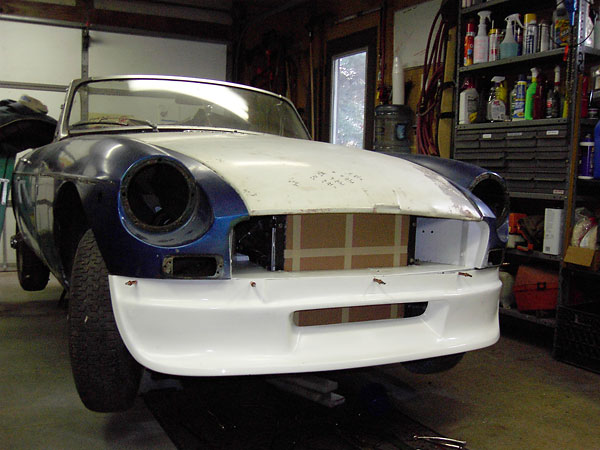
The frenched license plate box is installed, but the rest of the car isn't ready for paint,
�
so some primer has been sprayed to protect the work.
�
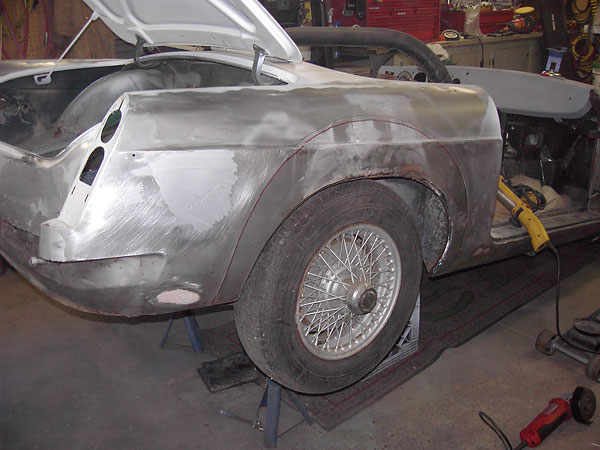
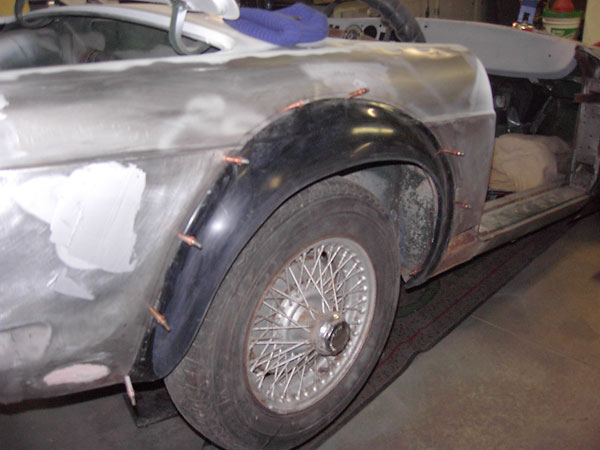
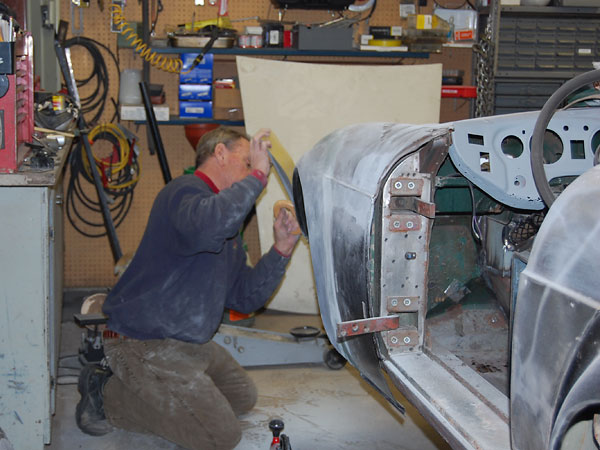
Installation of Huffaker Fender Flares
��
�
Before starting the installation of fender flares, rust damage may need to be repaired.
�
This photo shows how a patch panel is typically attached to an MGB front fender.
�
�
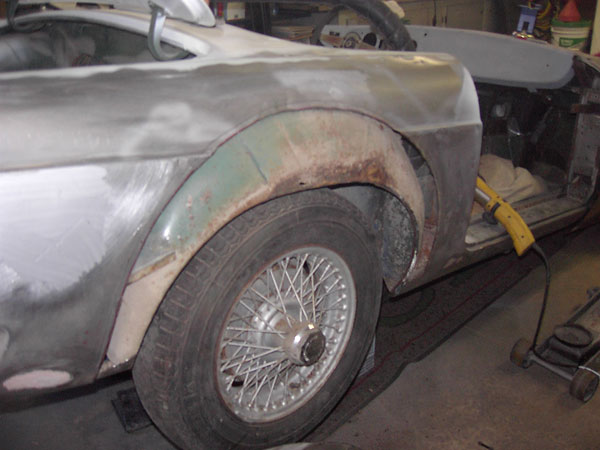
Test fitting the new Huffaker-style fiberglass flares. Note that they're temporarily held in
�
place by spring-loaded Cleco clamps. Next, Paul traced around the flares with a pencil.
�
�
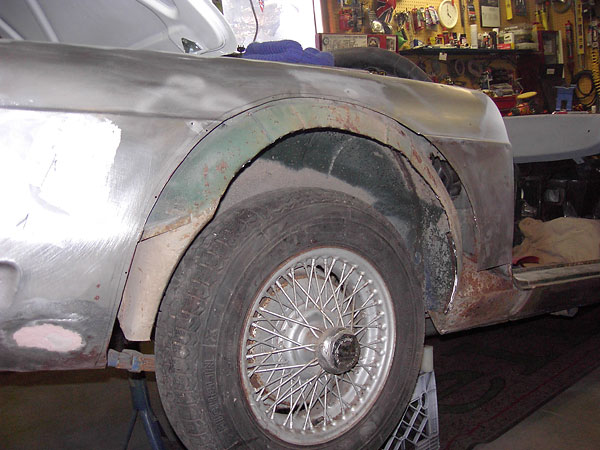
With flares pulled back off, the pencil line can be seen better. Paul has added a second
�
line in red magic marker approximately a half inch below the original pencil line.
�
�
The red line indicated where metal would be cut back to. Here, the cut has been made.
�
Now we can see the inner fender, and we can tell that it had some rust-through.
�
�
Of course for tire clearance, the inner fender needs to be trimmed back too.
�
�
The fender flares have been put back into position. However, now that the cuts have been completed,
�
the mounting flange on the flares can be placed inboard of the body instead of outboard.
�
�
The fiberglass flares were bonded on with LORD Corporation's "Fusor" brand adhesive, which is what
�
Chevrolet recommends for repairing Corvette body damage. After bonding, fiberglass matting was
�
applied on the inside of the fenders to reinforce the joints. No rivets or screws were used.
�
�
A thin layer of DuraGlas "short strand" fiberglass body filler was applied on the
�
outside to blend the panels, and then carefully sanded back to a smooth radius.
�
�
With a thin coat of primer, its easier to comprehend how much has been accomplished. However,
�
the job isn't done until the inside of the wheel well is reconstructed too.
�
�
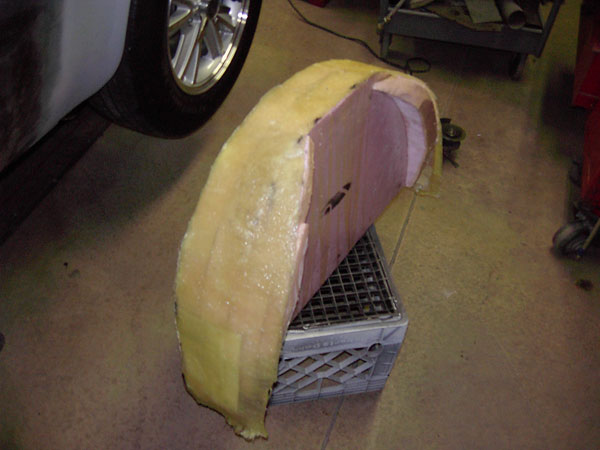
Paul used insulation foam to model the shape of the wheel wells. These served as "plugs"
�
over which he could lay-up fiberglass filler-panel strips.
�
�
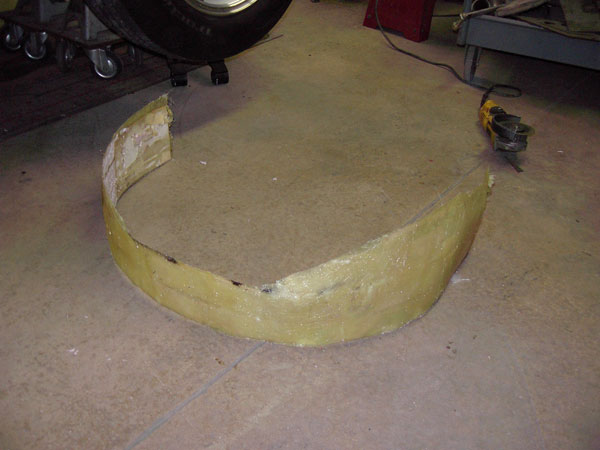
The fiberglass filler strips are gently cut from the male molds.
�
They're flexible, and easily trimmed for an excellent fit.
�
�
Once in place, fiberglass resin is used to bond the filler panels to both the steel
�
inner fenders and also the fiberglass Huffaker fender flares.
�
�
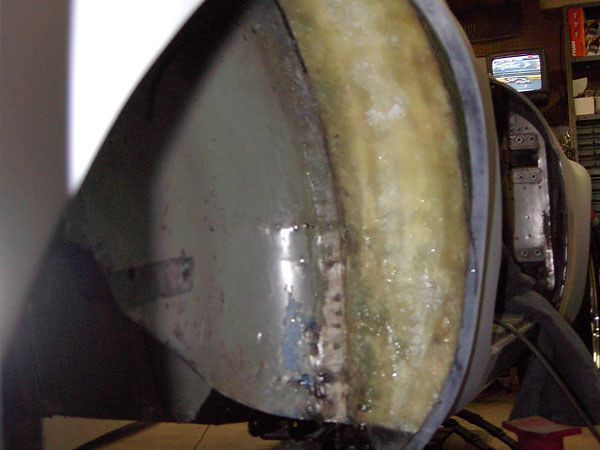
With a coat of rugged paint, the inside surfaces of the flared fenders are complete.
�
�
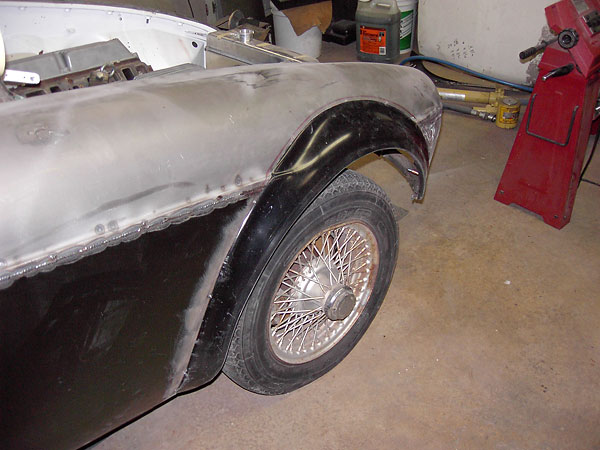
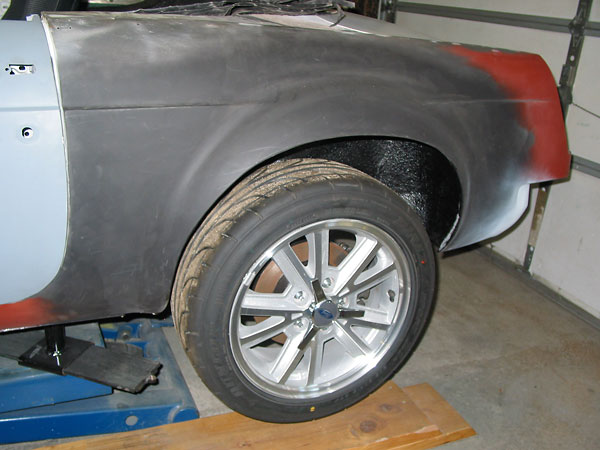
Here's the final result! Incidentally, that's Dan Masters' MGB-GT in the background, and on it you can see
�
Dodge Omni fender flares. Huffaker flares are a more bold alternative than Omni flares, yet they're more
�
subtle than the "Sebring flares" the MG factory race team used in 1967 and 1968. Huffaker flares were
�
created and used by Joe Huffaker's British Leyland sponsored race team, which campaigned MGB cars
�
to SCCA championship victories in the mid 70's. For a detailed look, see: Huffaker MGB Race Car.
�
