
�
�
How To: Install Nissan Stanza Fender Flares on your MGB
��
as published in BritishV8 Magazine, Volume XX Issue I, July 2012�
�
by: Mike Cook�
�
Newton's first law states that "The velocity of a body remains constant unless the body is�
acted upon by an external force."�
�
Would losing a wheel count as an external force? That's exactly what happened on a drive in my�
MGB V8, The Silver Lady, through the�
North Georgia mountains. Seeing the wheel overtake me as I negotiated a curve produced a terribly�
unsettling feeling. We managed to come to a stop safely. Upon inspection, we found that the wheel�
arch had been re-designed when the wheel said good-bye to the car. This was the excuse I needed�
to add fender flares.�
�
�
There are a number of well-known fender flare alternatives for MGBs. I was only interested in�
grafted-on flares; not replacement fenders. When it comes to grafting flares onto existing�
steel fenders, the first decision is "fiberglass or steel?" The most popular and easily�
sourced fiberglass option are "Huffaker" flares. That's the style of flare used on Huffaker�
Engineering's famous SCCA championship winning racecars during the 1970s. However, I wanted�
steel fender flares so I decided to visit a local junkyard and see what was available.�
When it comes to steel flares for an MGB, the most familiar donor car options are the Dodge�
Omni / Plymouth Horizon models or alternatively the Volkswagen Rabbit.�
�
Unfortunately, I couldn't find any of these cars at my local junkyard.�
Armed with the MGB's dimensions, tape measure, notebook, and a camera I went off to look�
for other alternatives.�
�
�
�
Off came both fenders, leaving a sad looking 1995 Nissan Stanza.
�
�
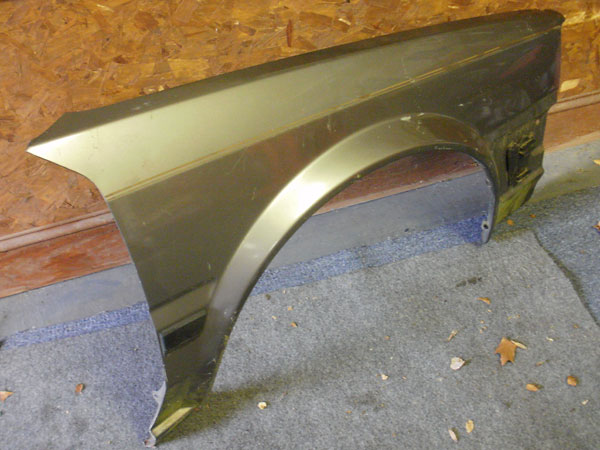
Enter the Nissan Stanza. As I took measurements and wrote them in my notepad, I realized�
the Stanza front wheel arch has similar dimensions to an MGB. I immediately noticed a�
advantage of Nissan Stanza flares: compared to Rabbit or especially Omni flares, the�
Nissan flares seemed to wrap further around the circumference of the wheel arch. I liked�
the look, so I began unbolting a pair of Stanza front fenders.�
�
In my enthusiasm, I almost forgot about rear arches. I hadn't brought cutting equipment with�
me to remove the Stanza's rear fenders, so I'd have to adjust my plans. I looked at the�
Nissan front flare profile and realized they could be used on the rear of The Silver Lady if�
I used the Stanza's left front fender on the MGB's right rear, and the Stanza's right front�
fender on the MGB's left rear.�
�
So off I went around the junkyard looking for another set, and with a feeling of success I�
imagine similar to that of Stanley when he eventually found Livingston, I discovered another�
Nissan Stanza and relieved it of its two front fenders.�
�
When I returned home with my plunder, my wife Sue just looked at the pile of metal on the�
driveway, rolled her eyes, and went back inside the house.�
�
�
�
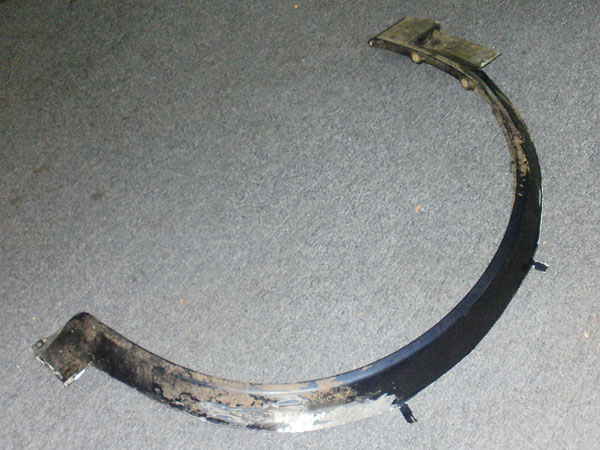
I attacked the Stanza fenders with my trusty angle grinder.
�
�
The next part of the process really confused Sue; I attacked the fenders with my�
trusty angle grinder. I held the first trimmed fender flare up against the�
Silver Lady from time to time. A little more trimming here and there, and before�
long I had flares that seemed to fit very nicely.�
�
�
Enjoying this article? Our magazine is funded through the generous support of readers like you!
�
To contribute to our operating budget, please click here and follow the instructions.
�
(Suggested contribution is twenty bucks per year. Feel free to give more!)�
�
�
�
Nissan Stanza fender flare newly welded onto an MGB front fender.
�
�
When the Stanza flares fitted to my satisfaction, the next step was to prepare�
the MGB for welding. I started at the front fenders, trimming the wheel lips�
and I grinding paint back from the weld zone. With Stanza flare carefully clamped�
into position, I stitch-welded with a MIG. After going back and filling in gaps,�
the front wheel flares looked like the picture above.�
�
Next came a layer of fiberglass, placed into the valley created between flare�
and fender. This adds additional strength and reduces the amount of polyester�
filler needed.�
�
�
�
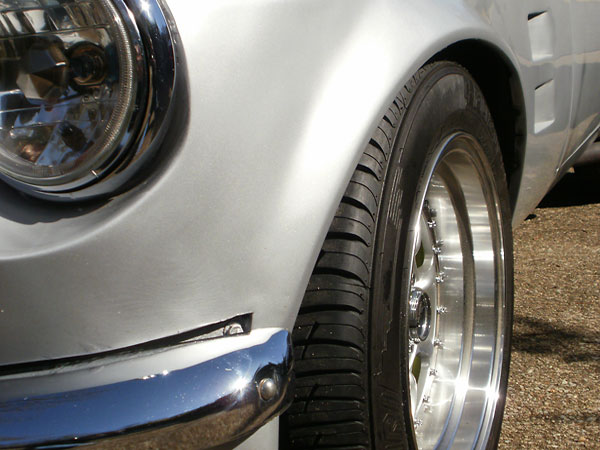
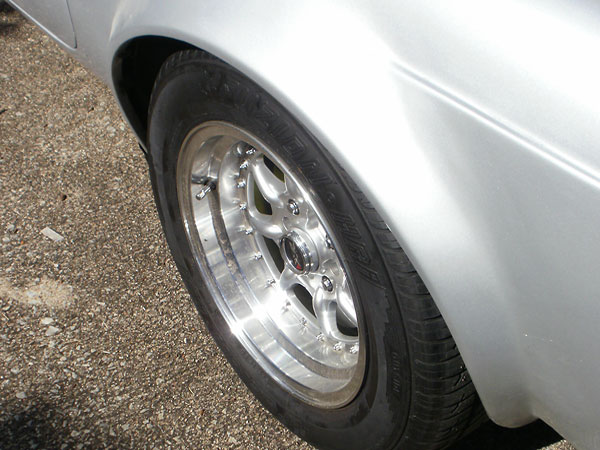
Here's how the front flares fit with 205/60R15 tires installed. Notice that the
�
Nissan Stanza flares blend nicely inward toward the front valance.
�
�
The front flares don't cross the waist line where stainless steel trim was originally applied.
�
�
Now I was ready to work on the rear fenders. I had previously decided to install 225/60R15�
tires on a new MGC axle. With the wheels and tires I selected, it was evident that my tires�
would protrude beyond The Silver Lady's fender, so even more cutting and welding was needed.�
�
�
�
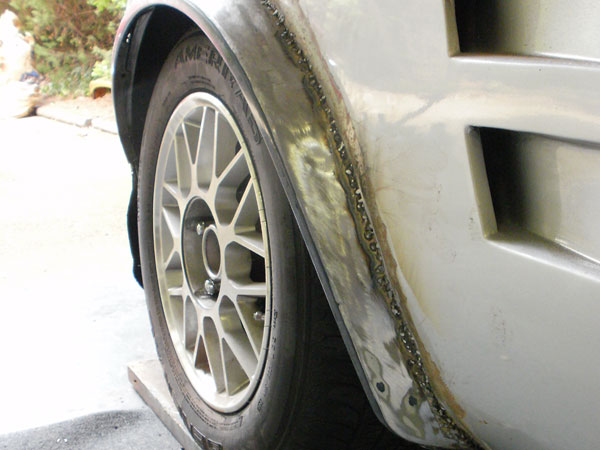
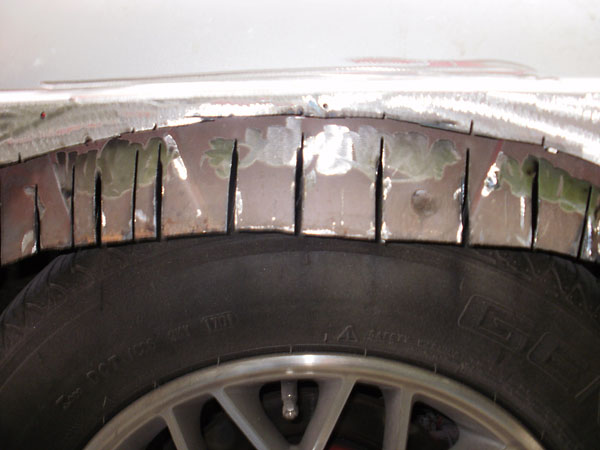
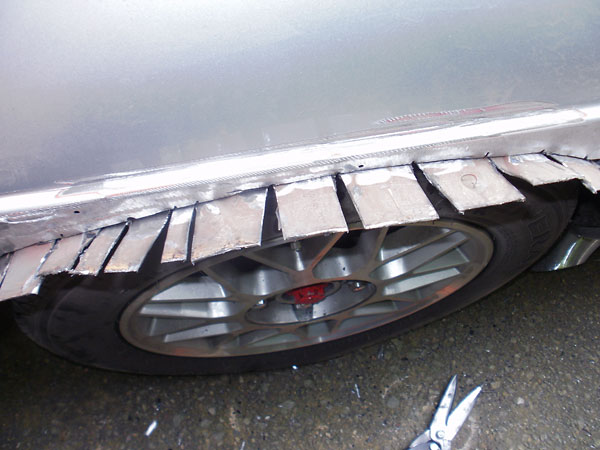
Installing rear flares is complicated by the need to seal between inner and outer fenders.
�
�
After trimming the outer fender skin away, I sliced the inner fender opening to make "fingers."
�
Then I folded the fingers outward and welded them to the outer skin to close up the gap.
�
�
With the old wheel and tire in place, I drew an arc on the fender the length from the�
center of the new wheel to the outside of the tread plus 1.5" to be on the safe side.�
I then placed approximately 180 pounds of ballast in the trunk. With the car loaded down,�
I confirmed that clearance would be okay. I also took this opportunity to check for clearance�
between bump rubber and bump stop.�
�
The next step was to cut to my marked line, through just the outer fender. The inner fender�
was "fingered" as shown in the photos above. In other words, I sliced the inner fender�
so I could fold it outward and upward to seal to the outer fender. (The fingers were�
longer than necessary, so after folding them to shape I cut away the excess material.)�
With inner fender fingers welded to the outer fender, I was almost ready to move on but�
first I decided to reinforce and seal up the area with a layer of fiberglass.�
�
From that point, flaring the rear fenders was fairly similar to what I'd already done at the�
front. The main difference was that the flares needed to be spaced outward a bit at the top.�
I had previously decided that as long as I was flaring the fenders, I should make the flares�
wide enough for the tires I really wanted. I had chosen a 225-width tire, so I worked with�
it. I spliced-in spacer sections between the Nissan flares and the MGB quarter panels along�
the top of the arch.�
�
�
�
Unlike the front, the rear fender flares do cross the horizontal feature line.
�
�
After stitch welding I again laid fiberglass in the valley created between fender and flare,�
finishing with a skim of polyester filler. �
�
�
�
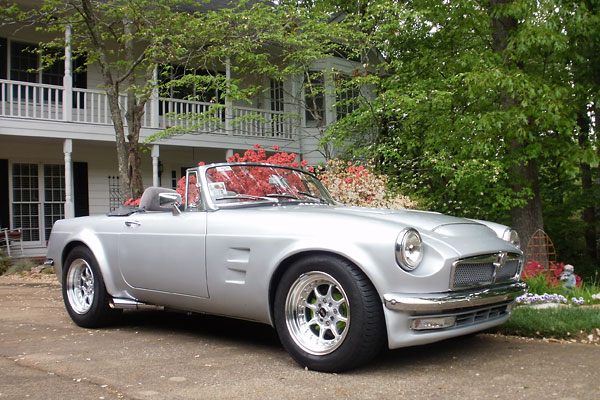
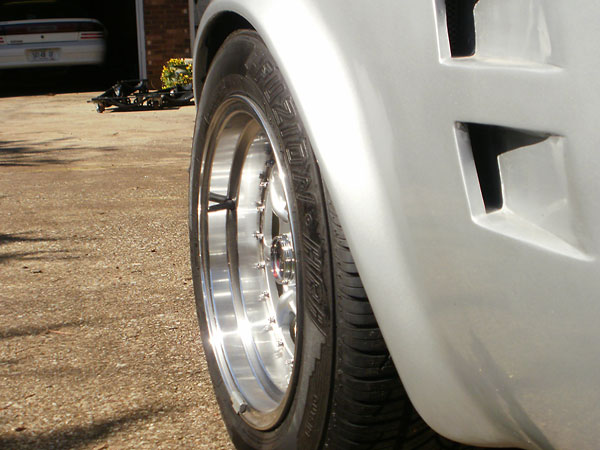
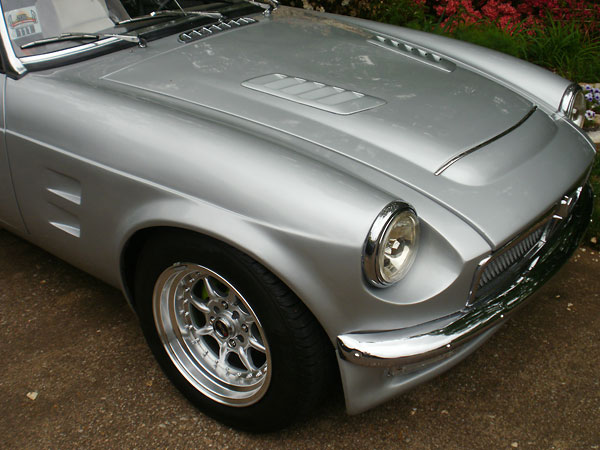
Integration of Nissan Stanza fender flares into the overall Silver Lady concept.
�
XXR "002" 15x7 Hyper Silver aluminum wheels, +38mm, 5.5" back spacing.
�

�
Nissan Stanza donor parts give this MGB a distinctive wrap-around fender flare appearance.
�
�
Looks are one thing, but how about performance? With a four-liter V8 under the hood this�
car was already pretty quick. Now, with the extra tire contact area (from 205-width front�
and 225-width rear tires) and with wider rear track, The Silver Lady is even more of�
a dream to drive.�
�
� Disclaimer: This article on this page was researched and written by Mike Cook.� Views expressed are those of the author, and are provided without warrantee or guarantee.� Apply at your own risk.�
� Photos by Mike Cook for BritishV8 Magazine. All rights reserved. �
