 �
�
�
�
Dan Root's Custom-Bodied 1977 MGB with GM 60-degree V6 engine
��
as published in British V8 Magazine, Volume XVI Issue 1, May 2008�
�
Owner: Dan Root
�
�
City: Leawood KS
�
Model: 1977 MGB
�
Engine: GM 3.4L V6
�
Conversion completed by: owner�
Executive Overview
�| Engine: | �Chevy 2.8L V6 (originally from a Chevy S10) bored and stroked to 3.4L and �
fuel-injected by A.R.I. (Anderson Racing Inc.) in Grandview, MO. �
"Phase 3" performace cam. | �
| Induction: | �a high-performance fuel injection manifold from a Camaro was selected �
to keep the height of the engine low. | �
| Exhaust: | �steel headers, modified for frame clearance and HPC coated. �
Custom made stainless steel exhaust pipes by Brad Ripley of Ripley Automotive. | �
| Cooling: | �new MG radiator. Puller fan. | �
| Transmission: | �Borg-Warner T5 5-speed. Chevrolet clutch slave cylinder. Custom driveshaft. | �
| Rear Axle: | �stock MGB. | �
| Suspension: | �(front) original MGB except with custom lower control arms (see below), � (rear) original MGB with new springs and racing shocks. | �
| Other Chassis: | �wheel base lengthened by 19 inches. Track widened by 6 inches. | �
| Paint: | �DuPont 2K primer. DuPont black urethane base. The cream color is custom �
mixed to match the Indian motorcycle color chart. DuPont 72200 urethane �
clear coat. | �
| Wheels/Tires: | �(front) 205-15, (rear) 225-15. Wide white-walls and 1957 Lincoln hubcaps. | �
| Electrical: | �stock MG gauges. MG wiring adapted by Brad Ripley of Ripley Automotive. | �
| Weight: | �2550 pounds. | �
| Completed: | �2002. | �
How It Was Done:
��
The car was built to recreate the style of a 1930's French automobile. When people �
ask what it is, I say a "Racine". Racine means "root" in French!�
�
Before I started assembling this car, I had already collected a number of vintage �
Ford body parts: the front half of a 1934 frame, fenders, and running boards, 1936 �
rear fenders, a 1938 hood, 1939 side panels. I was looking for a way to get all of �
these parts to fly in formation! �
�
�
My answer was to purchase a 1977 MGB and use it as the basis for the other parts.
�
I selected a donor car in excellent condition so I wouldn't have to do work twice. �
�
�
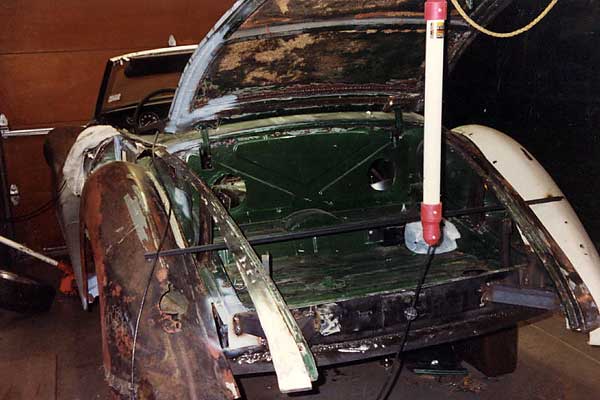
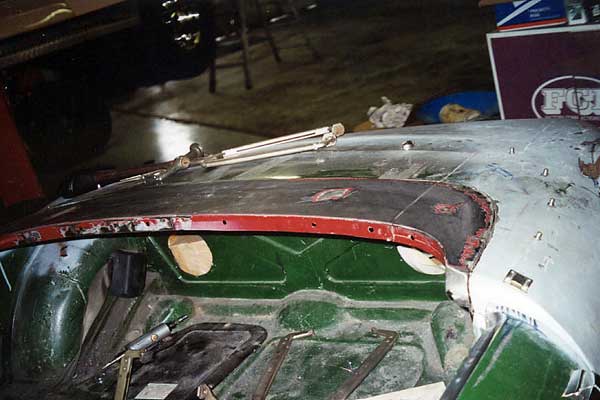
The first fabrication job was to cut the rear deck panel behind the seats, and move it forward five inches.
�
I also tilted it up at the front about one inch, before welding it into position. Then I placed the hood behind
�
the rear deck panel for a mock-up, to see if it would work as a boot lid.
�
�
�
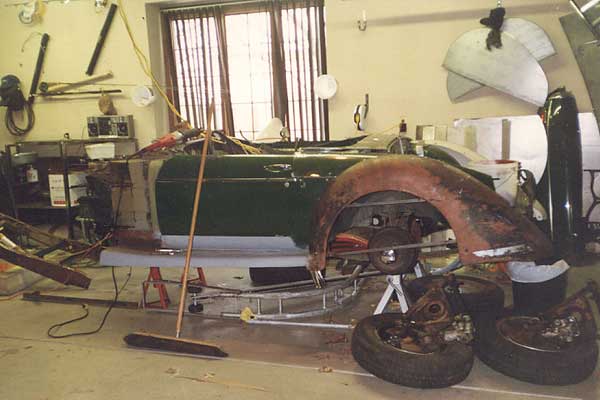
I cut out the rear sheet metal to fit the leading edge of the rear fender, and then
�
attached the '34 Ford running board to the rear fender and under the quarter panel. �
�
�
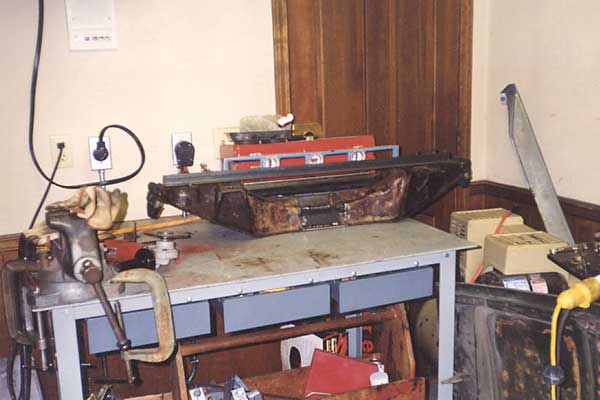
I cut and widened the MGB crossmember six inches. The wider front suspension will fill the fenders,
�
provide more cornering ability, and maintain proper Ackerman to suit the extended wheel base. �
�

�
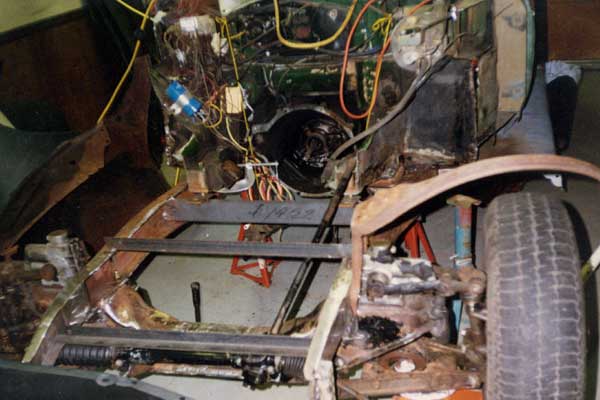
The MGB is unit-body car, but with formed sub-frame sections coming forward through the engine bay
�
I cut these off short and welded the '34 Ford frame over them. With the '34 Ford frame installed,
�
the axis of the front wheels was moved 19 inches forward. �
�
�
I then built the new mounts for the cross members. Amazingly, they fit the '34 Ford frame.
�
I attached the crossmember to the frame with six three-quarter inch diameter SAE grade-8 bolts. �
�
�
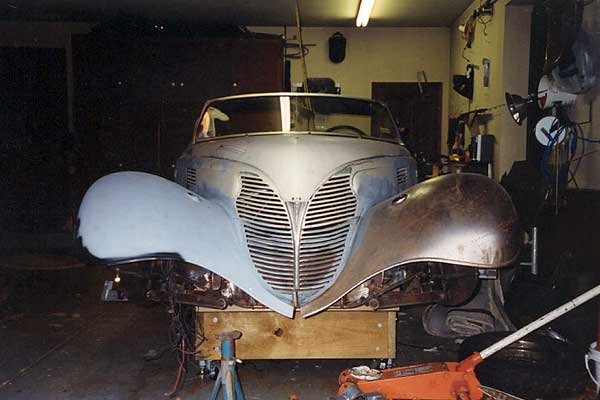
With the '34 Ford frame in place, the fenders and running boards bolted right up.
�
I set the '38 hood and '39 side panels in place on top of the fenders for mock up. �
�
�
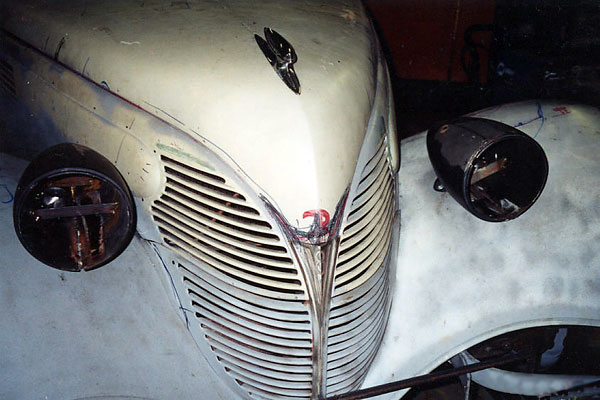
The '39 Ford side panels fit the '34 fenders amazingly well, although the bottom half
�
of the grille had to be redesigned to fit the '34 Ford fenders properly.�
�
�
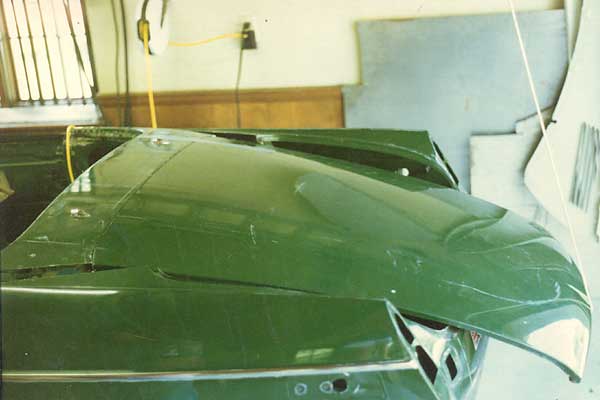
As this view shows, the Ford hood and MGB windshield seem made for each other!�
�
�
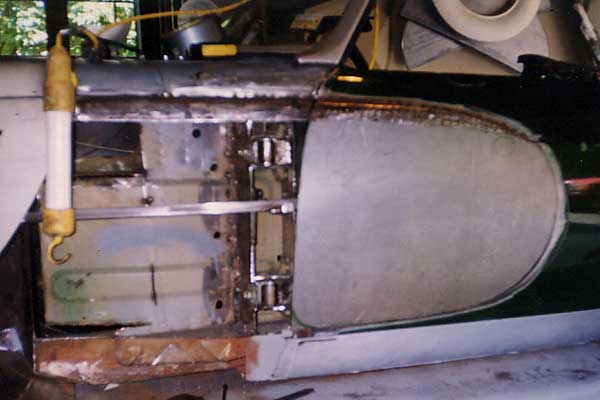
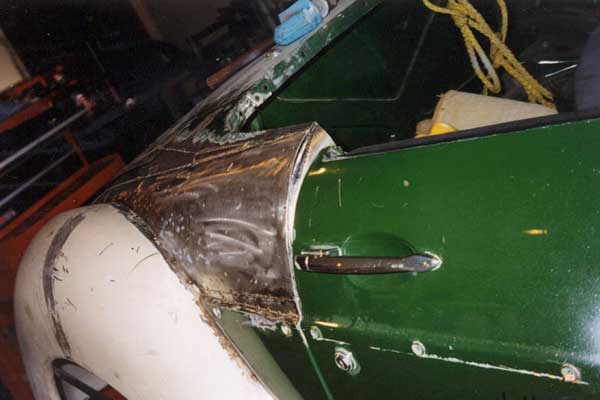
To get a natural-looking beltline, I had to remove part of the door hinge towers.�
�
�
I made new panels to cover the hinge towers. Small steel covers were
�
fabricated to cover the actual hinge mechanisms, shown here. �
�
�
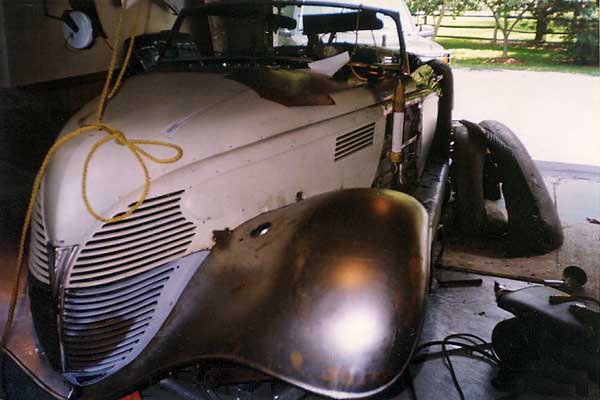
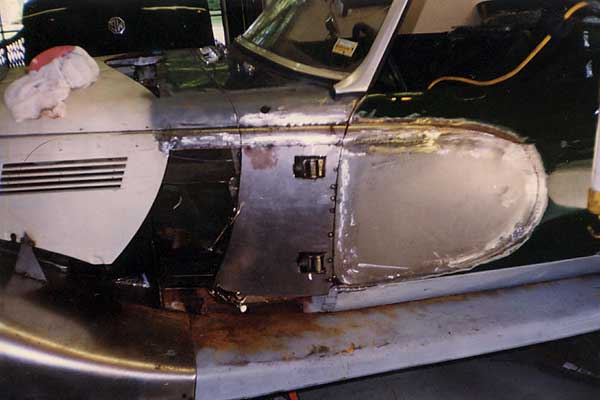
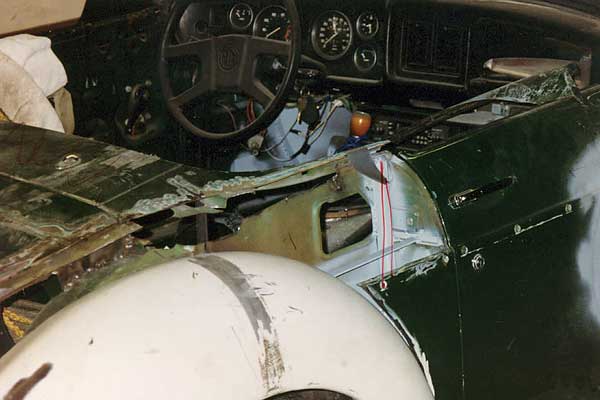
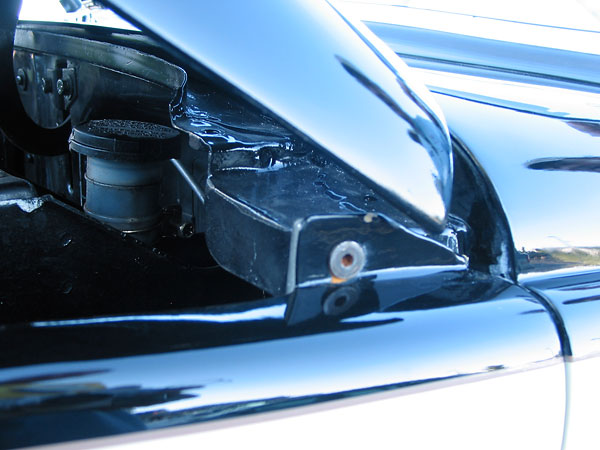
The '38 Ford hood was attached to the original MG hood hinges... but obviously there was a large
�
gap between the hood and MG cowl/firewall. I fabricated a cowl extension to fill this area.�
�
�
Moving back to the rear of the car, the MGB bonnet was modified to mate with the MGB trunk-lid hinges.
�
The hinges were also modified and reinforced. Note also that the original MGB rear axle was actually
�
left in its location. Three inch offset wheels make up the six inch width difference needed.�
�
�
I cut-up the original MGB front fenders for their rain gutters, which I needed
�
to match the contour of the MGB hood (now being used as a trunk lid.)�
�
�
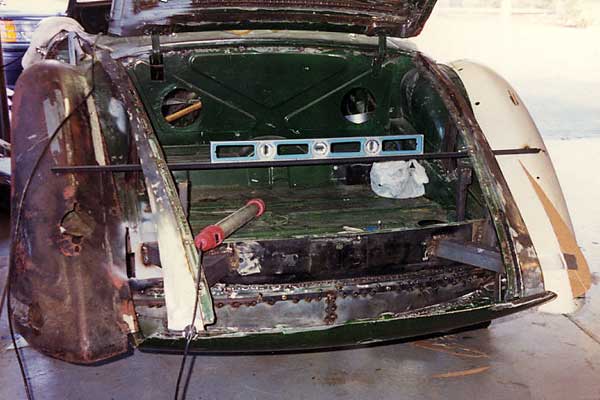
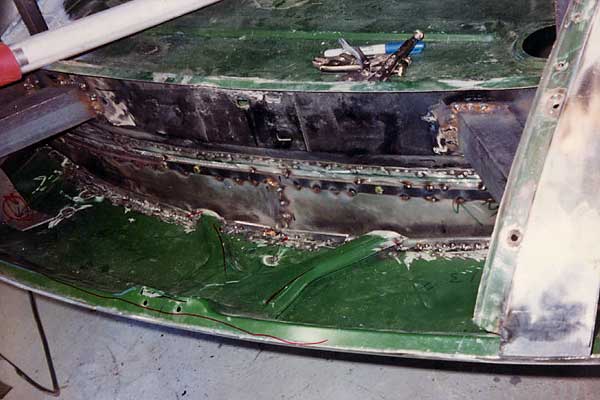
A stepped-down section has been added to the trunk floor.�
�
�
Believe it or not, the original MG trunk lid was inverted and used as a splash apron!
�
Tunnel sections were boxed-out for the exhaust pipes. As the photo hints, the original
�
MGB trunk latch is still in service! The bottom edge of the MG trunk lid matched-up nicely
�
to the compound curve of the original MG hood. Am I lucky or what?�
�
�
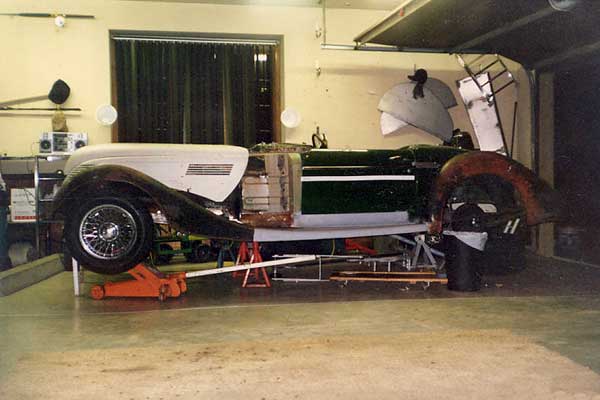
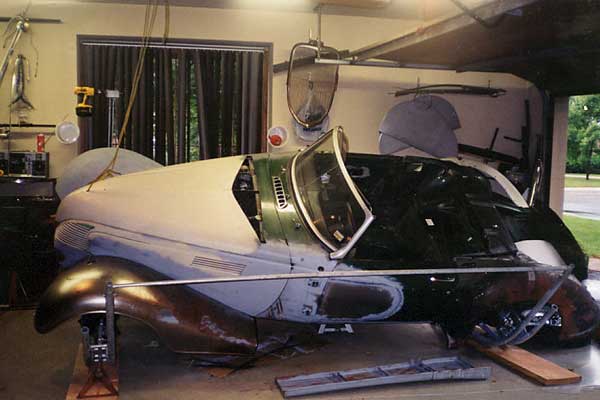
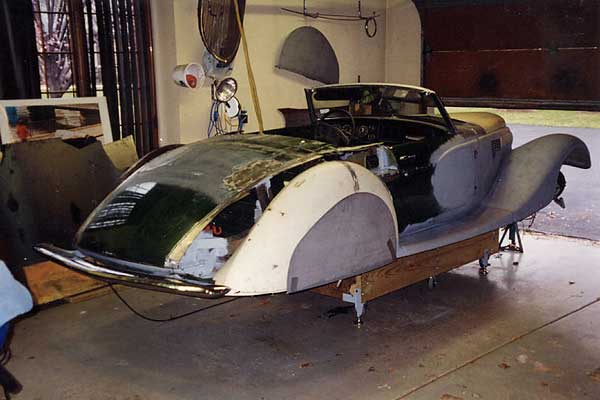
I had used a car tilter earlier in the process, but then I switched to this six wheeled dolly, with levelers.
�
Notice the poster in the window behind - a '36 Delahaye roadster! - that's what kept me inspired. �
�
�
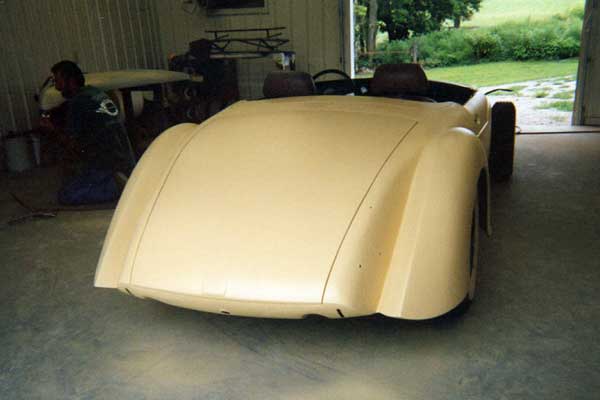
The last of the bodywork to be filled in...�
�
�
Enjoying this article? Our magazine is funded through the generous support of readers like you!
�
To contribute to our operating budget, please click here and follow the instructions.
�
(Suggested contribution is twenty bucks per year. Feel free to give more!)�
�
�
�
Notice that this rear panel has been raised up in a more traditional fashion.�
�
�
All that was left to build were bumper mounts and fill in the sheet metal between �
the hood and fenders. �
�
�
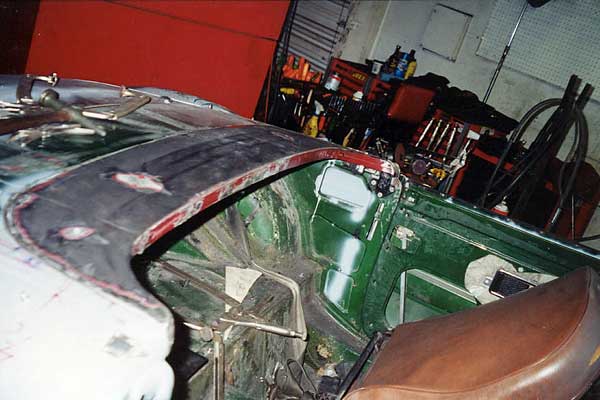
As already stated, the cockpit had been closed-up about five inches behind the seats.
�
I now focused again on this area, and fabricated a removable steel (partial) tonneau cover.
�
The cover is secured in place by two wing nuts.�
�
�
New brackets have been welded-in just behind the door jams for the convertible roof top bows.�
�
�
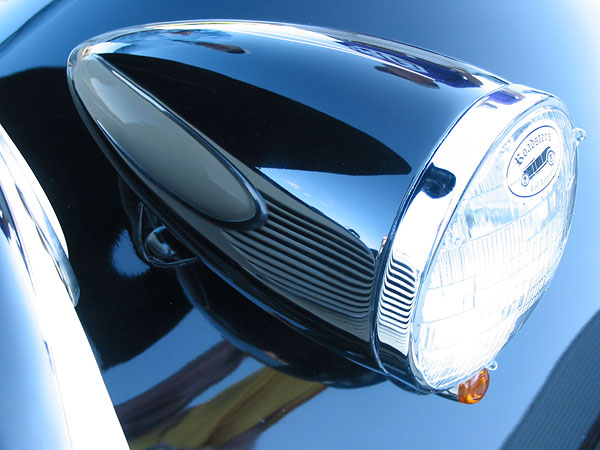
Next the headlights: while trying to capture the Figoni Falaschi designed Delahaye concept,
�
I needed bullet shaped headlights and taillights. I used '37 Chevy headlight buckets which
�
normally mount sideways. I reduced the overall diameter two inches by carefully pie-cutting,
�
and rewelding. I used '34 Ford shorty headlight mounts welded to the headlight buckets.�
�
�
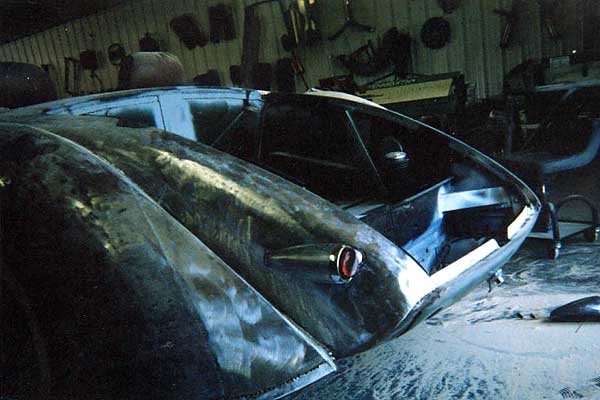
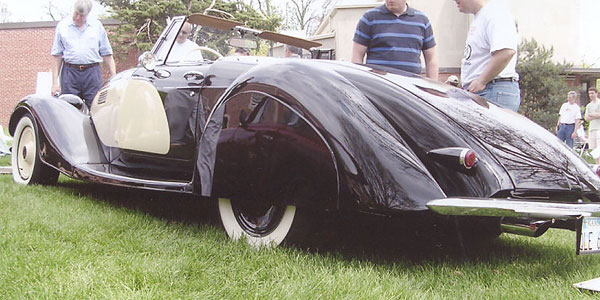
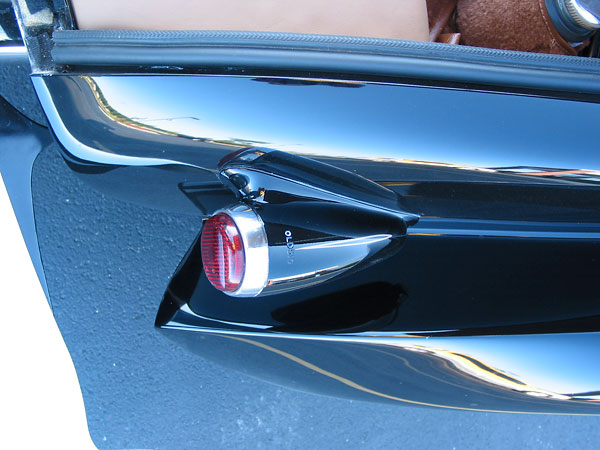
Taillights are stock '38 Olds. The '36 Ford rear fenders were extended 10 inches as shown.�
�
�
Then it was "off to see the Wizard"! �
�
�
The Wizard being Bruce Curry's body shop in Clinton, Missouri. �
�
�
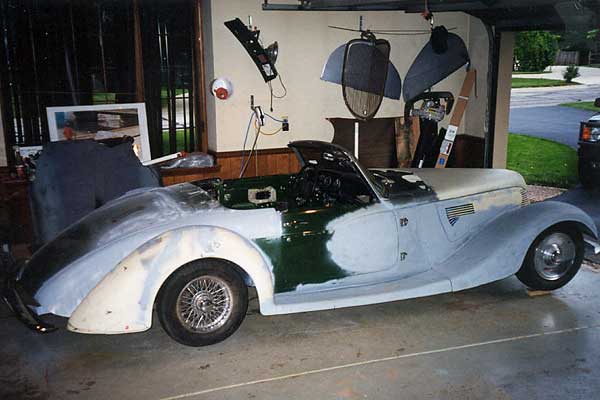
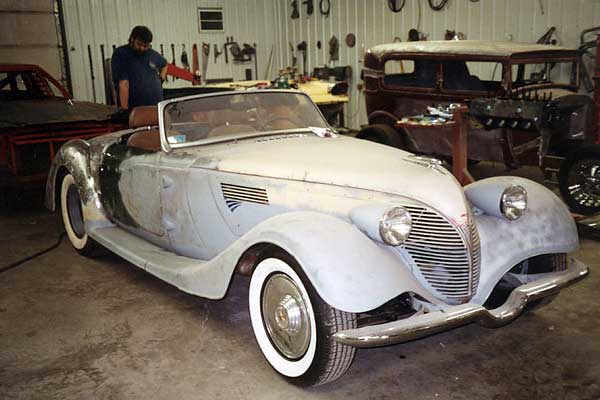
Bruce painstakingly corrected my lumpy body work and covered it with a couple coats of primer. �
�
�
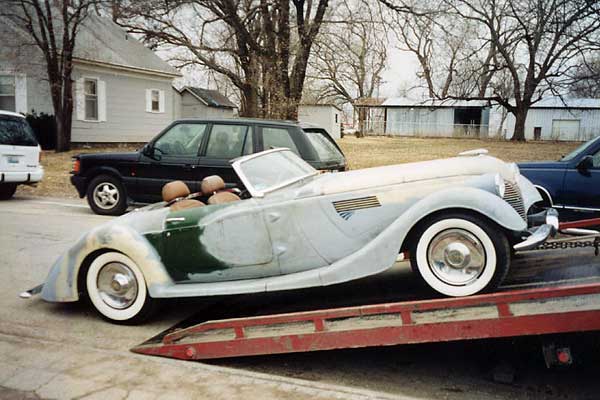
At this point, I put the car on the road for six months before final tear down and paint.
�
(Note: it took about four years from concept to get to this point.)�
�
�
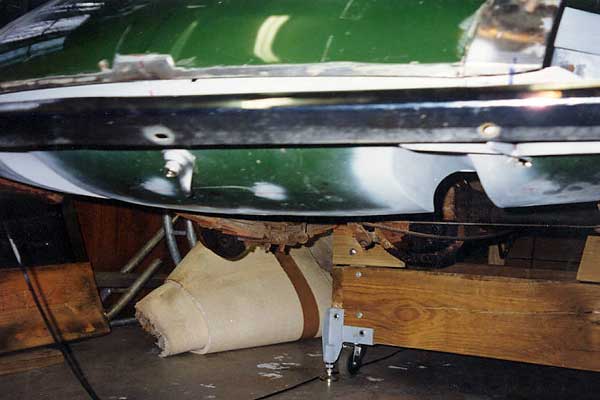
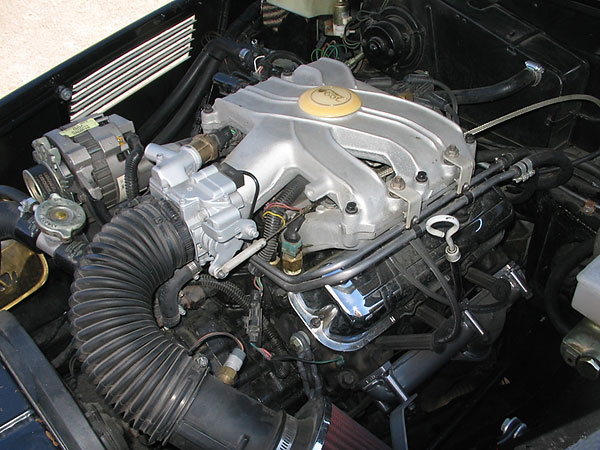
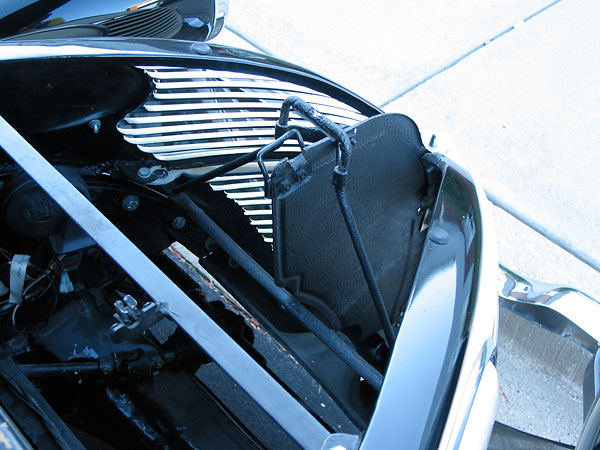
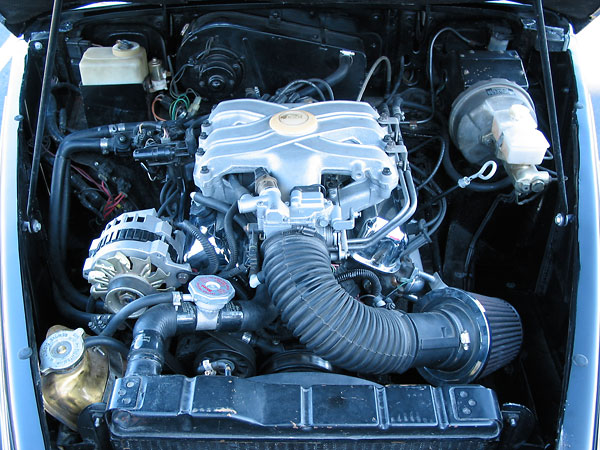
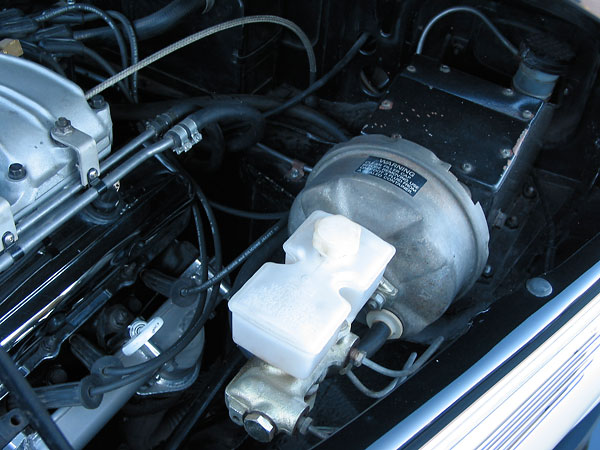
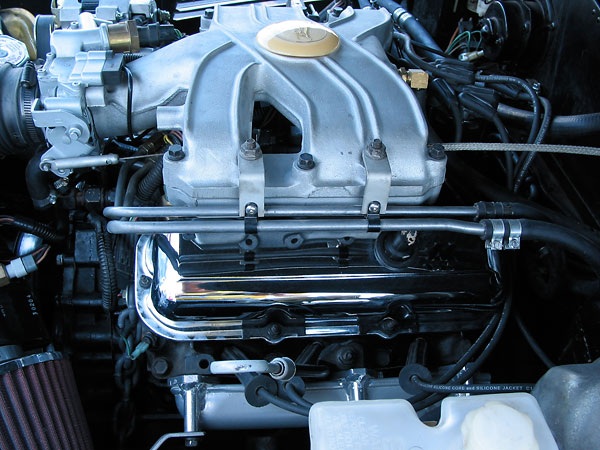
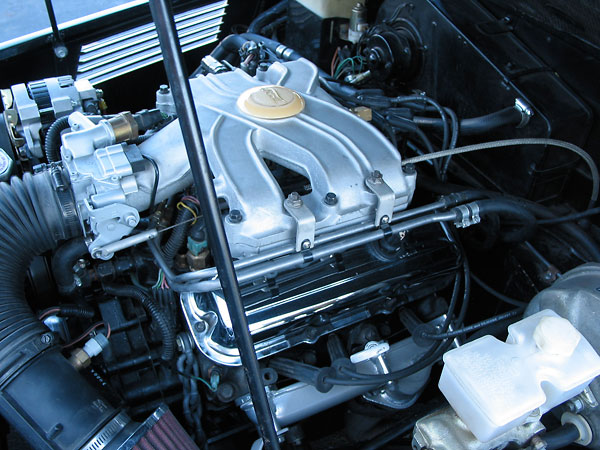
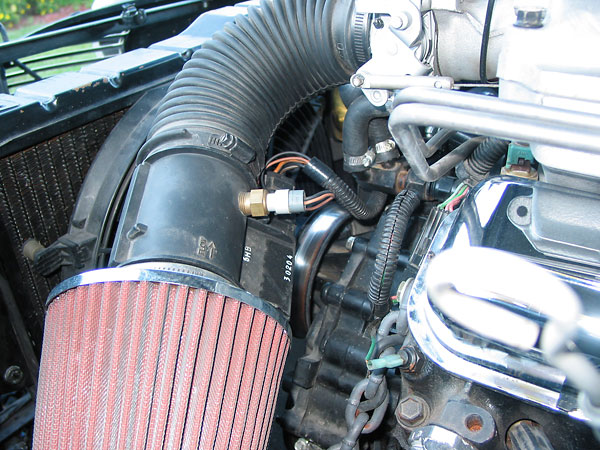
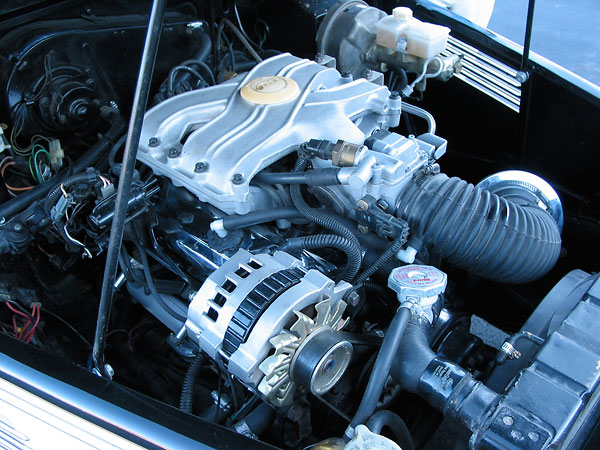
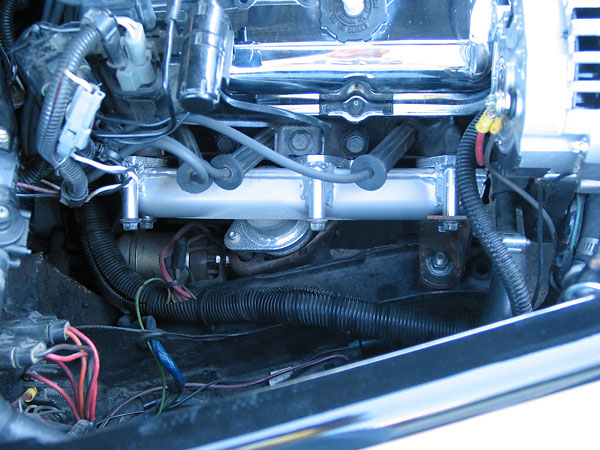
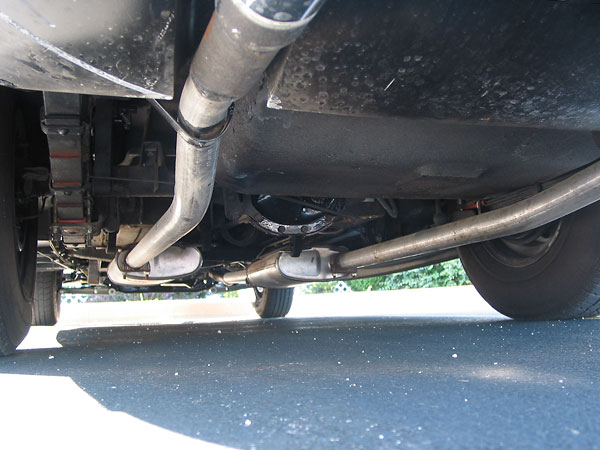
The engine is GM 2.8L V6, bored-and-stroked to 3.4L, with fuel injection.
�
A new MG radiator cools the car just fine.�
�
�
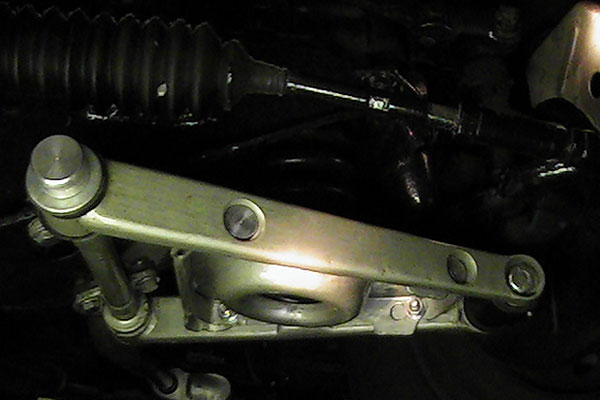
The front suspension is sometimes visible because of the rise of the '34 fender, so I modified the
�
exceptionally ugly MGB lower control arms by tapering them towards the wheel then boxing them
�
and recessing the bolt holes for the lower spring mount. I also beefed up the attachment point
�
at the spindle. The front suspension is MG with modified racing springs, rack and pinion steering
�
extended 3 inches on each side.�
�
�
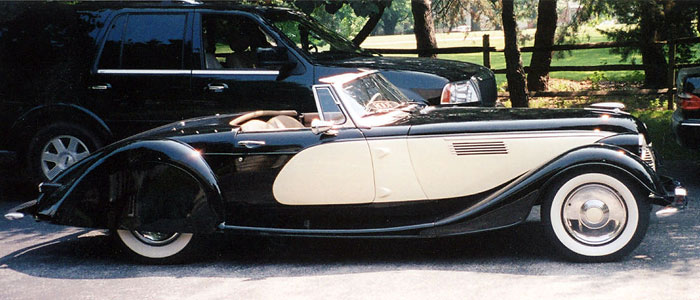
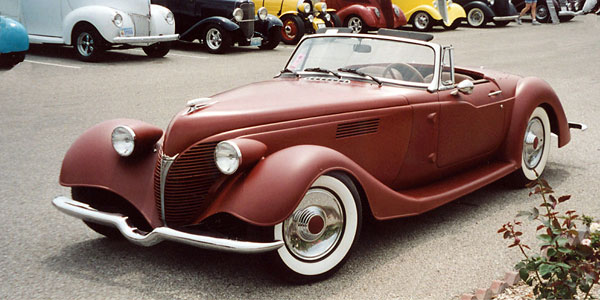
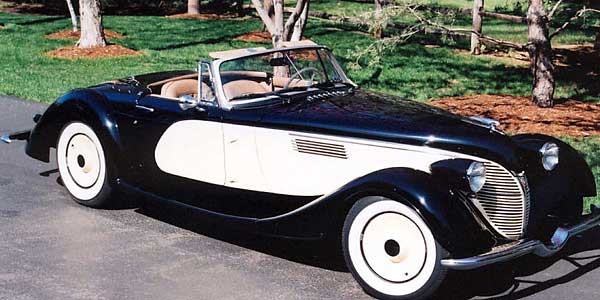
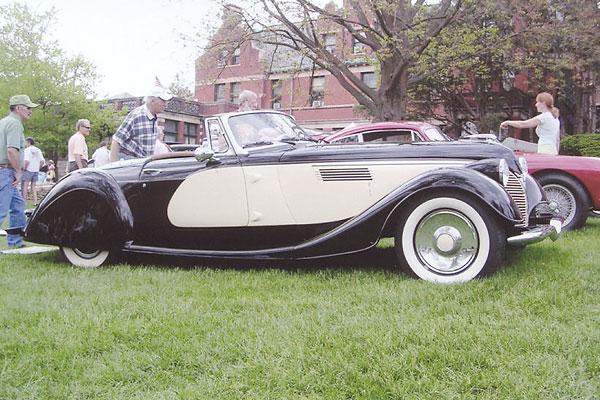
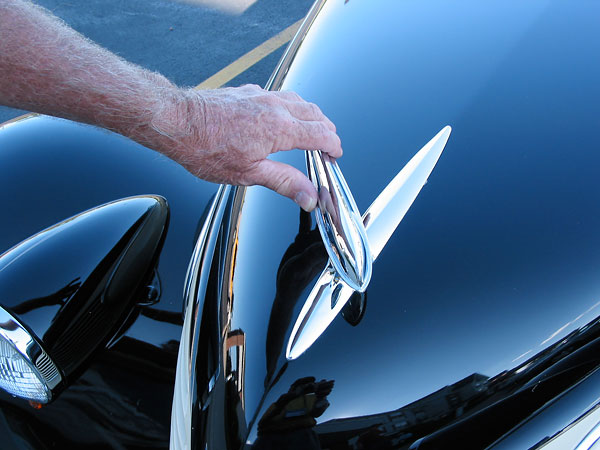
This is how the car looked with fresh new paint. Incidentally, that's a 1961 Jaguar front bumper
�
(slightly modified) and 1960's Rover sedan rear bumper (unconfirmed).
�

�
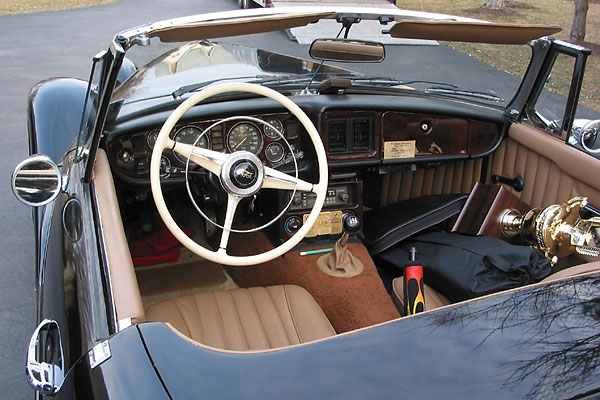
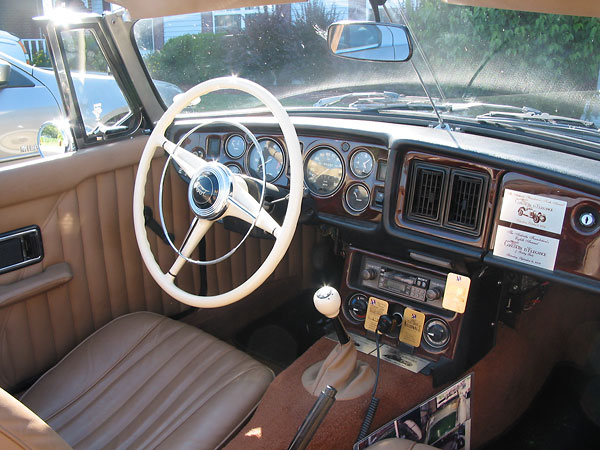
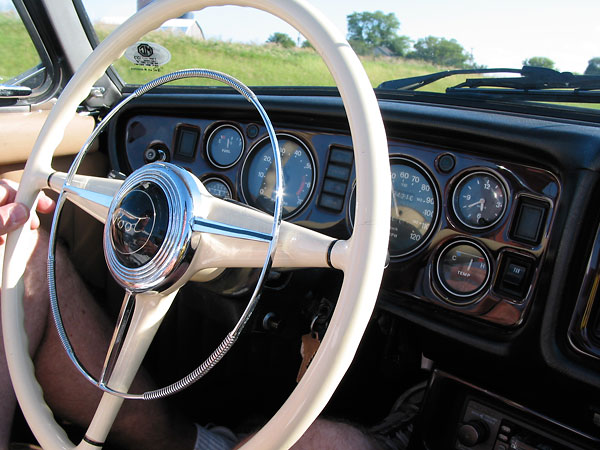
I kept the MG dashboard, but with wood-grain trim added, and I used a '48 Plymouth steering wheel.�
�
�
A Borg-Warner T5 5-speed transmission was used. Its shortened shifter comes through the original
�
hole in the transmission tunnel. The engine and transmission easily dropped in using original MG
�
motor mounts and transmission mounts with only slight alterations.�
�

�
The original MG top still works with the use of the old style collapsible top bows.
�
�
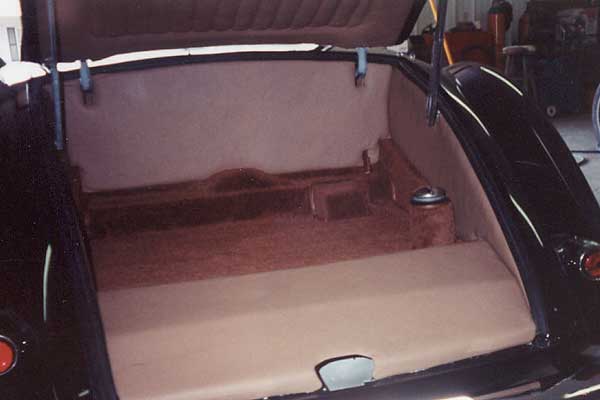
Fuel filler cap is accessed from inside the trunk. In the foreground is a lidded storage compartment.�
�
�
�
Since completion in 2003, the car has been accepted and shown at the L.A. Roadster Show (4 years
�
ago) and it won First in Class at the Grand National Roadster Show 3 years ago.�
�
�
The car has appeared in two books: "Radical Hot Rods" by Larry O'Toole (Graffiti Publications, Victoria,
�
Australia) and "Wheels of Dreams" by Tom Strongman (Kansas City Star Books, Kansas City, MO.)�
�
�
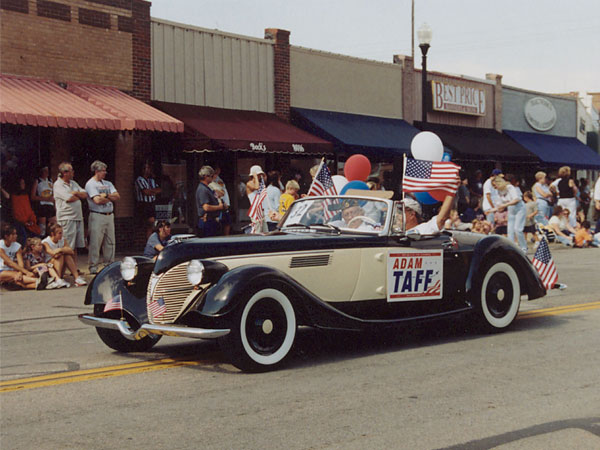
The Racine Roadster was designed and built to be a practical car, and I drive it as often as I can!
�
Unlike most roadsters, the Racine Roadster has generous ground clearance. I love being low and cool,
�
but dragging on the ground gets old quickly. I have eight hubcaps in four different colors (two each),
�
so each side of the car has a different look and I can change the look from time to time. No one seems
�
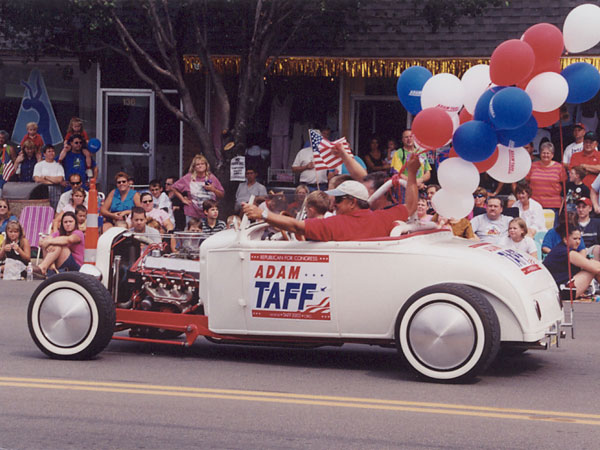
to have noticed though. In this parade photo, the crowd seems to be looking at the hot rod behind...
�
�
�
which is also mine!�
�
�
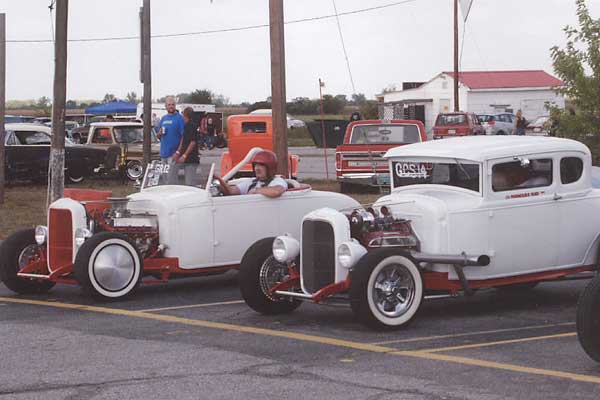
I have in the past done 6 other conversions starting with a Fiber-Fab Jamaican, two '31 Fords
�
(a Coupe and a Roadster), a '59 Jaguar, a '33 Ford Roadster and a '34 Ford Roadster. Two of
�
these are nostalgic drag cars, but back when I built them it wasn't nostalgia... These are the
�
cars I drive when I want to go really fast!�
�
In this photo, the roadster is a '31 Ford chopped-and-channeled over '32 rails with a 351 Ford
�
Cleveland engine, FMX transmission with shift kit and a three-point roll hoop. The coupe is a
�
'31 Ford chopped-and-channeled over '32 rails, 327 Chevy engine with three deuces, 4-speed
�
(TH700R) transmission and four-point roll hoop. �
�
�
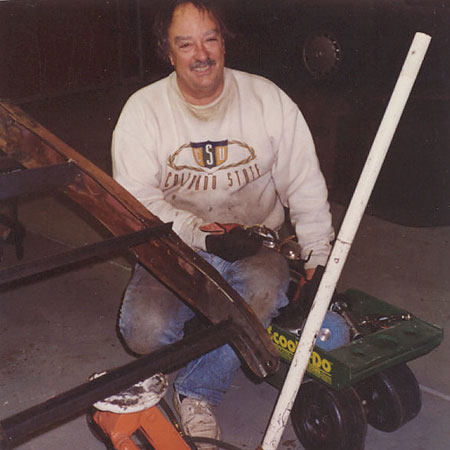
Racine Roadster builder Dan Root - showing off his "Scoot and Do"�
�
Additional Photos, from British V8 2008 in Port Washington WI
��
�
�
�
�
�
�
�
�
�
�
�
�
�
�
�
�
�
�
�
�
