�
 �
�
�
�
�
�
�
�
�
�
� presented by: Dan Masters of Advance Auto-Wire
� coverage by: Curtis Jacobson�
� Dan Masters presented his electrical wiring tech session at 4pm of Friday afternoon.� He focused his presentation on walking us through what's included with an � Advance Auto-Wire wiring kit, and also what skills and tools are needed to get it � properly installed. �
�
�
�
�
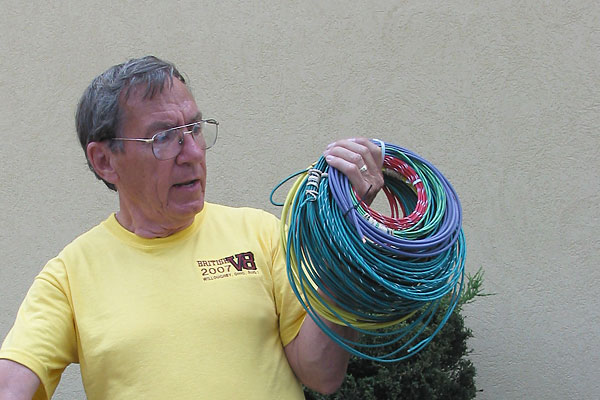
Dan Masters explained some of the unique virtues of the Advance Auto-Wire wiring kit.�
British V8 2007 Tech Session: Installing a Wiring Kit
� as published in British V8 Newsletter, Volume XV Issue 2, September 2007�� presented by: Dan Masters of Advance Auto-Wire
� coverage by: Curtis Jacobson�
� Dan Masters presented his electrical wiring tech session at 4pm of Friday afternoon.� He focused his presentation on walking us through what's included with an � Advance Auto-Wire wiring kit, and also what skills and tools are needed to get it � properly installed. �
What Comes In The Box?
� I don't need to tell you that British sports cars don't have a great reputation � for their electrical systems. Whether that's deserved or not, if you're replacing � the engine in a British sports car, it makes a lot of sense to remove forty year � old wiring and replace it fresh parts and newer technology. Dan makes that feasible � for anyone by providing a high quality kit and including good documentation. So � far, Advance Auto-Wire has shipped around two hundred wiring kits direct to customers � in the U.S., Canada, England, Belgium, Germany, and Australia. ��
Perhaps the most important feature of Advance Auto-Wire's kit is the cable itself. �
The Advance Auto-Wire wiring kit comes with a great big bundle of fat wires. �
Frankly, every single lead is designed to be longer than it needs to be. You trim �
them to length. But why are they so fat? On almost all circuits the copper cable �
itself is thicker gauge than stock. The practical significance of fatter wire is �
that there's less electrical resistance and thus less voltage-drop, and consequently �
many devices work better. (Electric fans spin faster. Lights glow brighter.) �
��
�
� The cable is covered with a thick layer of cross-linked polyethylene insulation. � "SXL" insulation has a significantly higher melting temperature than the polyvinyl � chloride (PVC) insulation that originally came on our cars' wiring. The higher � temperature rating of SXL insulation provides a big safety net in the event of a � mishap. With a one-off, hand-built car there's a very real possibility that a � fuse won't always be there to catch an installer's mistake. The SXL insulation can � withstand a lot more heat, whether the heat is caused by over-current or by letting � a wire fall across a hot exhaust system. SXL insulation is also quite noticeably � thicker than usual insulation. Dan has, however, color-coded the cable insulation � to match the familiar British automotive standards. This is a nice feature that � other hot-rod wiring kits don't offer.�
� Another hugely important advantage of the Advance Auto-Wire wiring is that it � provides better circuit protection and more relays than the original car had. � Fuses? There are more fused circuits (eight, or twelve if you buy the accessory � add-on) and also modern ATC fuses in lieu of glass fuses. Take particular note � of the relays. With a relay added into a circuit, electrical current through � corresponding switches is reduced dramatically. Again, there's typically � significantly less electrical resistance and thus less voltage-drop in the � circuit, so the switched device performs better. Furthermore, the switch contacts � themselves are less stressed, so they'll live longer and be more reliable. �
� "Typical" Advance Auto-Wire Circuit Protection and Relay Scheme�
��
�
� Note: in all cases fuses are sized for the cables they're intended to protect
� (length and gauge) - NOT the devices powered by those respective circuits.�
��
�
�
�
�
| �
Enjoying this article? Our magazine is funded through the generous support of readers like you! � To contribute to our operating budget, please click here and follow the instructions. � (Suggested contribution is twenty bucks per year. Feel free to give more!)� |
� The cable is covered with a thick layer of cross-linked polyethylene insulation. � "SXL" insulation has a significantly higher melting temperature than the polyvinyl � chloride (PVC) insulation that originally came on our cars' wiring. The higher � temperature rating of SXL insulation provides a big safety net in the event of a � mishap. With a one-off, hand-built car there's a very real possibility that a � fuse won't always be there to catch an installer's mistake. The SXL insulation can � withstand a lot more heat, whether the heat is caused by over-current or by letting � a wire fall across a hot exhaust system. SXL insulation is also quite noticeably � thicker than usual insulation. Dan has, however, color-coded the cable insulation � to match the familiar British automotive standards. This is a nice feature that � other hot-rod wiring kits don't offer.�
� Another hugely important advantage of the Advance Auto-Wire wiring is that it � provides better circuit protection and more relays than the original car had. � Fuses? There are more fused circuits (eight, or twelve if you buy the accessory � add-on) and also modern ATC fuses in lieu of glass fuses. Take particular note � of the relays. With a relay added into a circuit, electrical current through � corresponding switches is reduced dramatically. Again, there's typically � significantly less electrical resistance and thus less voltage-drop in the � circuit, so the switched device performs better. Furthermore, the switch contacts � themselves are less stressed, so they'll live longer and be more reliable. �
� "Typical" Advance Auto-Wire Circuit Protection and Relay Scheme�
�
| Position | Circuits Protected | Fuse Rating |
| Fuse 1 | Windshield Wipers / Gauges / Turn Signals | 15 Amp |
| Fuse 2 | Heater / Reverse Lights / Brake Lights | 15 Amp |
| Fuse 3 | Fuel Pump | 15 Amp |
| Fuse 4 | Parking Lights | 15 Amp |
| Fuse 5 | Courtesy Lights / Radio Memory | 15 Amp |
| Fuse 6 | Horn / Hazard Lights | 20 Amp |
| Fuse 7 | Cigar Lighter / Accessories | 20 Amp |
| Fuse 8 | Cooling Fan | 20 Amp |
� Note: in all cases fuses are sized for the cables they're intended to protect
� (length and gauge) - NOT the devices powered by those respective circuits.�
�
| Position | Circuit Switched / Device Type |
| 1 | Main Power Relay (4 pin) |
| 2 | Fuel Pump Relay (5 pin) |
| 3 | Cooling Fan Relay (5 pin) |
| 4 | Horn Relay (4 pin) |
| 5 | Low Beam Relay (5 pin) |
| 6 | High Beam Relay (5 pin) |
| 7 | Hazard Lights Flasher |
| 8 | Starter Relay (4 pin) |
| 9 | Turn Signal Flasher |
�
�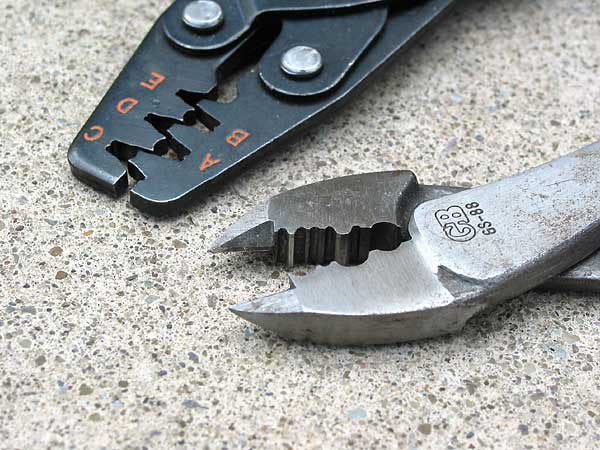
� This photo provides a comparison of two styles of better quality crimping tools.
� The black crimper is for modern automotive OEM-style "F crimp" terminals.
� The plain steel ("GB") crimper is for barrel terminals like electricians use.
� The GB brand tool is stout and crimps "along" rather than "across" the barrel
� terminal, making for much stronger crimps than typical auto-parts-store tools.
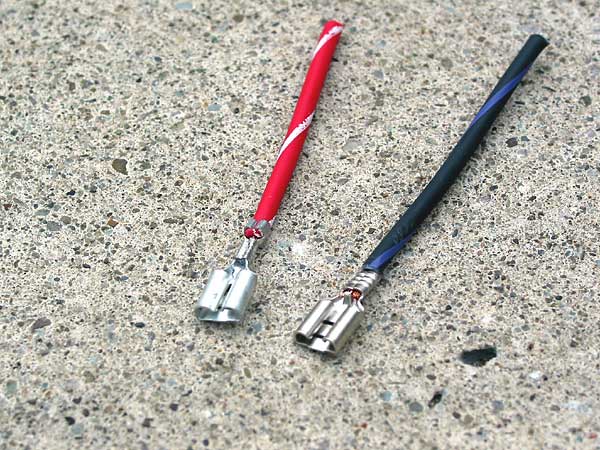
� The terminal at left has two different crimps - one for the conductor and one for
� the insulation. In both cases the crimp wings curl over and pinch down into the
� cable. This is the prevailing modern OEM-style. The terminal at right has just one
� "barrel style" crimp for the conductor. When crimping a barrel terminal, make sure
� the seam in the terminal is on the concave side of the jaws, or the crimper will
� tend to split the barrel open thus making a poor crimp. If terminals come with
� insulation on them, Dan recommends removing and discarding the insulation. After
� crimping, insulate the terminal with heat shrink tubing. Most hand-crimped terminal
� installations are improved by a small amount of properly applied solder.
�
�
�
How Do You Install It?
� Firstly, various wire terminals are used throughout the wire harness installation. � To connect terminals to cable, you will need to procure at least one, preferably � two, and possibly three good-quality crimping tools. Don't be tempted to use cheap � tools - this is one area where quality tools are mandatory for safe, reliable results. ��
� This photo provides a comparison of two styles of better quality crimping tools.
� The black crimper is for modern automotive OEM-style "F crimp" terminals.
� The plain steel ("GB") crimper is for barrel terminals like electricians use.
� The GB brand tool is stout and crimps "along" rather than "across" the barrel
� terminal, making for much stronger crimps than typical auto-parts-store tools.
� The terminal at left has two different crimps - one for the conductor and one for
� the insulation. In both cases the crimp wings curl over and pinch down into the
� cable. This is the prevailing modern OEM-style. The terminal at right has just one
� "barrel style" crimp for the conductor. When crimping a barrel terminal, make sure
� the seam in the terminal is on the concave side of the jaws, or the crimper will
� tend to split the barrel open thus making a poor crimp. If terminals come with
� insulation on them, Dan recommends removing and discarding the insulation. After
� crimping, insulate the terminal with heat shrink tubing. Most hand-crimped terminal
� installations are improved by a small amount of properly applied solder.
�
�
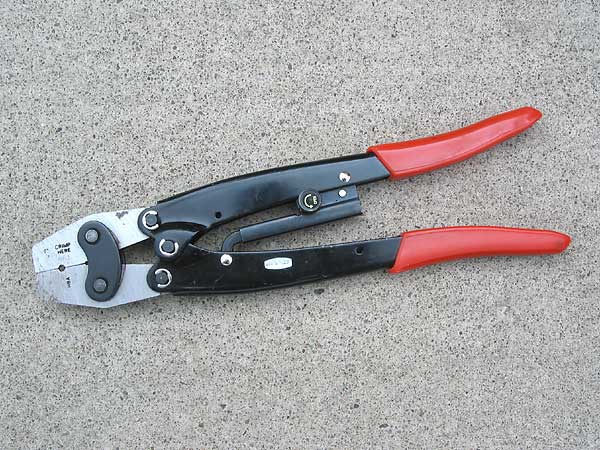
� This crimper is for the original (Lucas, MG, Triumph, etc.) bullet style terminals.
� It has a ratchet/latching mechanism, so you won't "under crimp" the terminal.
� You only need this tool if you're leaving some original wiring in the car.
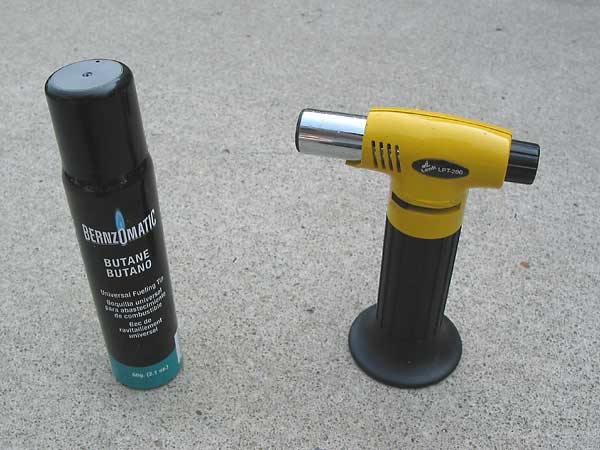
� Dan's convenient butane-powered portable soldering iron. In general, Dan recommends
� high-wattage irons because they can get the solder joint made without heat having
� time to soak out into the wire and/or to damage cable insulation. Whatever iron you
� use, Dan recommends rosin-core 60/40 thin gauge solder.
� Disclaimer: This page was researched and written by Curtis Jacobson. Views expressed � are those of the author, and are provided without warrantee or guarantee. Apply at your � own risk.�
�
�
� This crimper is for the original (Lucas, MG, Triumph, etc.) bullet style terminals.
� It has a ratchet/latching mechanism, so you won't "under crimp" the terminal.
� You only need this tool if you're leaving some original wiring in the car.
� Dan's convenient butane-powered portable soldering iron. In general, Dan recommends
� high-wattage irons because they can get the solder joint made without heat having
� time to soak out into the wire and/or to damage cable insulation. Whatever iron you
� use, Dan recommends rosin-core 60/40 thin gauge solder.
� Disclaimer: This page was researched and written by Curtis Jacobson. Views expressed � are those of the author, and are provided without warrantee or guarantee. Apply at your � own risk.�
