
�
�
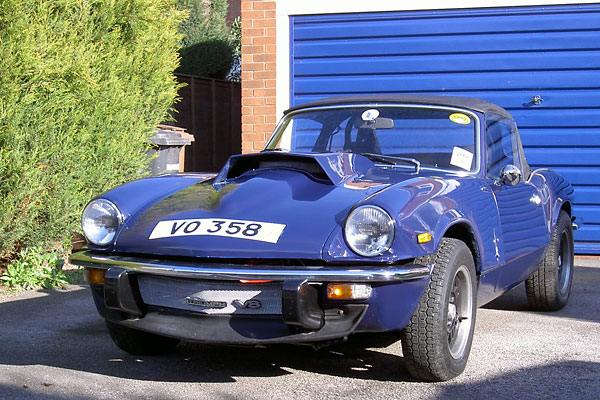
Graham Bingham's Spitfire - Rover 3.5L V8 Engine Conversion
� as published in BritishV8 Magazine, Volume XVII Issue 1, July 2009�� Owner: Graham Bingham
� BritishV8 UserID: Graham B
� � City: Draycott, Derbyshire, UK
� Model: 1974 Triumph Spitfire Mk.IV
� Engine: 3.5L Rover V8
� Conversion performed by: Owner
� (with help from Jim Britland, MGB GT V8 owner.)
�
How It Was Done
�| Engine: | �3.5L Rover V8. (The engine was originally from a Rover P6B saloon, circa ~1976, �
but it was bought secondhand after someone previously installed it in a Triumph TR7.) | �
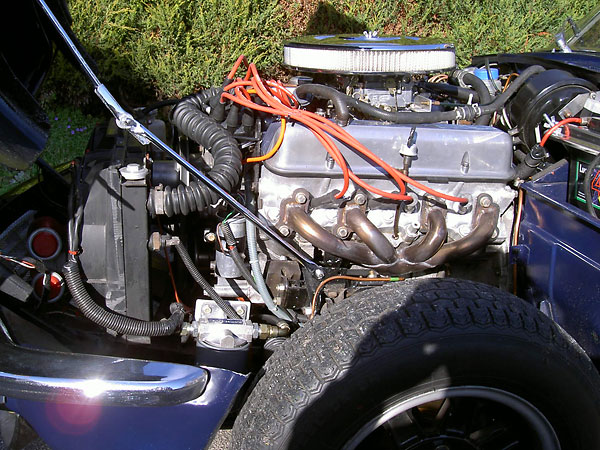
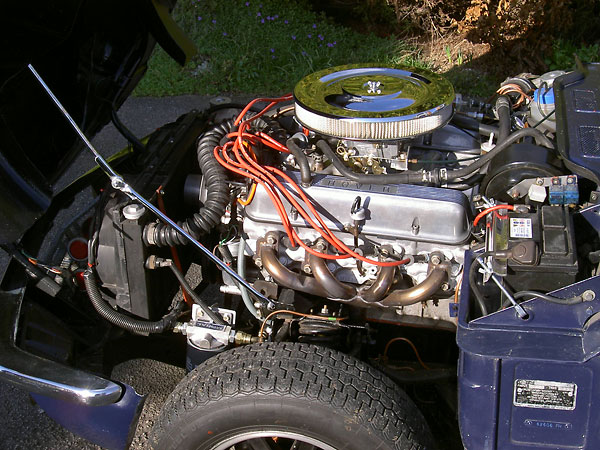
| Intake: | �Offenhauser 360 manifold with Edelbrock/Weber Performer 500 four barrel carb. �
Mitsuba electric fuel pump. MR Gasket 14" chrome free flow air filter. | �
| Cooling: | �modified Renault 21 radiator (bottom outlet angle modified), fitted �
with twin Peugeot 205 electric fans in a custom modified housing. �
Standard Spitfire heater and control valve. | �
| Exhaust: | �(all stainless steel.) Modified MGB V8 block hugger manifolds with nearside �
exit pipe adapted to fit closer to the block. Custom fabricated Y-pipe. �
Phoenix Systems 1-into-2 and twin single rear straight through sports silencers. | �
| Transmission: | �LT77 5-speed, with Sherpa van short remote to correctly position the gearshift.�
Standard Rover clutch, with TR8 master cylinder. | �
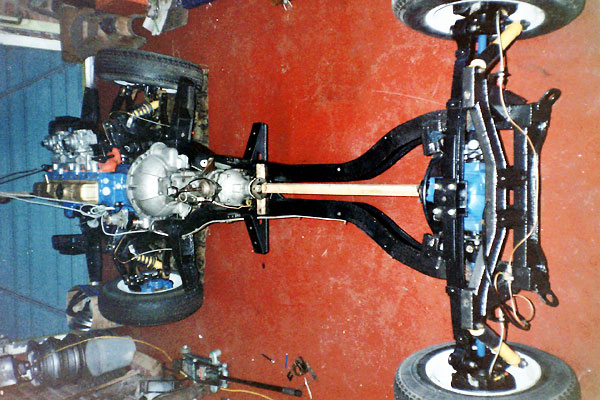
| Driveshaft: | �Triumph TR8, with rear flange re-drilled to mate to Spitfire differential. | �
| Rear End: | �Spitfire 1500 - watch this space! | �
| Front Suspension: | �Triumph GT6 MkIII | �
| Rear Suspension: | �currently standard MK1V Spitfire with all new springs, shocks and bushes �
etc. - watch this space! | �
| Brakes: | �Spitfire master cylinder and Lockheed remote servo. � Front - Standard GT6 MkIII calipers and rotors. � Rear - Standard Spitfire MkIV drums. | �
| Wheels/Tires: | �unknown make/model alloy wheels, with 175/70/13 tyres. | �
| Electrical: | �modified MK1V Spitfire loom, with fused relays added for electric cooling fans, �
electric fuel pump, etc. | �
| Completed: | �on the road in May 2008. I doubt this conversion will ever be completed! | �
�

�
�
�
�
�
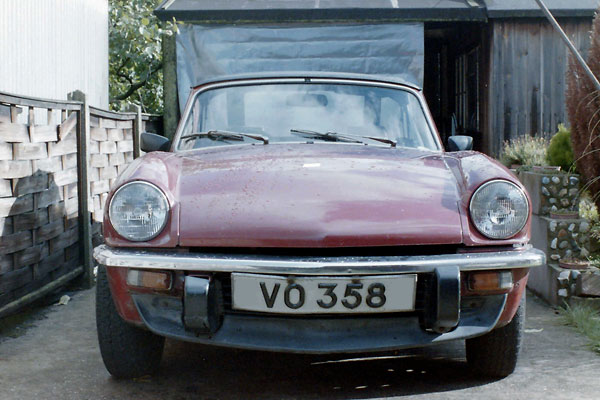
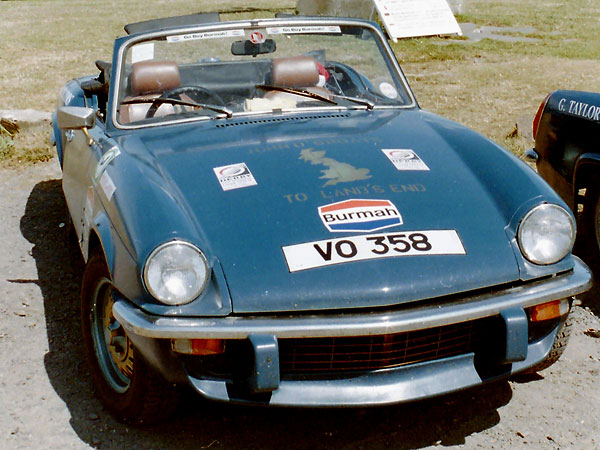
The Story of my Triumph Spitfire V8
�� The story begins with a 1974 Triumph Spitfire Mk.IV which I purchased in 1984, � slightly the worse for wear due to ravages of the British climate and � unsympathetic previous owners. I got the car back into a reasonable state � on a very limited budget and enjoyed running the car as a 1300cc. �
��
�
� In 1988 I joined up with a couple of friends in a charity run from one end of � our island to the other to raise money for a scanner for our local hospital. � One friend drove his MG Midget and the other drove his Spitfire. The event � involved driving from our homes in the East Midlands up to John O'Groats in � Scotland, down to Land's End in Cornwall and then back home. My Spitfire ran � superbly during this challenge, returning the best fuel economy and fastest � turn of speed of all three cars. �
��
�
�
Towards the end of 1989 it became clear a proper restoration was required. �
Patching rusty areas wasn't keeping pace with decay. Luckily, by this time �
I'd made friends with an engineer named Jim Britland, who taught me many �
repair skills including how to weld. Also, now I had a house with a garage �
and an understanding wife. I decided to carry out a full body-off restoration �
and whilst the car was off the road I also decided to fit a Triumph six-cylinder �
2000cc engine. During the next few years my Spitfire got new floor pans, a �
new boot floor, new rear wings, new inner and outer sills, and new door skins. �
I purchased a glassfibre GT6 bonnet because the original Spitfire bonnet �
wouldn't cover the bigger engine.�
�
The engine and gearbox came out of a Triumph 2000 saloon. (I'd have preferred a�
GT6 engine, which would have come with a lighter flywheel, etc. - but this �
particular engine was too good an offer to pass by.) I completely overhauled the�
engine and fitted a new clutch, GT6 engine mounts, inlet manifold and carbs. I �
even purchased a nice stainless steel six branch extractor and twin silencers �
from Phoenix exhausts. �
�
�
Triumph 2000 saloon engine... in a Spitfire!
�
�
�
At the time, I couldn't source a GT6 radiator so instead I installed one from �
a Renault 21. (It was necessary to modify the lower pipe.) I also installed twin �
electric fans from a Peugeot 205. This combination kept the engine at the right �
temperature. �
�
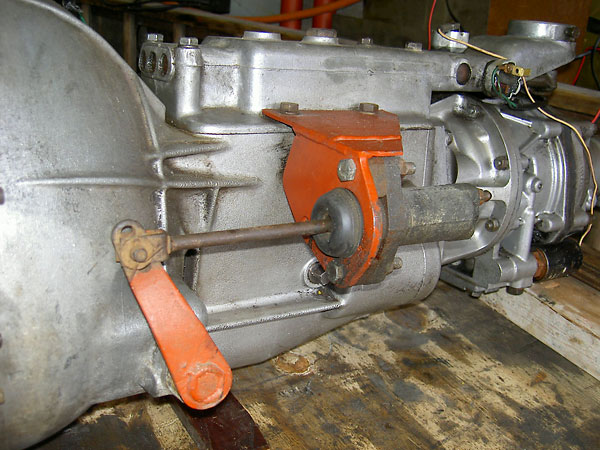
To get the 2000 saloon gearbox (with overdrive) into the Spitfire chassis meant �
some lateral thinking was required with the clutch slave cylinder and operating �
arm. Ultimately, I turned them 180 degrees and fabricated a new slave cylinder �
bracket.�
�
�
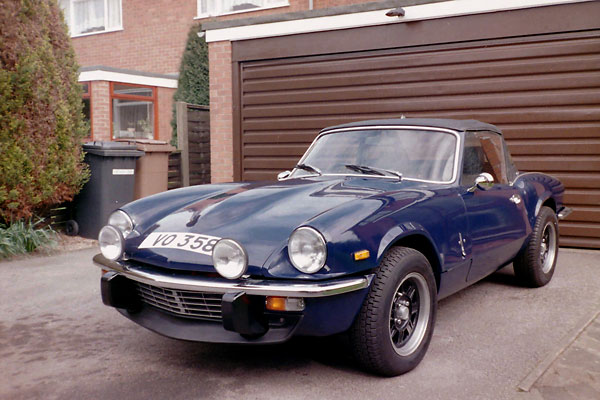
� During this restoration period the front suspension and brakes were upgraded � to GT6 items and a remote servo was added along with all new brake plumbing. � New springs, adjustable dampers, and bushes were fitted all round. The car � was completed in 2003 with several coats of Rover "Eclipse Blue" paint and a � set of second hand alloy wheels.�
��
�
� I ran the Spitfire in 2000cc form for the next four years, greatly enjoying � its increased performance and novelty value, and carried on enhancing the � car with such items as a new soft top etc. With the 2000 saloon gearbox and � heavy flywheel, the car wasn't quick from a stop, but it was an excellent� lazy cruiser and the exhaust made a beautiful sound. �
��
�
Graham Bingham's Triumph Spitfire with Triumph Inline-Six Engine
�
�
And then the madness set in!�
�
During this timeframe, my friend Jim was busy restoring an MGBGT. As part of �
this project, since he decided the 1800cc engine and four speed gearbox were �
tired, he would upgrade to a V8. Jim purchased an original factory MGB GT V8 �
with a very sorry body and transferred all the necessary mechanicals over to �
his restored body. Over the winter of 2006-7, I helped Jim perform the V8 �
conversion on his MG and he had it on the road for spring 2007.�
�
And then the real madness set in... he let me drive it!�
�
After driving Jim's MG several times that next summer, and hearing that famous �
V8 roar, I started looking into the possibility of putting a V8 in the Spitfire. �
Most sane people would have sold the Spitfire as a six-pot and looked for a �
Stag to restore, but I had put a lot of me into the Spitfire over the years. �
It wasn't time to part company yet. Besides, the thought of a Spitfire with �
a V8 really appealed to me.�
�
I started trawling the internet for information. One night, as I was looking �
at Triumph Spitfires on Google, I came across a picture of Buddy Fares' 1962 �
Mk.III with Chevy 350. Wow! More importantly, Buddy Fares' conversion provided �
me a link to the BritishV8 website.�
�

�
Buddy Fares' Triumph Spitfire with Chevy V8 Engine
�
� I couldn't believe my luck! This excellent site gave me lots of inspiration and � proved to me that a Spitfire V8 conversion could be done. Although I would have � liked to put a Chevy motor in my car, the cost and availability in England was � going to be prohibitive, so I decided on the more readily available Rover V8 � and started monitoring eBay for a suitable engine. Carsten Ullerup's "How It � Was Done" write-up gave me much valuable information and spurred me on.�
��
�
Carsten Ullerup's Triumph Spitfire with Rover V8 Engine
�
� Luckily, I came across an advert for a Rover V8 engine and gearbox. The engine � could be heard running because it was still in its donor car: a TR7 V8 conversion. � I bid on the car, but it didn't reach reserve so I contacted the seller and � arranged to go have a look. A trip up to North Yorkshire later and I had agreed � to buy the car for the seller's reserve. The car had only done 3,500 miles in � the past 10 years and had been stored outside for some time. The body was � completely beyond salvage, but the engine sounded good and it would provide me � with all the ancillaries I needed as well as plenty of specialist TR8 bits that � I didn't want but which could be sold on eBay to help recoup my investment.�
��
Enjoying this article? Our magazine is funded through the generous support of readers like you!
�
To contribute to our operating budget, please click here and follow the instructions.
�
(Suggested contribution is twenty bucks per year. Feel free to give more!)�
�
I spent the summer stripping the TR8 down and selling off the parts I didn't �
need. I then had a look at the engine and decided to check out the bottom end �
as a matter of course, the mains weren't worn but were pockmarked so I decided �
to replace them and also fitted an up-rated billet timing gear set and chain. �
While I was stripping it down, one of the inlet manifold bolts sheared off in �
the head. Despite every effort, I couldn't get it out. Luckily, I spotted a �
pair of SD1 heads on eBay and bought them. (Bonus: they're regarded as an upgrade �
because they have slightly larger valves.) �
�
I took the Spitfire off the road in October 2007 and took the straight six out. �
Fitting the engine and box wasn't as difficult as I thought it would be. I was �
aware of two main issues, it needed to be as low as possible to give me as much �
bonnet clearance as I could get, and the gear stick had to fall in the right place.�
�
�
Removing the Triumph 2000 engine.
�
� I had fabricated a lifting beam in the garage hung the engine in the place � noting modifications needed to the bulkhead and frame. Clearance between starter � motor and steering column was tight, as were the exhaust downpipes and the � chassis rails. I had to modify the bulkhead quite a lot but only had to make � minor adjustments to the chassis such as bending over and welding flat one or � two flanges and remaking the gearbox support. I also had to install a remote � oil filter housing (from MOCAL). �
��
�
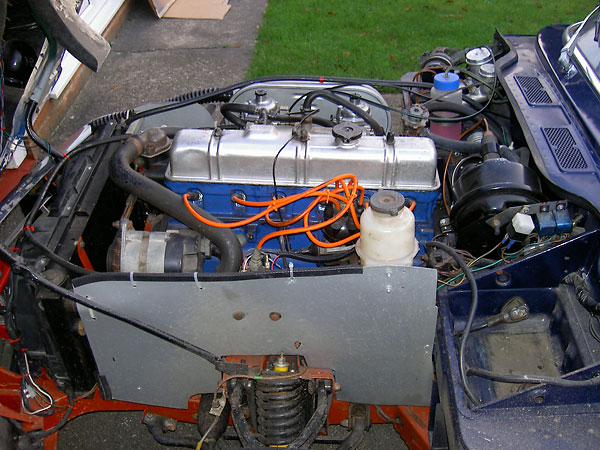
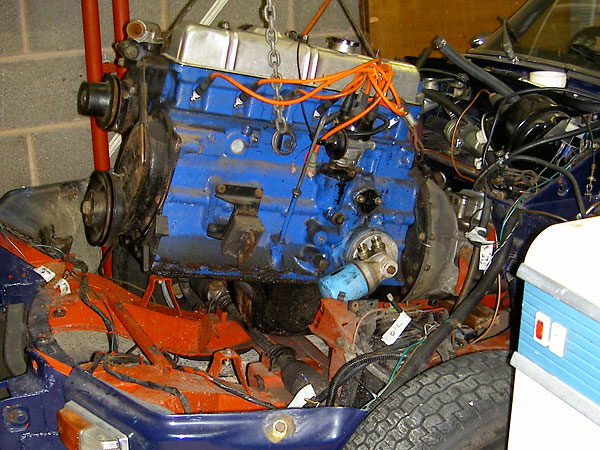
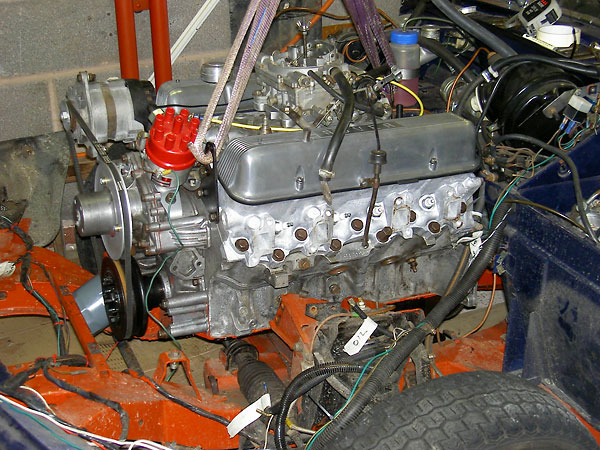
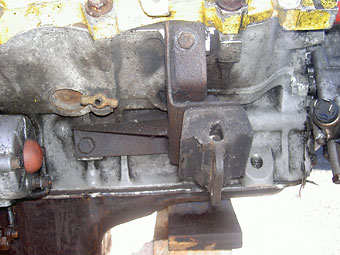
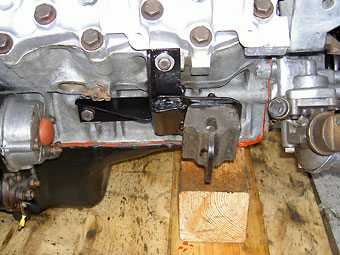
Trial fitting the Rover P6B engine.
�

�
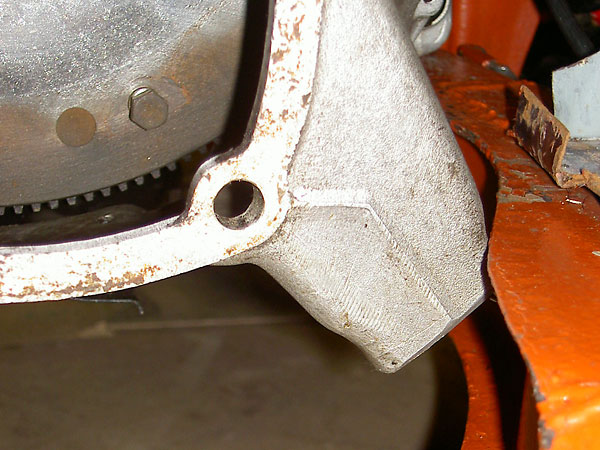
That's where the engine mount needs to be.
�
�
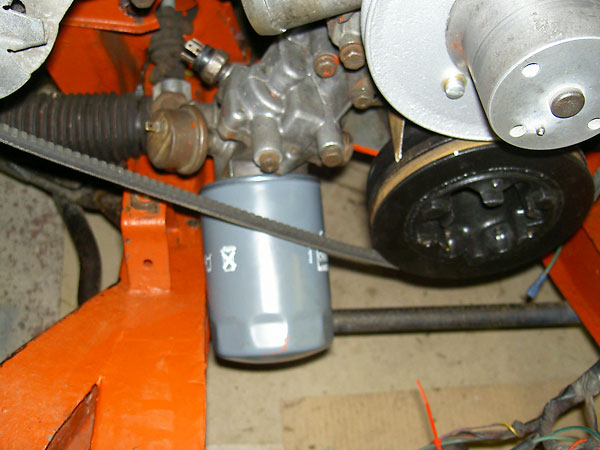
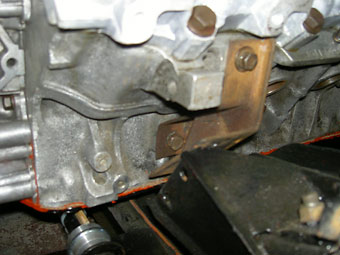
The oil filter didn't really fit here. It will be mounted remotely instead.
�
�
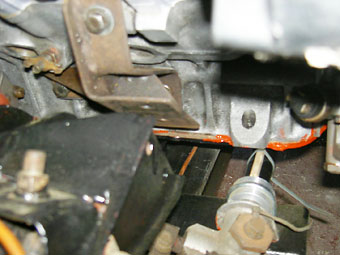
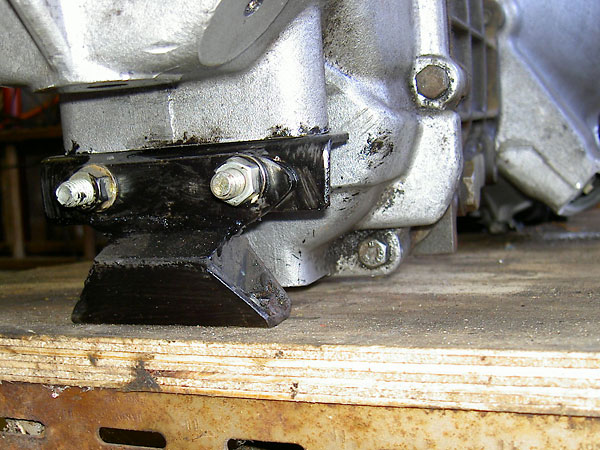
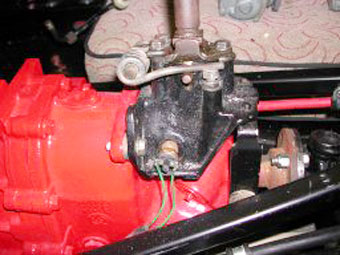
Small chassis mod needed to clear clutch cylinder housing.
�
� Jim and I modified the TR8 engine mounting brackets and made up a gearbox mount � to allow use of a GT6 overdrive gearbox bracket. The engine was in! �
��
 �
�
�
 �
�
�
 �
�
�
�
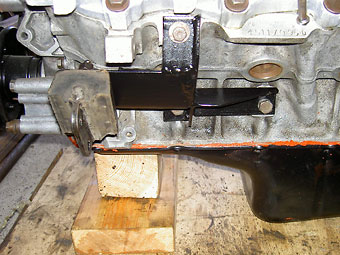
Bracket made to facilitate mounting gearbox with GT6 overdrive mount.
�
�
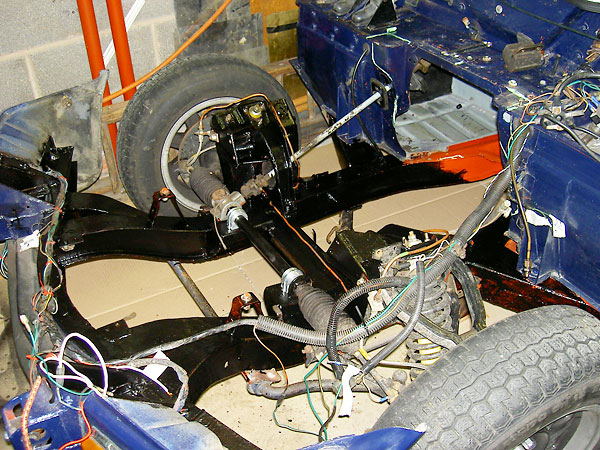
Front of chassis blacked prior to bulkhead mods.
�
�
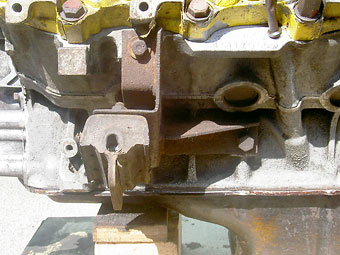
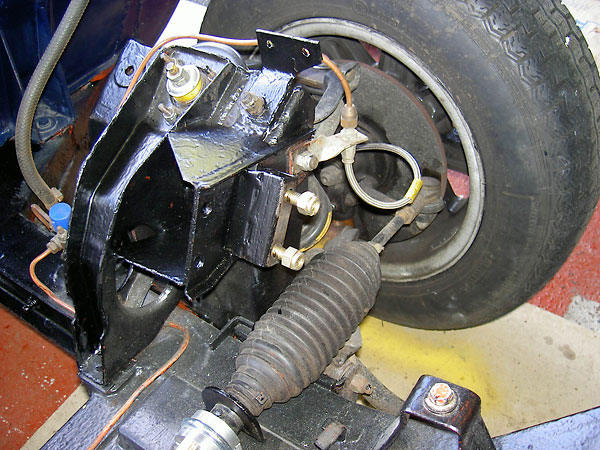
Modification of passenger side to turret for wider and further forward position of engine mount.
�
�
Trial fitting. Oil filter take-off can be seen on left hand side.
�
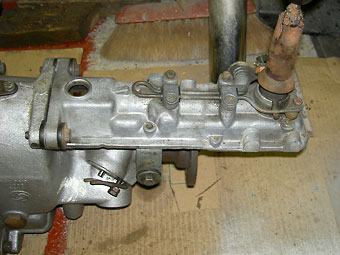
� To position the gear shifter where I wanted it, I installed the shifter from a Sherpa � van, shortened in height to suit my seating position. I also had to rebuild the tunnel � cover.�
��
 �
�
�
Sherpa van shifter is shown at right.
�
�
I reused the Renault 21 radiator, and it has proven well up to the job, with no �
overheating problems at all. �
�
For the exhaust system, I used "block hugger" manifolds, as sold for an MGB V8 (Rover conversion). �
These worked well, althought one of the collector pipes had to be bent closer to the engine block �
for frame clearance. The exhaust pipes and silencers are stainless steel. �
�
�
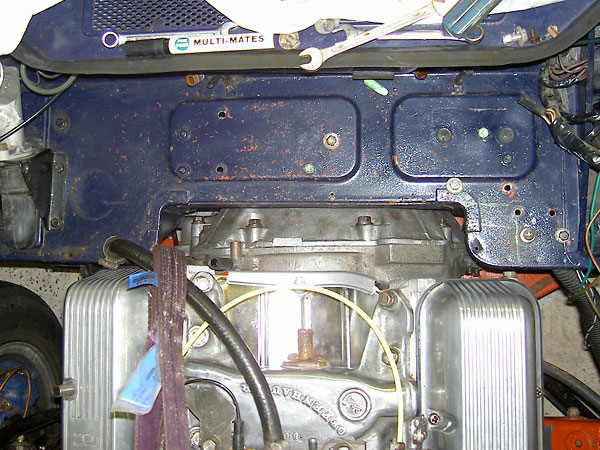
Nice first try, but the engine needs to go further back.
�
 �
�
�
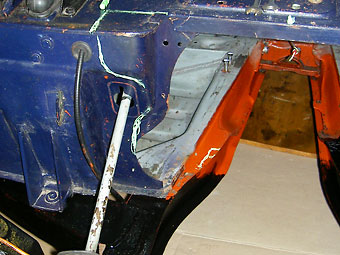
Chalk marks were made to plan where the sheetmetal will be cut back.
�
 �
�
�
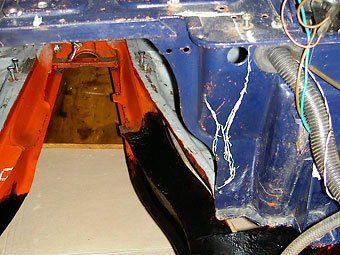
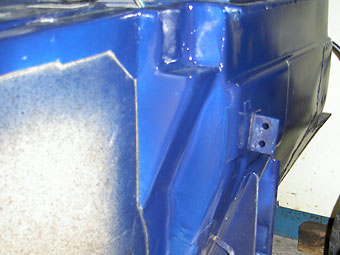
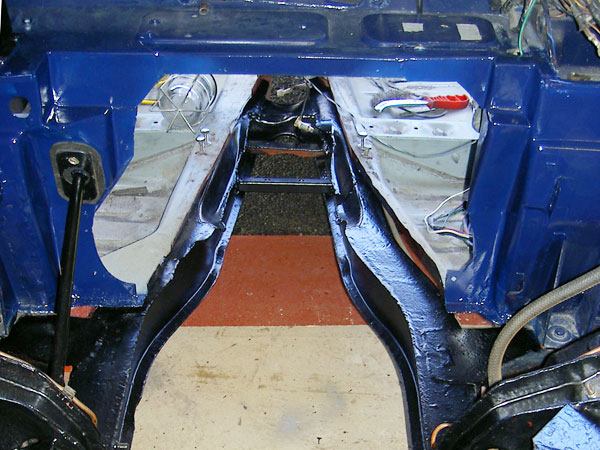
Final, modified bulkheads.
�
�
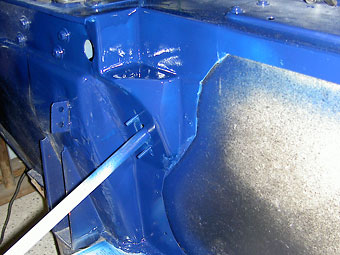
The bulkhead and frame are ready, and the engine can be installed.
�
�
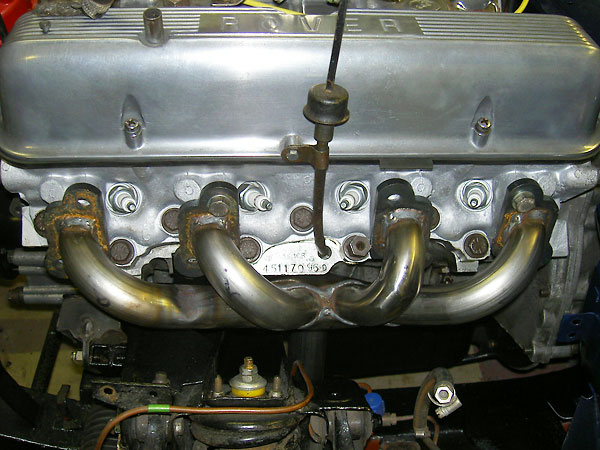
MGB V8 block hugger headers. Driver's side didn't need modification.
�

�
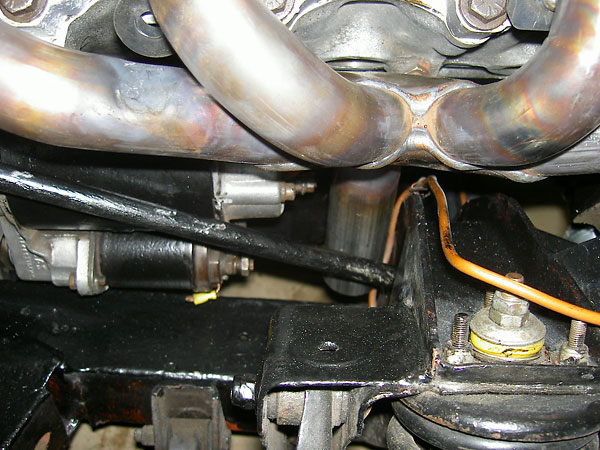
Passenger side header needs to bend inward to exit closer to the engine block.
�
�
(The brake pipe was later moved and a heatshield was made for the starter motor.)
�
�
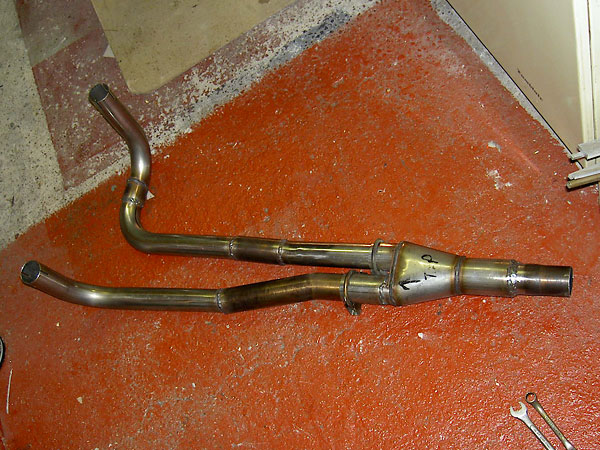
Modified stainless steel exhaust "Y-pipe".
�
�
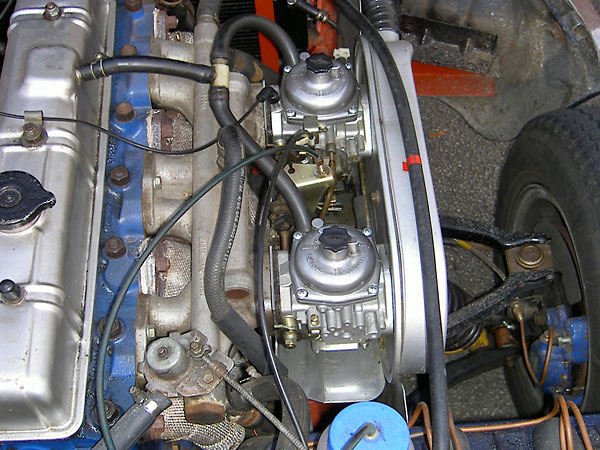
I had some problems with the carb which came with the engine, so I decided to treat �
myself to a new Edlebrock/Weber 4 barrel unit. �
�
I have a GT6 fibreglass bonnet fitted and without an air filter I could just about �
close the bonnet. (The carb wouldn't be able to breathe though.) I pondered about �
whether to go for the subtle approach or the in-your-face one. The latter won. �
�
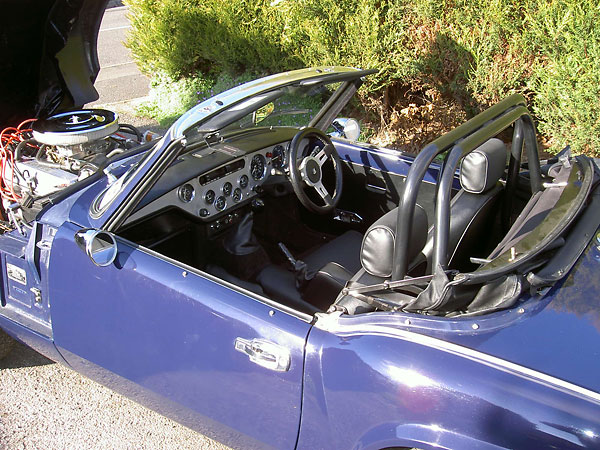
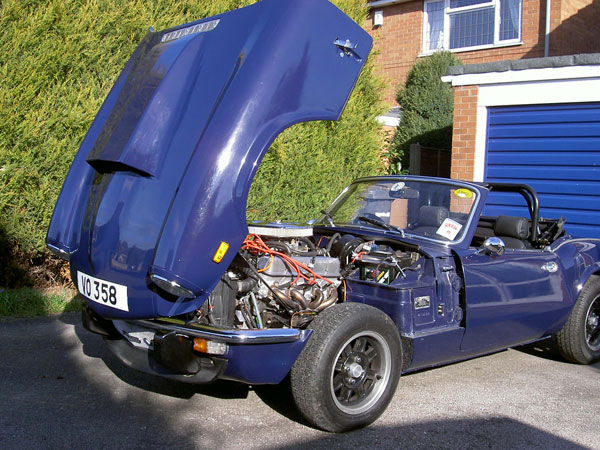
I ended up fitting the circular air filter you see in the photos, and cutting a hole �
in the bonnet. Next, I fabricated a frame of thin aluminium strip and riveted and �
bonded this onto the bonnet, I then covered the frame with cardboard to get the shape �
I wanted. The labour intensive part was covering the cardboard with glassfibre mat and �
resin followed by glassfibre filler and finally many hours of rubbing down and refilling �
before I was satisfied with the result. �
�
�
�
I have now got to decide whether I need to beef up the rear. I'm currently running with �
standard Spitfire differential and halfshafts. I have several options; either purchase �
some upgraded GT6 halfshafts and a beefed up racing diff, or be prepared to launch into �
another project next winter and modify and fit a Jaguar back axle unit, or a Ford �
Sierra LSD or Subaru LSD and a fully independent coil over shock rear end. Decisions, �
decisions! �
�
I've done about 200 miles in the car so far, and recently taken it for its MOT which �
it passed without problems. �
�
It's fantastic to drive, with power in abundance. It sounds fantastic. It will burble �
through villages at 30mph in fourth gear and then take off like a scalded cat when �
you put your foot down. (There's no need to change gears!)�
�
I've only taken the car to one Triumph Sports Six Club meeting so far, but it �
certainly draws the crowds. Good job I never tire of telling interested people �
how it was done!�
�
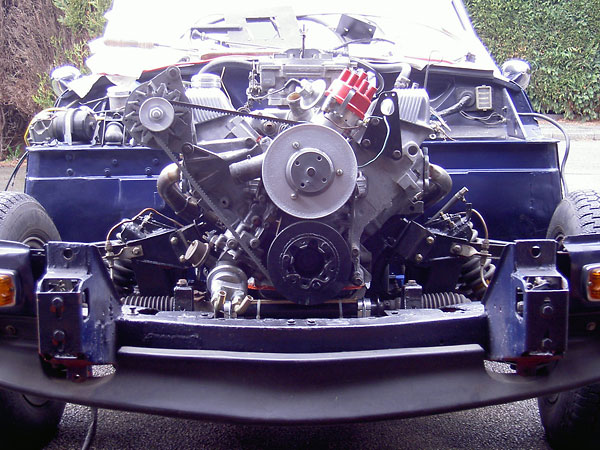
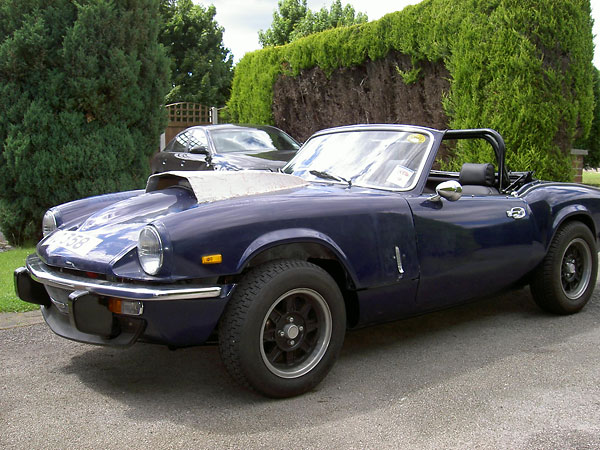
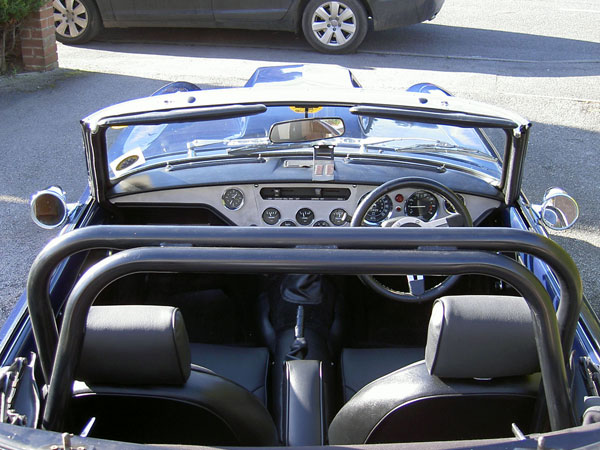
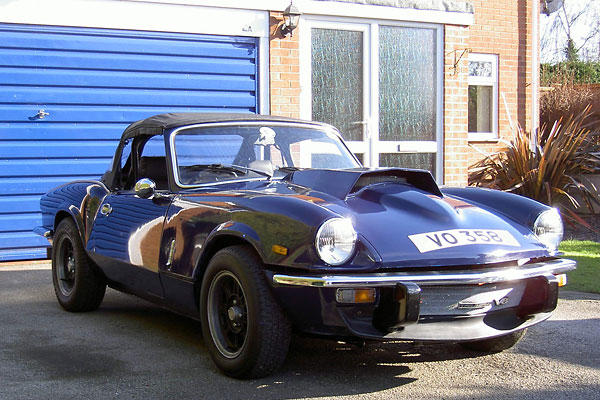
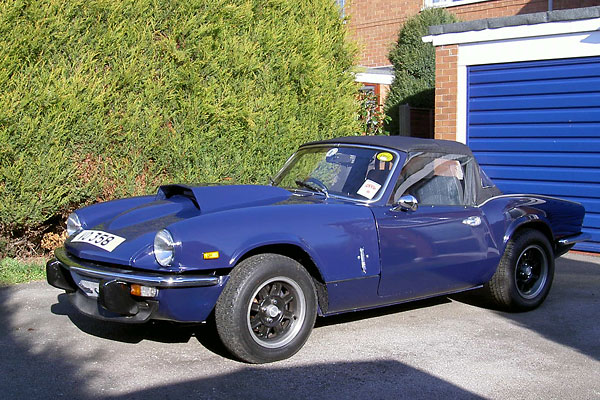
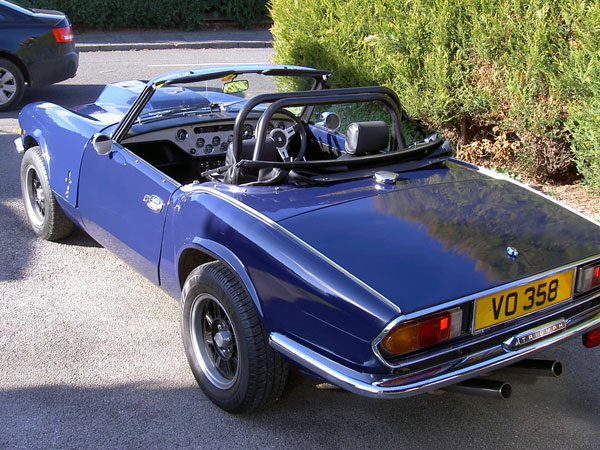
The Completed Conversion
��
�
�
�
�
�
�
