
�
� Just in case you think that these types of conversions produce cranky, unreliable, � monsters, Bill Llewellin has been driving his V8 conversion for over ten years with� no problems.
�
� Bill has provided the following tech data for his conversion:
�
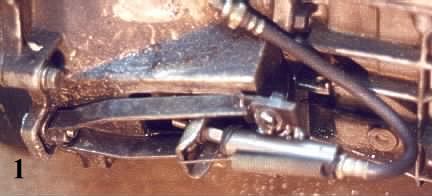
� O.K. here are the long awaited pictures of how I did my car. I'm using a� 79 302 from a Bronco, with a 92 T5 from a Mustang GT. In the first� picture you can see how I handled the clutch. The T5 is a cable clutch� and has a softer spring with longer travel than the earlier hydraulic� ones. I made the slave cylinder to 0.687 ID, which is as small as you can� get brake cylinder seals to fit in it. This, with a Datsun PU master� cylinder gives the right amount of travel. I don't know why the stock� master cylinder wouldn't work just as well, but I didn't have one and� the Datsun is a drop in if you get the bolts along with the cylinder.� The stock Ford cover fit over this assemblage after cutting out the aft� end a bit.
�
�
�
�
 �
�
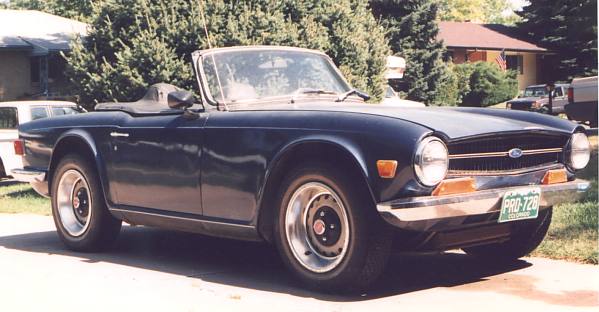
Bill Llewellin's Triumph TR6, powered by a Ford 302cid V8
� � (as recorded by Dan Masters)� Just in case you think that these types of conversions produce cranky, unreliable, � monsters, Bill Llewellin has been driving his V8 conversion for over ten years with� no problems.
�
� Bill has provided the following tech data for his conversion:
�
� O.K. here are the long awaited pictures of how I did my car. I'm using a� 79 302 from a Bronco, with a 92 T5 from a Mustang GT. In the first� picture you can see how I handled the clutch. The T5 is a cable clutch� and has a softer spring with longer travel than the earlier hydraulic� ones. I made the slave cylinder to 0.687 ID, which is as small as you can� get brake cylinder seals to fit in it. This, with a Datsun PU master� cylinder gives the right amount of travel. I don't know why the stock� master cylinder wouldn't work just as well, but I didn't have one and� the Datsun is a drop in if you get the bolts along with the cylinder.� The stock Ford cover fit over this assemblage after cutting out the aft� end a bit.
�
�
�
�
�
 �
�
�
 �
�
�
 �
�
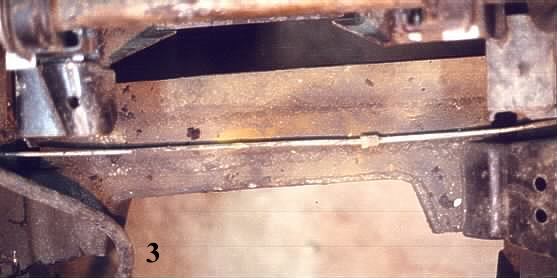
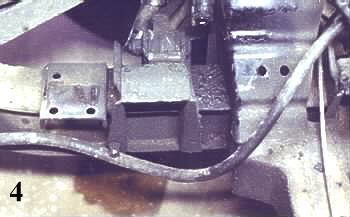
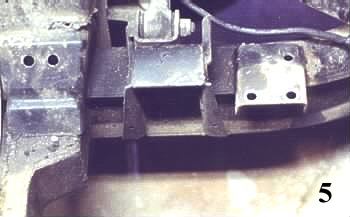
� Picture #4 shows the new left hand engine mount attached to the frame� longeron. Note that the old ones were completely removed from the front� suspension towers. Note also that the new ones have three holes in them.� I have completely forgotton why I put in the third hole. My engine� mounts are from a 65 Galaxie, which was the donor car for the 289 that I� put in originally. I added a bracket to them to mate with these mounts,� as putting in the long longitudinal bolt would have been nearly� impossible. Or at least that's how I saw it. Picture #5 shows� the right hand engine mount. Same story here.�
�
�
 �
�
�
�
�
Sorry, no picture of the tranny mount adapter, I spent some time at the�
NAPA store and got the one with the lowest overall height. I think it�
matches the one from the old T4 I put in originally, but I'm not sure.�
The adapter is U-shaped, and hangs from the original trans mount�
brackets and passes under the new tranny.
�
� I built a new tranny tunnel out of aluminum. I couldn't use the� original tunnel is because I needed to trim away a bit of the firewall� to clear the rocker covers, about 2" x 2" on each side, looking� vertically down.
�
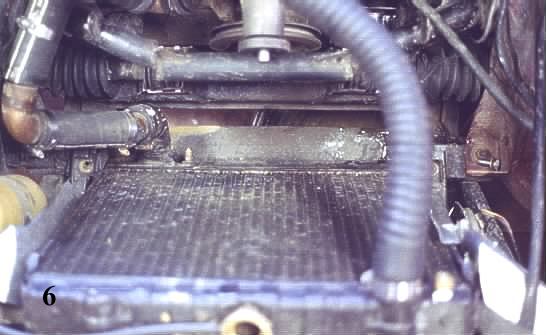
� I'm using stock late 70's iron headers, which tuck in close to the� block and point downward on the left hand side.� The motor will NOT fit into the TR-6 with the stock fuel pump and oil� filter on it. So I'm using an electric pump and a remote mount oil� filter adapter. The adapter points at the small gap between the wheel� well and the frame, so I put the filter low on the rear surface of the� drivers side wheel well.
�
� Springs are aftermarket stock, front shocks are Chrysler, rear shocks� are Bronco on homemade adaptors. Rear axle is stock TR6.
�
� - Bill Llewellin�
�
�
�
� I built a new tranny tunnel out of aluminum. I couldn't use the� original tunnel is because I needed to trim away a bit of the firewall� to clear the rocker covers, about 2" x 2" on each side, looking� vertically down.
�
� I'm using stock late 70's iron headers, which tuck in close to the� block and point downward on the left hand side.� The motor will NOT fit into the TR-6 with the stock fuel pump and oil� filter on it. So I'm using an electric pump and a remote mount oil� filter adapter. The adapter points at the small gap between the wheel� well and the frame, so I put the filter low on the rear surface of the� drivers side wheel well.
�
� Springs are aftermarket stock, front shocks are Chrysler, rear shocks� are Bronco on homemade adaptors. Rear axle is stock TR6.
�
� - Bill Llewellin�
