
�
�
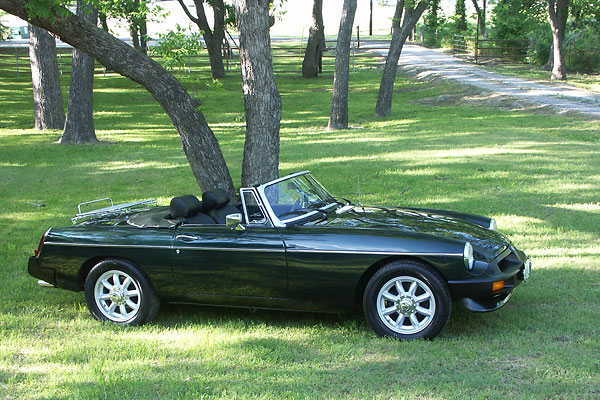
"Hobbes"�
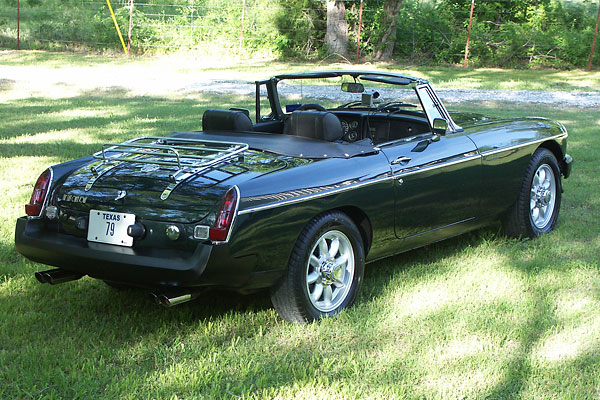
Wayne Kube's 1979 MGB Roadster with Rover 3.9L V8 engine
� as published in BritishV8 Magazine, Volume XVII Issue 1, July 2009�� Owner: Wayne Kube
� BritishV8 UserID: wkube
� � City: Plano, TX
� Model: 1979 MGB Roadster
� Engine: Rover 3.5 V8
� Conversion by: Wayne Kube, Mark Trosper & Nick Pappas
� � (a.k.a. "2nd Chance Garage")
�
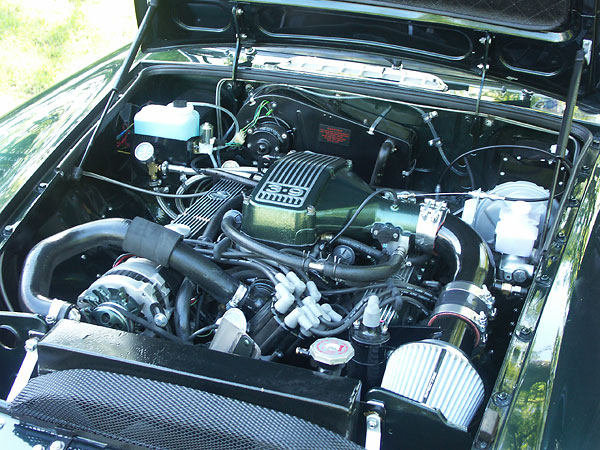
| Engine: | �Rover 3.9L engine from a 1989 Range Rover, bored 0.020" over and �
rebuilt. Rotating assemblies were balanced by Kim Barr Racing Engines �
in Garland, TX. Crower cam (276°, 0.488" lift.) Delco distributor, �
custom curved by D&D, with a Pertronix Ignitor electronic ignition �
and a 40,000 Volt Pertronix coil. Bosch Platinum 4 plugs. MSD 8.5mm wires. �
Standard Rover fuel injection manifold and plenum/throttle body (height �
reduced 1 inch.) MegaSquirt EFI system, which uses a MAP (manifold �
absolute pressure) sensor in lieu of an �
airflow sensor. MGB GT V8 valve covers. | �
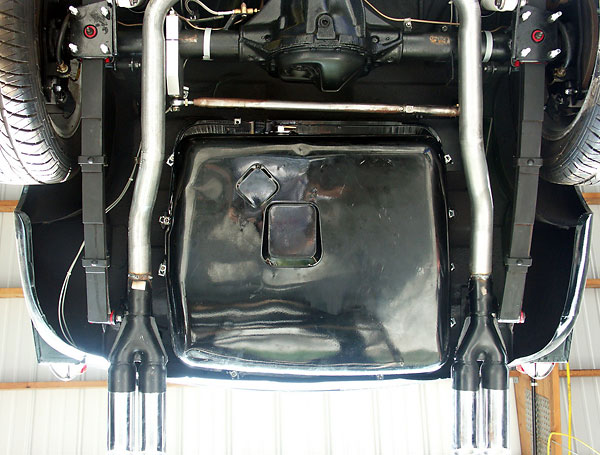
| Fuel System: | �new 5/16" line up to the engine, and original MGB 1/4" line to return �
surplus fuel back to the tank. I cut an opening in the top of a new, �
unused tank, and installed an in-tank swirl pot (home made) to ensure �
a steady fuel supply at low fuel levels. The return line dumps back �
into the swirl pot. | �
| Cooling: | �D&D Fabrications brass/copper radiator, 18"W x 15"H, with 4 rows �
of half inch tubes. (If I'm out on the road and have a radiator problem, �
just about anyone can repair a brass/copper radiator. Not every shop can �
repair an aluminum radiator.) Engine driven flex fan for primary cooling. �
If coolant temperature reaches 185° F, the ECU engages a relay to power �
the MGB fans in front of the radiator. | �
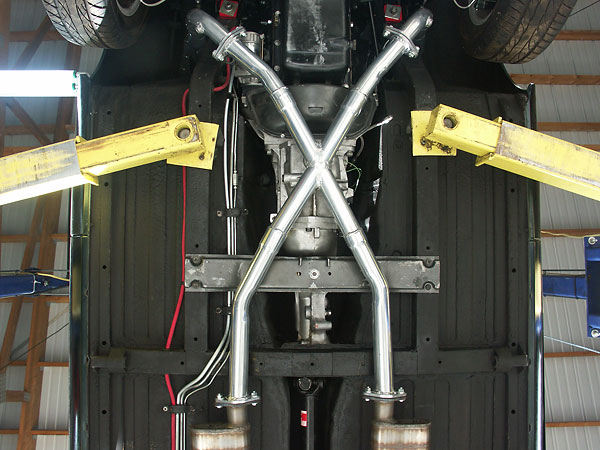
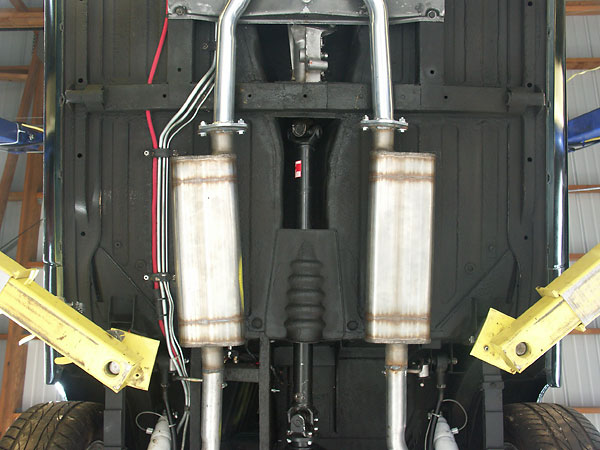
| Exhaust: | �RV8-style headers routed to an x-pipe (all Jet-Hot coated). 2 inch �
exhaust tubing throughout. Stainless Specialties dual Mega-Oval mufflers. �
The fuel tank was centered to make room for Pacesetter Monza dual exhaust �
tips with glass-packed resonators at the rear. | �
| Transmission: | �T5 ("World Class") 5-speed from a V8 Camaro, with 0.63:1 top gear. �
D&D Fabrications flywheel with Camaro 10.5" clutch and pressure plate. �
D&D shifter. The clutch is operated by a hydraulic throw-out bearing �
from a stock MGB master cylinder. | �
| Rear Axle: | �stock MGB (3.909:1) splined-hub axle. (I already had Minilite-replica �
wheels, and didn't want to give up that appearance, so I kept this axle �
arrangement.) I considered changing to a 3.07:1 axle ratio, but now I'm �
glad I didn't because I prefer the acceleration through the low gears �
that it provides. In top gear I'm turning about 2,400 RPM at 70 mph, and �
I can accelerate to pass or climb most grades without needing to downshift. �
If I'd used the 3.07:1 ratio (like MG used on the MGB GT V8 model and �
some MGC's), my RPM at 70 mph would only be about 1,800 rpm. | �
| Front Susp.: | �standard MGB lever-arm shocks, but the oil was drained and the shocks �
flushed with mineral spirits, then replaced with 30-weight motorcycle fork oil. �
I've had this combination in the car for over 10 years (through about 75,000 �
miles on the 4 cylinder engine) and it's worked well for me. With this V8 �
conversion, I up-sized the front sway bar to 7/8" with the kit from Moss. �
The front suspension was lowered about 2 inches with a Moss coil spring kit. | �
| Rear Susp.: | �lowered 2 inches with Moss lowered rear springs (not the aluminum spacers �
that they now offer). Polyurethane bushes and pads. I have a tube-shock conversion �
kit on the rear that I purchased several years ago, but I changed to Monroe �
air-adjustable shocks. During hard cornering, the 205/60-15 tires sometimes �
rubbed on the inner fenders, and the air shocks reduced that problem. More �
recently, I've installed Mantell Motorsports' Panhard bar to further restrain �
sideways axle movement. Note: I special ordered the Panhard bar with the �
threaded ends not welded onto the bar so that I could easily shorten it. This was �
necessary to accommodate both the disc brakes and also a difference in how �
the Panhard bar mounts to the "wire wheel" axle. | �
| Brakes: | �standard MGB servo-assisted master cylinder. � (Front) slotted rotors and larger (TR8) pads. � (Rear) Scarebird disc brake conversion kit. | �
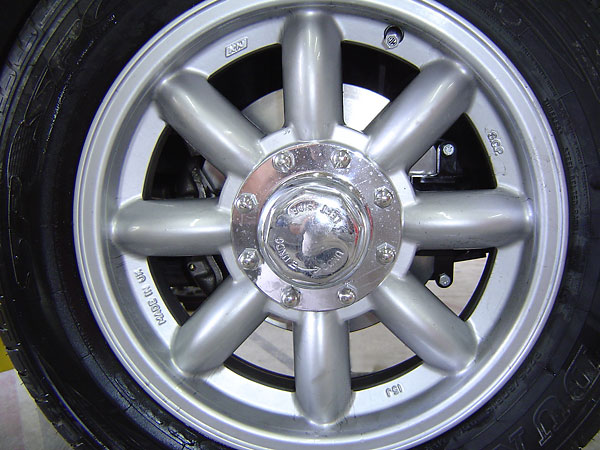
| Wheels/Tires: | �15x6 Minilite replicas, with 205/60R15 Dunlop tires. | �
| Electrical: | �Painless Performance 18-circuit universal wiring kit, with relays for �
ignition, headlights, driving lights, and the electric fans. The only �
wiring components that are still original MGB are behind the instrument �
panel. The dashboard mounted gauges are original; the 4-cylinder tachometer �
was modified and recalibrated for 8-cylinder operation. Saturn 85 amp �
alternator, wired so the in-dash "Ignition" lamp still operates properly. | �
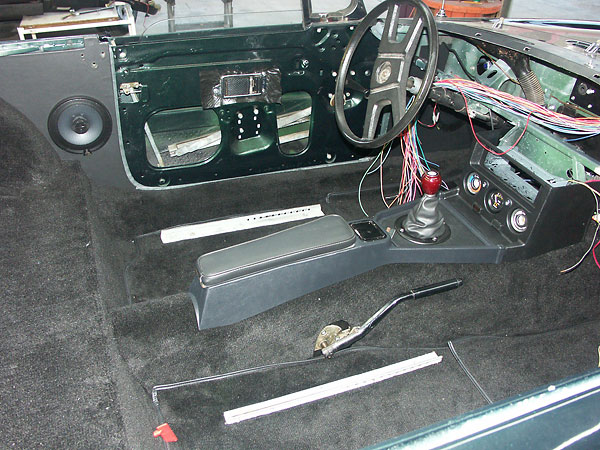
| Interior: | �black vinyl upholstery kit from Victoria British. I applied half inch �
high-density foam to the back of the carpet to reduce noise and heat. Moss �
electric seat heaters. (My wife likes that!) Moss in-door courtesy lights. �
Panasonic head unit with integral XM (satellite radio) tuner, plus a 4x80 �
Watt amp mounted in the trunk. Four speakers, plus tweeters mounted in the �
dashboard. The front speakers are mounted in the kick panels and the rears �
are mounted behind the door jams, just below where the top frame mounts. | �
| Exterior: | �"Dark British Racing Green, Metallic" (actually, it's a Cadillac/Corvette �
color called "Polo Green 2") basecoat/clearcoat paint, applied over dark �
primer. Side marker lamps removed. Early model (all red) taillights. | �
| Completed: | �April 2008. | �
| Weight: | �Original 4-cylinder 1.8L engine: � LF - 580 lbs, RF - 570 lbs, Subtotal - 1150 lbs (50.9%) � LR - 540 lbs, RR - 570 lbs, Subtotal - 1110 lbs (49.1%) � Total weight - 2260 lbs � � Rover 3.9L EFI engine: � LF - 570 lbs, RF - 560 lbs, Subtotal - 1130 lbs (50.2%) � LR - 545 lbs, RR - 575 lbs, Subtotal - 1120 lbs (49.8%) � Total weight - 2250 lbs � � (In both cases, the trunk was empty except spare tire, and there was 1/2 tank of fuel.) | �
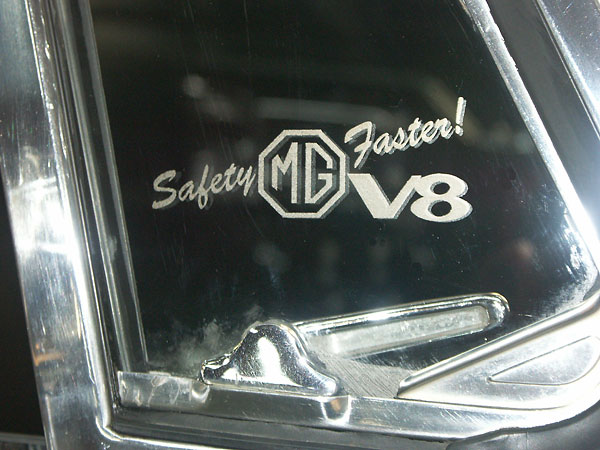
| Comments: | �my goal with this car was to not drastically alter the outside �
appearance. I really didn't want to have a bonnet bulge or hood scoop, and I �
really like the idea of the 3.9L engine with fuel injection, much in the line �
of the RV8. The only external tell-tale of the V8 conversion is the dual �
exhausts and the etching on the vent windows. And the sound, of course! �
� It took some tuning on a "rolling road" (chassis dyno) to get the custom EFI � optimized. The final result was 191 HP and 207 lbs/ft of torque at the rear � wheels. That's not way over the top, but it's certainly good enough for me � right now. | �
�
�
The valve covers and EFI plenum are powder-coated body color.
�
�
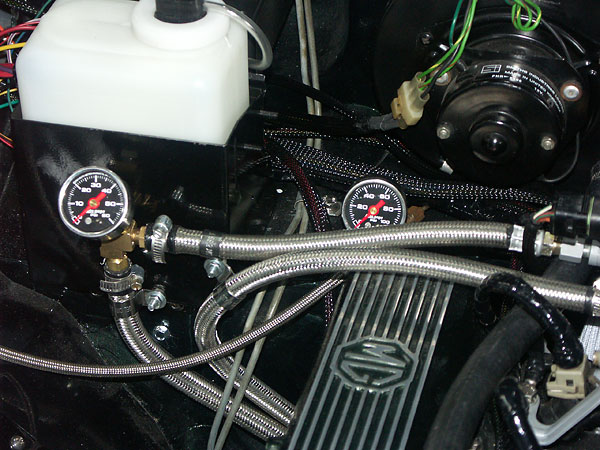
The two gauges shown here are for fuel pressure (left) and oil pressure (right).
�
�
�
�
�
�
�
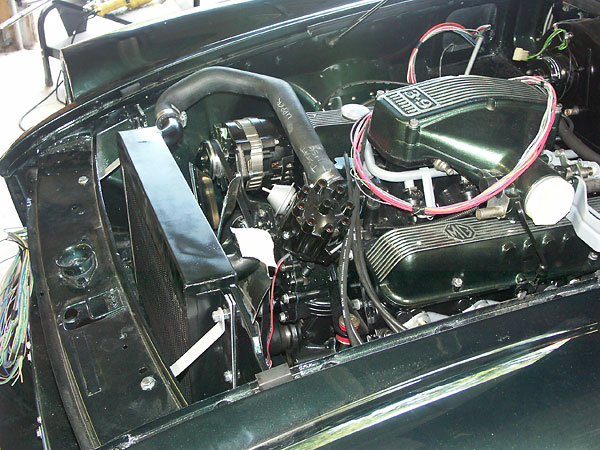
Installing the Painless Performance 18-circuit universal wiring kit.
�
�
I etched the vent windows with glass beads in our media blast cabinet. The trick is to make a negative
�
mask (they call it a "reverse weed") out of vinyl. My local "Fast Signs" shop cut the vinyl for me
�
from a JPEG image file that I created and took to them. I used their heaviest vinyl sign material.
�
�
�
15x6 Minilite replicas, with 205/60R15 Dunlop tires.
�
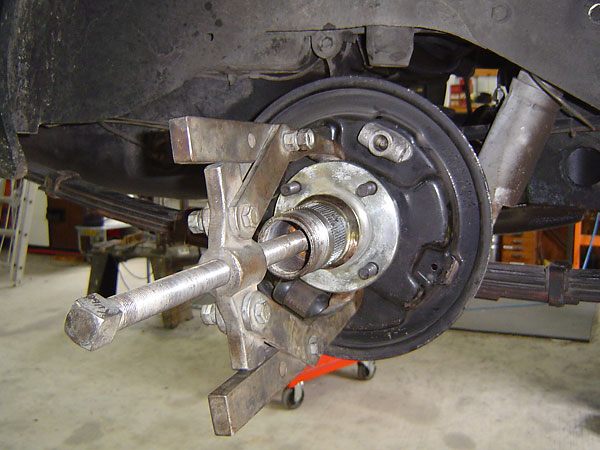
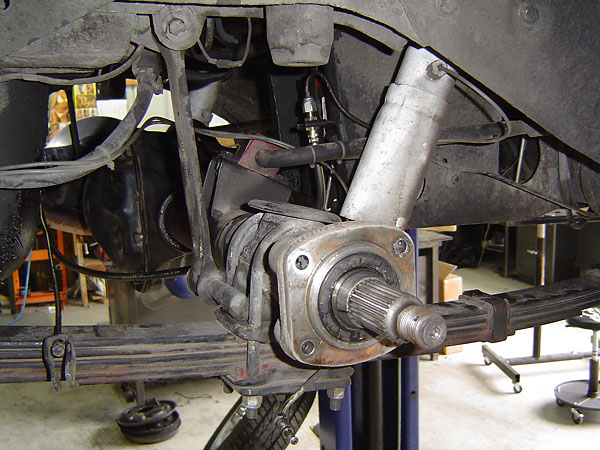
Installing a Scarebird Rear Disc Brake Conversion Kit on the MGB (Salisbury) Axle
��
�
The first step is disassembly. Here the hubs are being pulled off.
�
�
This is what the ends of the axle shafts look like.
�
�
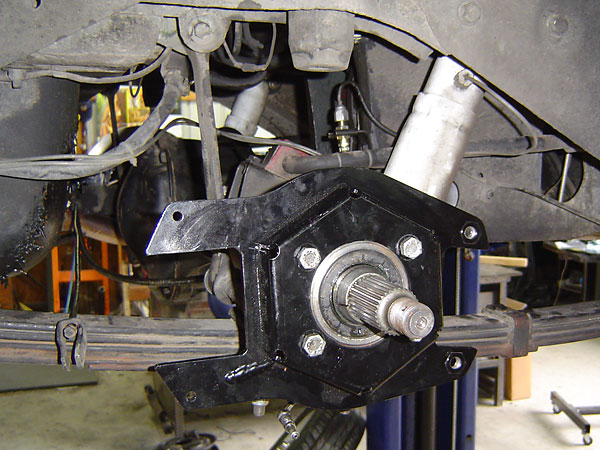
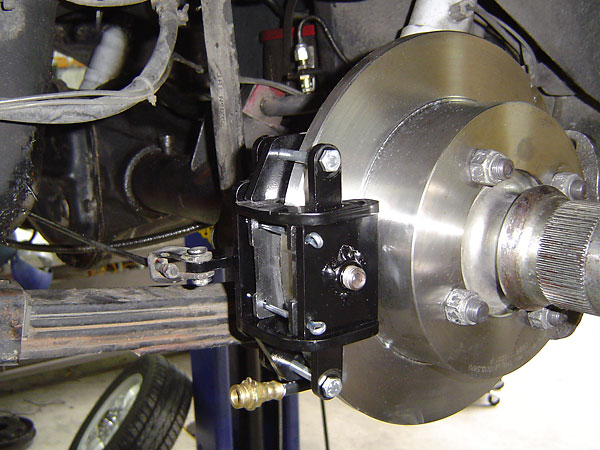
Scarebird Classic Brakes LLC brackets.
�
�
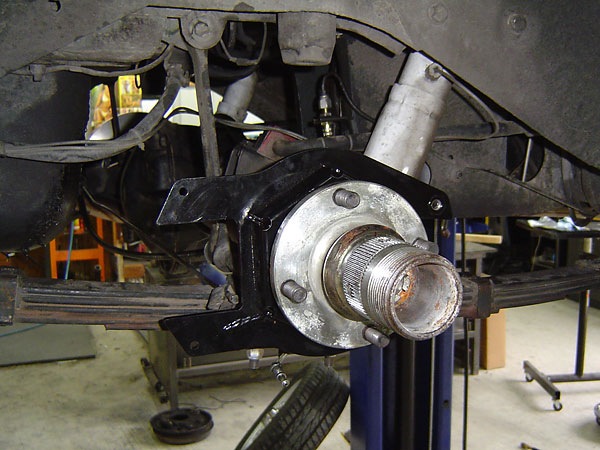
Now the MGB (wire wheel) hubs go back on.
�

�
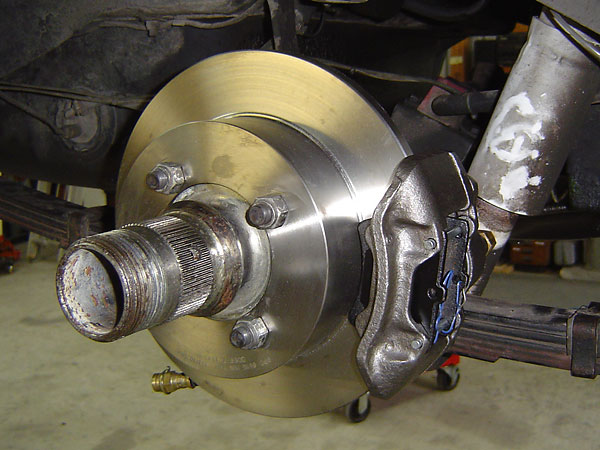
1994-98 Hyundai Sonata rear disc brake rotor.
�
�
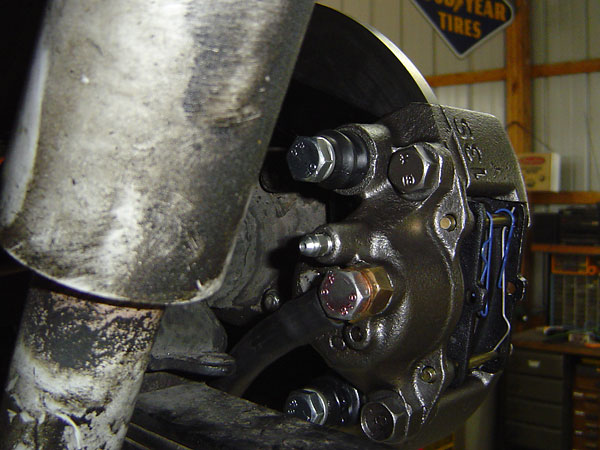
1988-93 Ford Festiva front caliper.
�
�
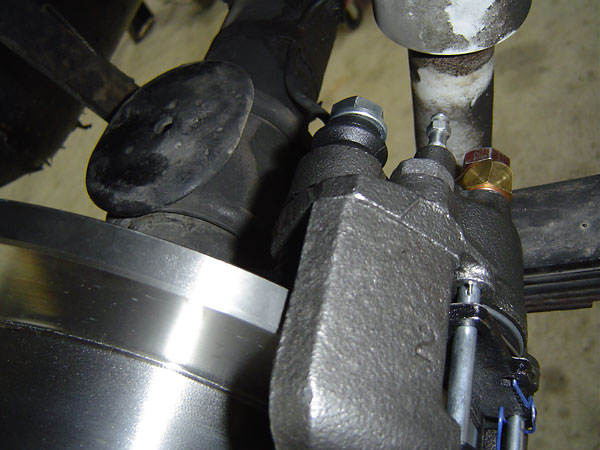
Left and right calipers are "handed". Install them with their brake bleeders at top.
�
�
1979-90 Chevrolet Caprice front brake hoses, with 1988-93 Ford Festiva banjo bolts.
�
�
Cable operated parking brake caliper (uses 1967-76 Triumph Spitfire pads.)�
