
�
�
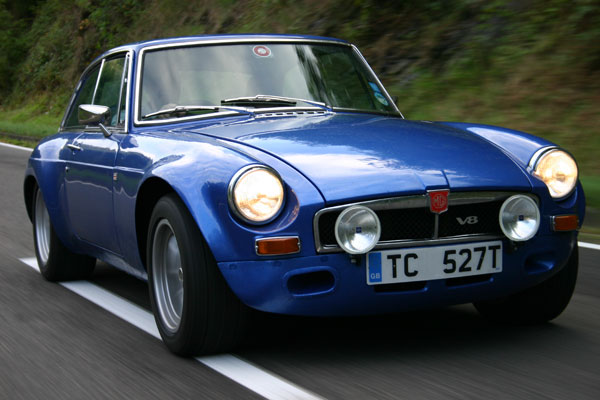
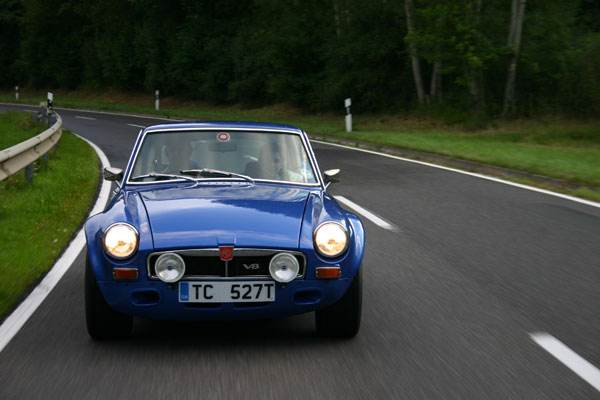
Darren Jones's 1979 "MGB GT V8 Sebring" features a Rover 3.5
��
as published in British V8 Magazine, Volume XVI Issue 1, May 2008�
�
Owner: Darren Jones
�
�
City: Blackburn, Lancashire, UK
�
Model: 1979 MGB-GT
�
Engine: Rover 3.5L V8
�
Conversion by: Darren Jones and Robin Brown�
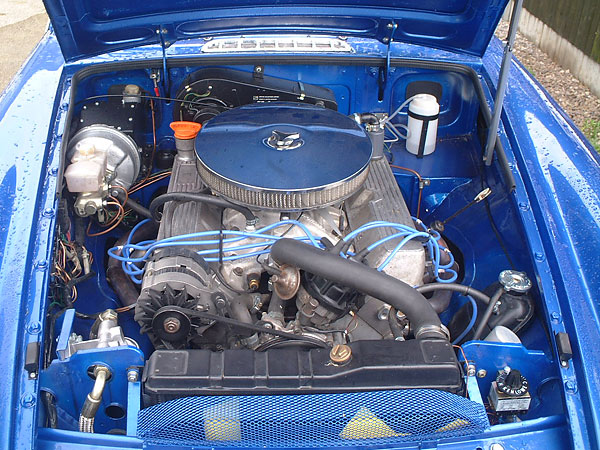
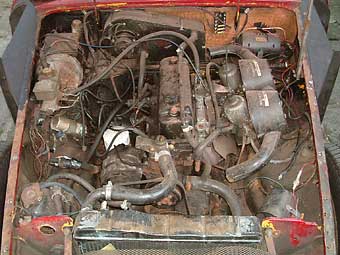
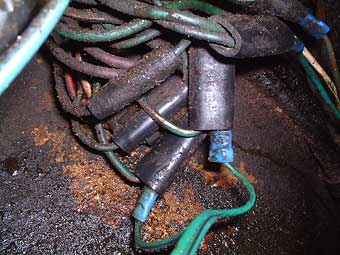
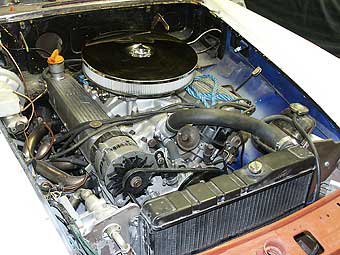
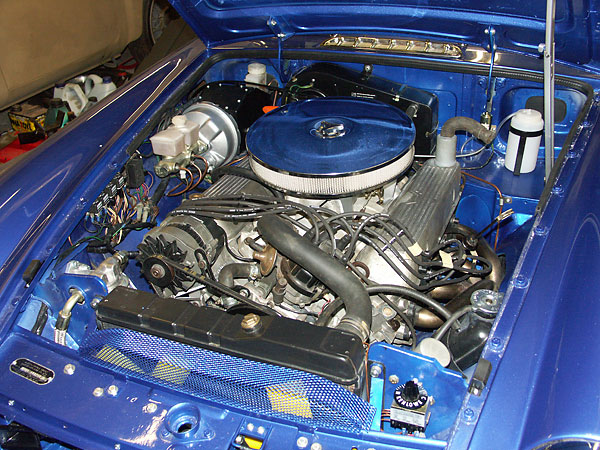
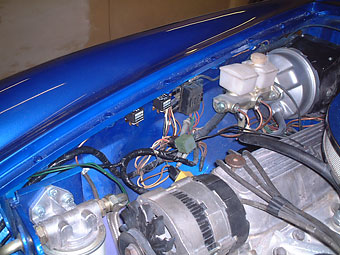
| Engine: | �Rover 3500cc V8. First unit was a second hand one putting out barely �
140bhp. This has been replaced with a reconditioned block and reground �
crank, with everything else new, giving about 200bhp. Piper 270/110 cam.�
Electronic ignition. | �
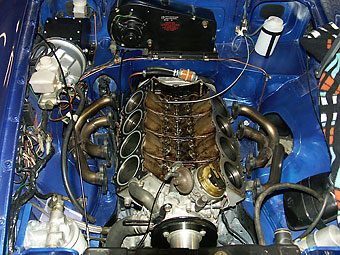
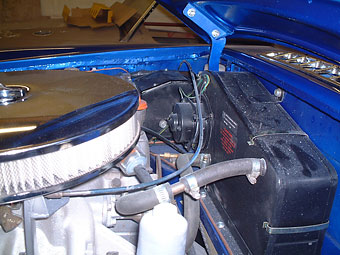
| Induction: | �Currently Weber 500, but soon to be replaced with 14CUX Hot Wire EFi. | �
| Cooling: | �new MGB V8 radiator, with twin electric fans as per the factory V8 model. | �
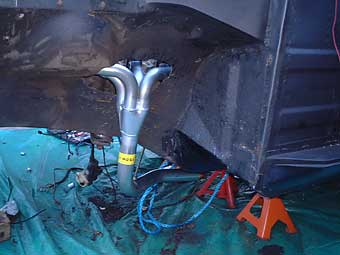
| Exhaust: | �big-bore system, with RV8-style through-the-wing headers. | �
| � |  � | �
| Transmission: | �Rover LT77 5-speed (from a Rover SD1). | �
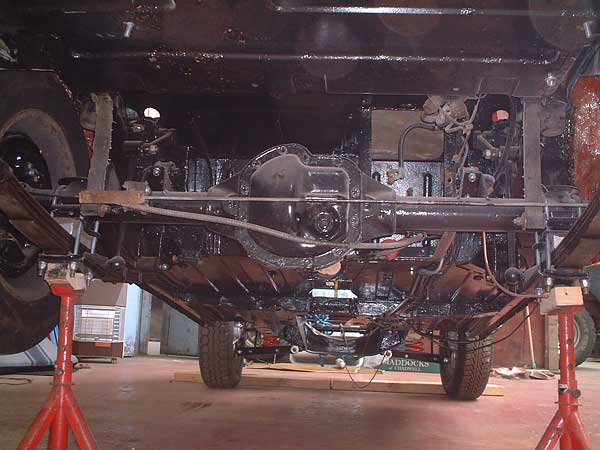
| Rear Axle: | �Salisbury, with 3.07:1 gear ratio. | �
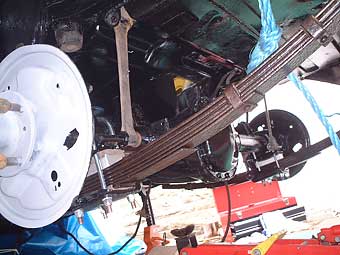
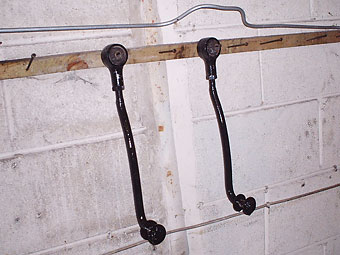
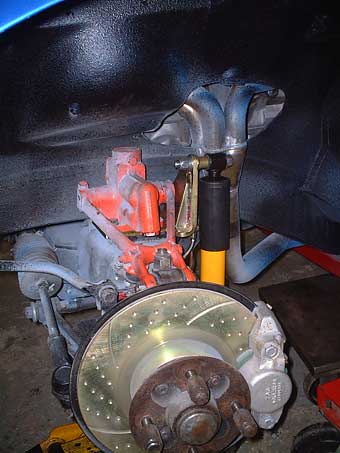
| Front Susp.: | �standard, except Spax adjustable shock absorbers and polyurethane bushings. | �
| Rear Susp.: | �standard, except Spax adjustable shock absorbers, plus the anti-sway �
bar has been cut and modified to function as anti-tramp bars. The main �
leafs of the leaf springs have been flipped upside down to provide a �
lowered stance. Polyurethane bushings. | �
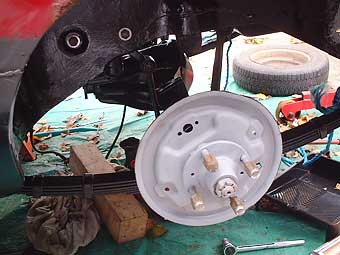
| Brakes: | �EBC grooved and dimpled front rotors and Green Stuff pads. Stock rear brakes. | �
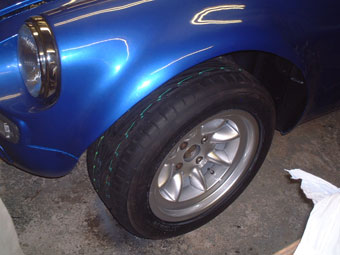
| Wheels/Tires: | �15x8 Minilites, 225/50-VR15 Toyo Proxes T1-R tires. | �
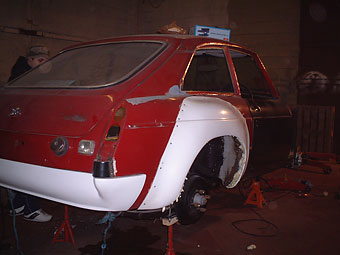
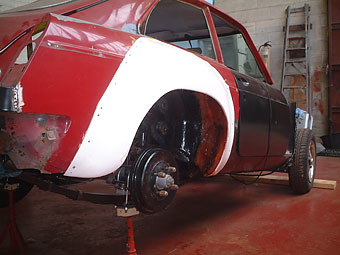
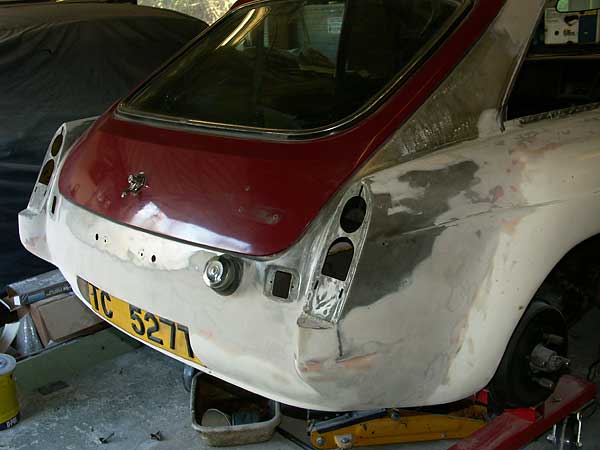
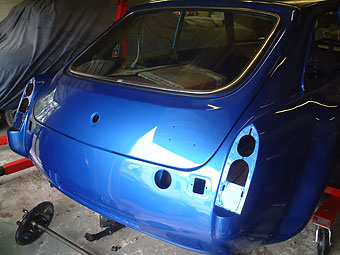
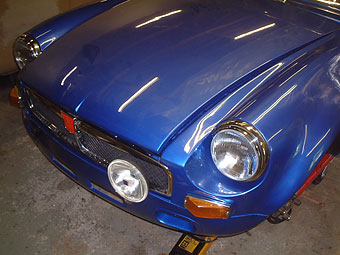
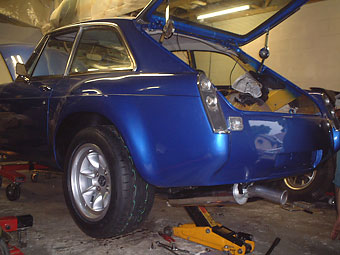
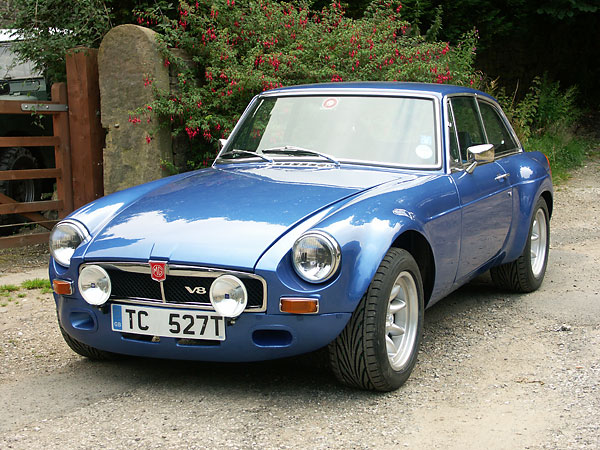
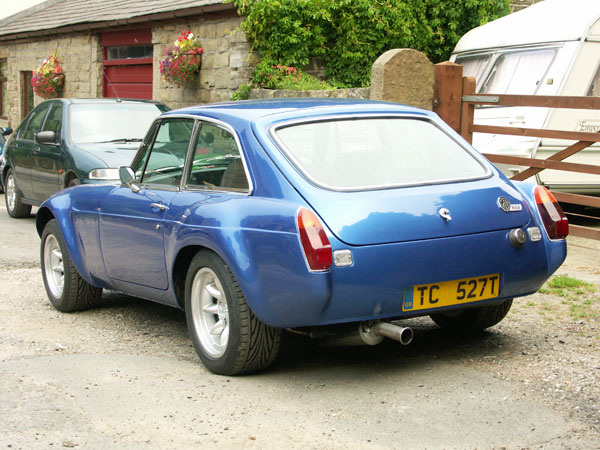
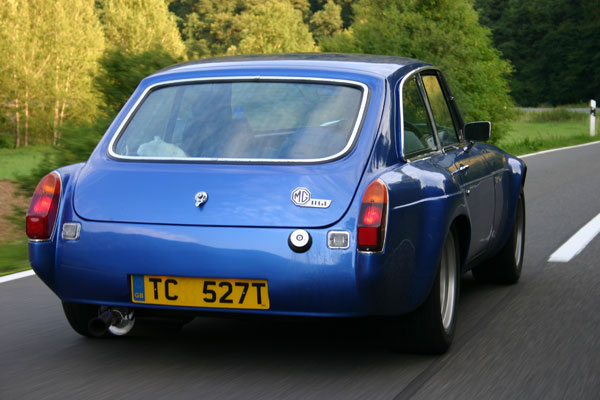
| Body: | �Sebring-style fiberglass fender flares and valances. (Instead of simply �
cutting out the original wheel arches from the steel quarterpanels, the �
steel arches were flared underneath the new fiberglass panels to retain �
structural integrity. Frenched license plate. MG "Trophy Blue" paint. | �
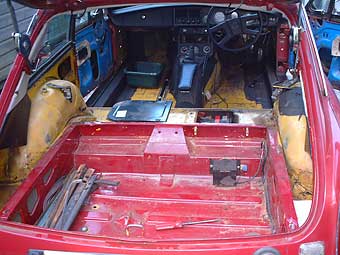
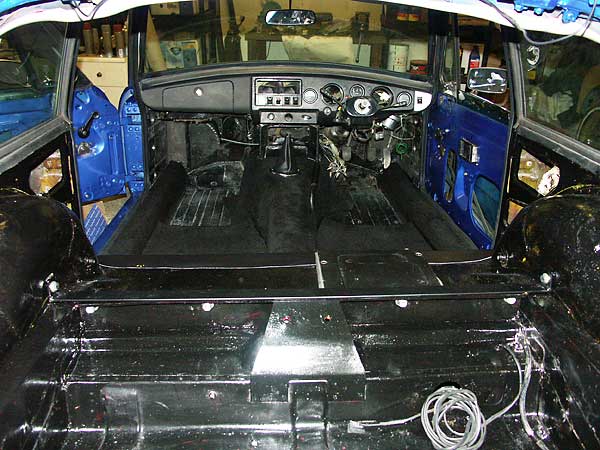
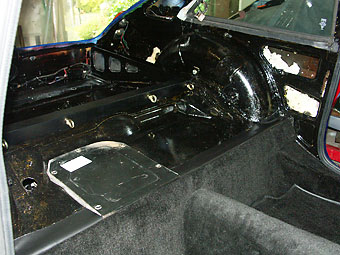
| Interior: | �1 GHz Mini-ITX computer with 7" touchscreen monitor mounted in the console�
in front of the shifter. The computer provides satellite navigation, MP3 �
audio, and DVD video. "Classic Vinyl" bucket seats with blue piping. �
Securon four-point safety harnesses. Mountney steering wheel. The rear seat �
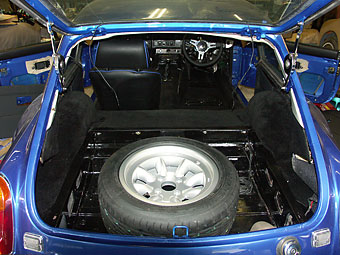
has been removed, and the space converted to house the PC and stereo �
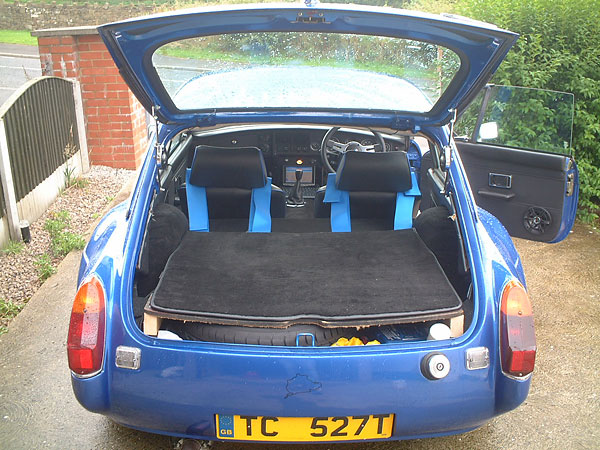
amplifier, with a parcel shelf above. (The car is now strictly a two-seater,�
"as it should have been.") Sony stereo with Pioneer speakers. | �
| Performance: | �not yet fully tested, but the car did reach 120mph at the Nurburgring during �
a holiday trip last August. | �
| Completed: | �summer 2005. (Driven approximately 5000 miles as of March 2008.) | �
| Comments: | �This is my interpretation of a British Hot Rod, she is everything I �
hoped for, a bespoke sports car which handles incredibly well. Due to �
its low ride, sticky tires and wide track, it gives a great grip and �
breaks away progressively in cornering or quickly if you want to, when �
having fun. Lapped the Nurburgring first time out in about 11 minutes, �
but I was so scared of going off so the time was fine.�
� Some MG enthusiasts are not too impressed with the non-standard � modifications, but I'm proud to say I salvaged a 4-pot rubber bumper GT � that was destined for the crusher and gave it new life. That's the best � kind of recycling!� � Next modifications will be the electronic fuel injection, primarily for � smoother running and fuel economy. I'd like to hook up the engine � management of the Rover 14CUX engine management system to my PC to � achieve real-time data access. If I can get it chipped, I'd like to be � able to switch fuel maps, depending upon circumstances. I've sourced an � MG RV8 bonnet, which will allow the Rover plenum to be used without � modification. � � Uprated brakes are also planned because the current ones fade during � track days.� � I use this car in all weather conditions. The chassis is waxoyled every � two years, and my local vehicle tester says it's in better condition than � other more recent cars. It has a couple of paint chips, and a war wound � from when I caught the exhaust on a ramp which pulled it out and damaged � the valance. That gives it character now.� � Two final things, if you look down on that front arch, its pure AC Cobra � - real 60's muscle car! If MG had had the wherewithal to make this model, � I feel sure it would have closed out the model on a high.� | �
How It Was Done:
��
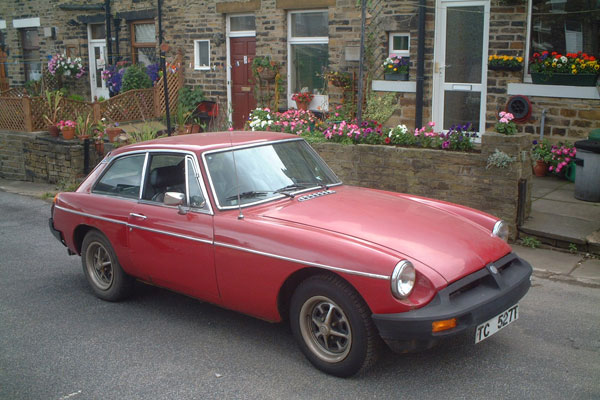
I know exactly when I fell in love with the Sebring MG shape. I'd bought a 1972 MG BGT �
for my wife in 1995. It was a typical B: red, not in very good condition, but great fun. �
Inside the car I found a book about the MG marque with a picture of the John Chatham �
MGC GT Sebring. Instant desire... but I didn't think I'd ever own anything like it.�
�
In 2003, while waiting for a job opportunity in Bulgaria, I had some spare time and �
wanted to do something productive. A magazine article that suggested I could build an �
MG Sebring replica, but with Rover V8 power, on a £4000 budget really caught my �
imagination.�
�
I found a donor but decided very early, that I didn't want to create an absolute replica. �
I wanted something more contemporary and more personal. My car would be a bespoke sports �
car with all the latest features, including a suitable Rover V8 motor and the piece �
de resistance: a 7" touch screen PC to provide entertainment and navigation. (My trade �
always finds some way into my projects!) I also decided upon a later MG colour - �
"Trophy Blue" - which I felt would suit the car really well and bring it up to date.�
�
 �
�
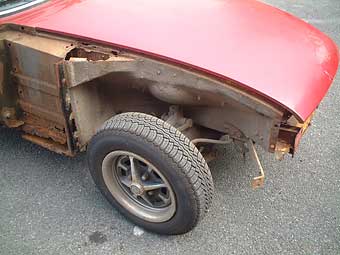
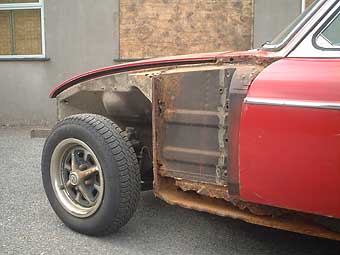
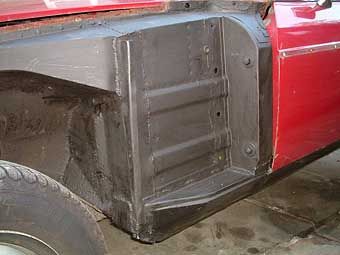
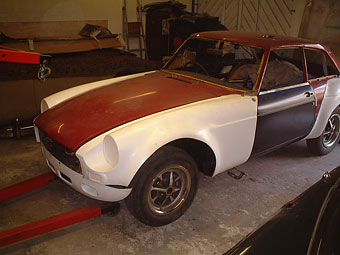
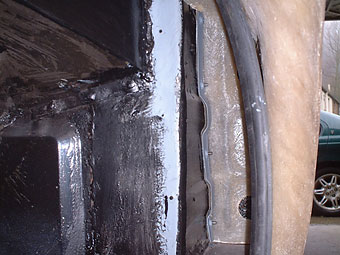
� In June 2003, after viewing several basket cases, I found a suitable donor car. I bought � a 1979 (rubber bumper) MGB GT which seemed generally sound apart from the sills. The sills � had been repaired previously, but not very well. With a little time on my hands and a � modicum of welding ability, I was prepared to try repairing the sills. I trailered the � car home behind my trusty 1973 Series III Land Rover. The car was a runner, recently out � of MOT, in dire need of some TLC and a good look at those sills.�
��
 �
�
�
 �
�
 �
�
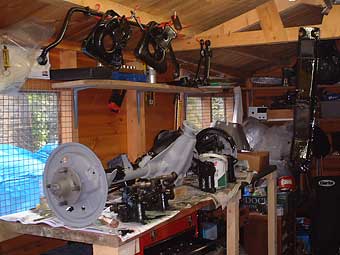
� Without a garage, my driveway was my workshop. Removal of the rubber bumpers made the � car look a little more lithe. Some prodding with a cold chisel showed the sills would � require a full rebuild. However, just as the project got underway, a temporary business � assignment threatened. As a consultant to the privatisation of a telecommunications company, � my due diligence work was critical to the deal - but the time in Sofia was going to impact � my schedule to complete the car before winter arrived. Without a garage, I needed some help. �
��
 �
�
 �
�
� I'd met a fellow enthusiast at the Woodvale car rally in August who'd built his own � MGB V8 Roadster. His partner in crime would be able to do the sills for less than the � cost of the normal MG restoration garages. Even with the saving, the cost immediately � blew my budget - and a precedent was set for the rest of the build. Oh well, easy come, � easy go! At least he confirmed that the rest of the body shell was as good as I hoped.�
��
 �
�
�
 �
�
�
 �
�
 �
�
�
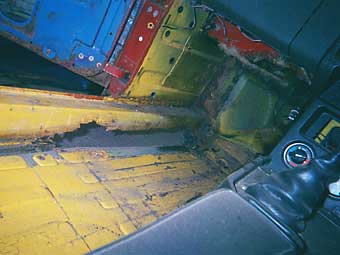
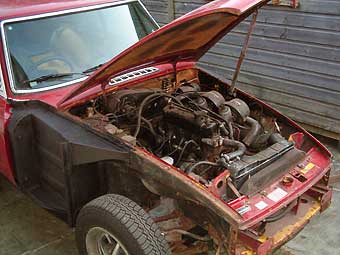
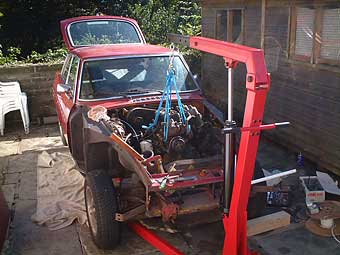
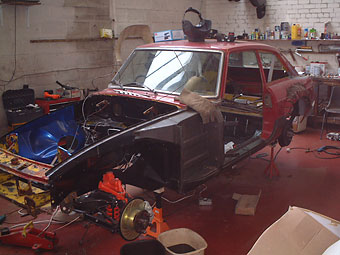
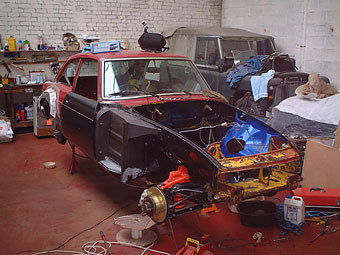
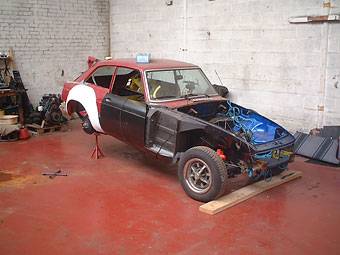
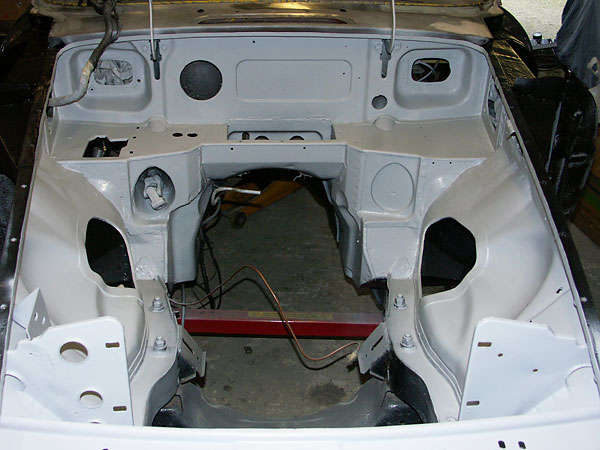
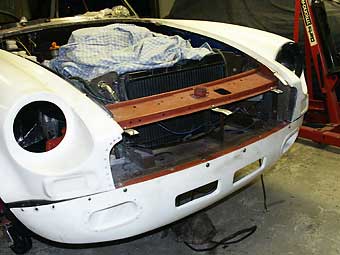
When my GT returned with new sills, I felt I had a good canvas on which to create my �
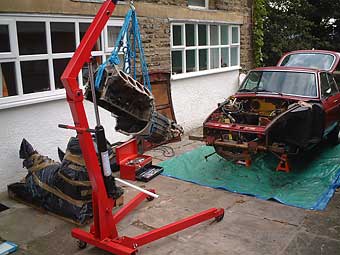
version of a masterpiece. The next tasks were to remove the engine, gearbox, and the �
interior (plus some unusual items such as a Harry Moss digital tachometer and a Tracker �
trip computer) took two days. My plan was to renovate or replace as much as possible. �
However, before I dismantled and shipped the suspension and axle parts off for shot �
blasting, I planned to remove the underseal from underneath and then repaint with �
Hammerite black paint.�
�
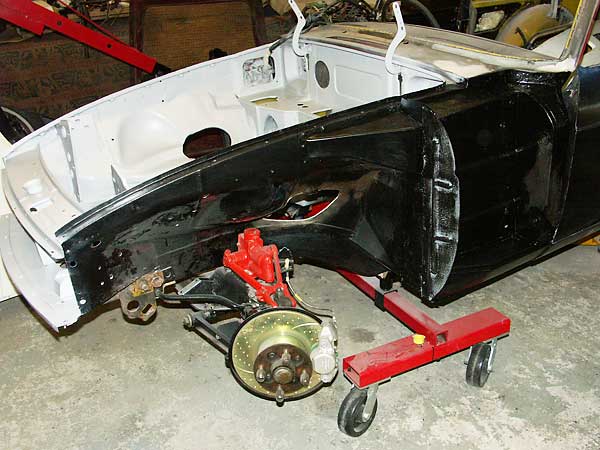
I found that without the engine and gearbox removed, I could rotate the car up to �
about 30 degrees with my crane and then prop it up with strong axle stands, which gave �
me enough space to lie underneath. Armed with a heat gun and paint scraper, plus some �
cellulose thinners, I successfully removed all the underseal. However, the process �
aggravated a repetitive strain injury into tendonitis which means I'll have to have �
an operation at some point.�
�
 �
�
�
 �
�
 �
�
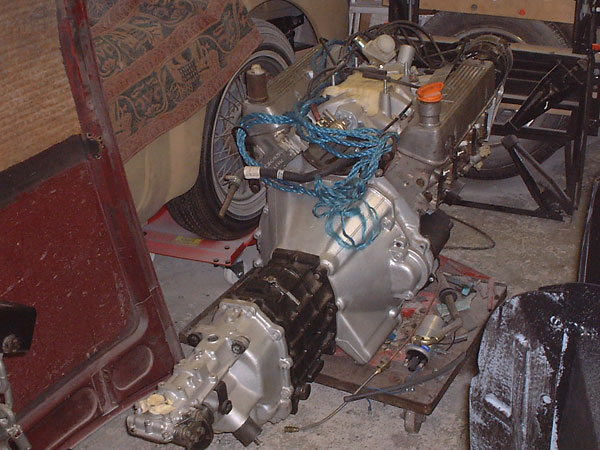
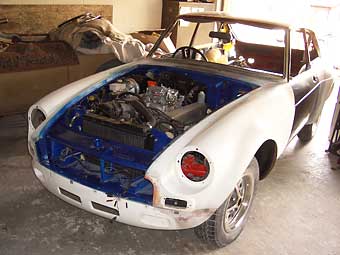
� I sourced an engine and gearbox from one of the local Rover SD1 club members who also � loaned me an extra engine block to help with locating the exhaust manifold holes in � the wings and to offer the gearbox up for relieving the transmission tunnel, instead � of using the heavier complete engine.�
��
 �
�
�
 �
�
�
 �
�
 �
�
� By now it was October and the weather was closing in fast, there was no way I would � complete it before winter arrived so I started looking for a lockup garage to rent � nearby. After a couple of false starts, I found a unit in an old mill which suited � my requirements perfectly. It had been used as a garage previously, so it had a bench � and painted floor. Price agreed, the MGB along with an MGF and my Land Rover were � shuttled in away from the wet weather and I could proceed in relative comfort.�
��
 �
�
�
 �
�
�
 �
�
�
 �
�
 �
�
�
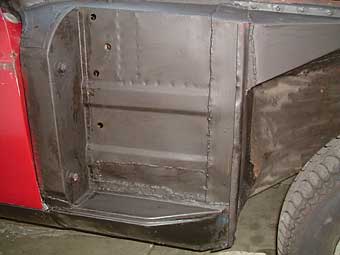
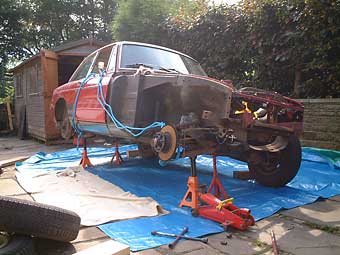
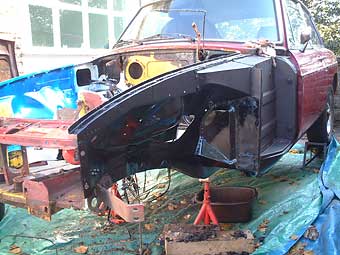
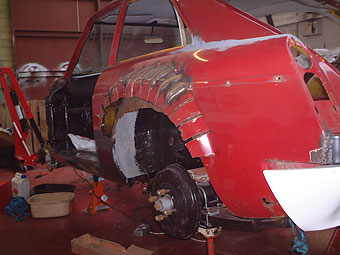
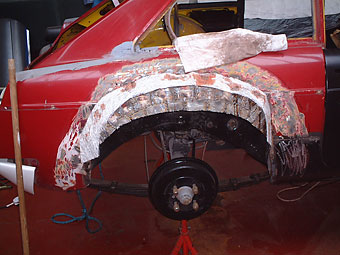
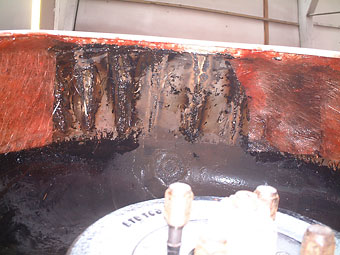
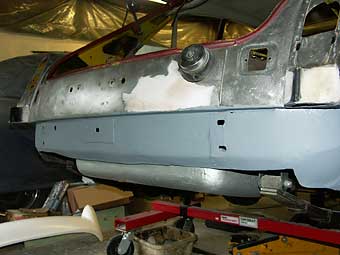
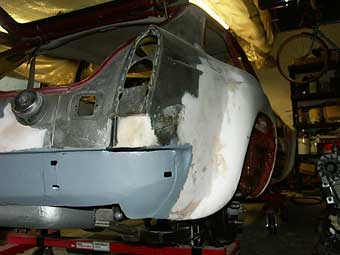
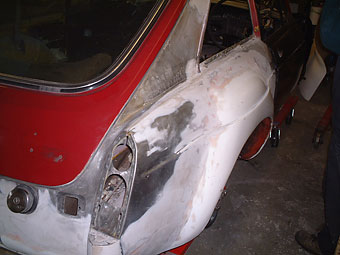
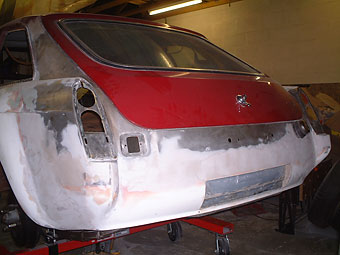
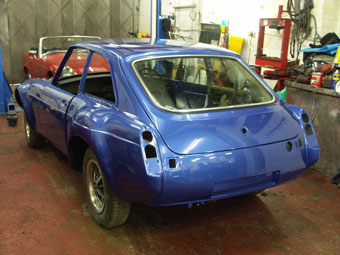
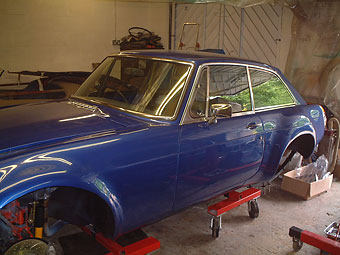
I then started onto the body work. I'd heard that some other Sebring conversions had �
been achieved by cutting the inner and outer rear wheel arches and inserting a fillet �
of steel in between before gluing the glass arches on. I believe this weakens the �
structure, so I set about 'fan' slicing the rear arches and bending them up into �
the shape of the arch before seam welding each strip. This then gave me a good base �
upon which to glue the arches which I'd cut up to get rid of all the superfluous �
fibreglass. �
�
Over Christmas, progress was slow but at least the car was safe from the elements, �
I finished the arches, the metalwork extending the transmission tunnel, painted the �
interior floorpans and test-fitted the doors. It was important to get the fit right �
before offering the front wings to get the gaps right.�
�
Then my normal day job started again with a vengence. For 6 months the rebuild stalled �
and when my career moved me temporarily to Sofia Bulgaria there was a risk that the car �
would become one of those half-finished projects offered in the small ads. I was �
determined to not lose focus, having completed much of the hard work and with many of �
the parts purchased.�
�
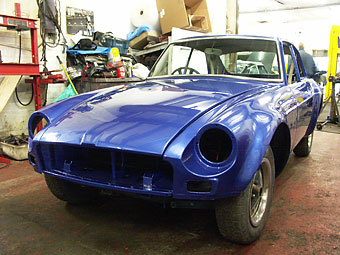
Over these months, a good friend named Robin had become my project mentor. �
Robin had previously built a V8 Cobra replica, installed a Rover M16 engine in his �
own BGT, and was now working on his own MGA. He could see that all my work might come �
to nothing, and took pity on me. So, sadly, after delivering the car up to Robin's �
garage my involvement for the next 6 months was limited to following its progress �
through email and photographs. On occasional visits home I did get to witness some �
key milestones: first engine start in December 2004, selection of seats and belts, �
seeing the beautiful new Trophy Blue paint in April 2005, and finally selection of �
wheels and tyres in June.�
�
 �
�
�
 �
�
�
�
Enjoying this article? Our magazine is funded through the generous support of readers like you!
�
To contribute to our operating budget, please click here and follow the instructions.
�
(Suggested contribution is twenty bucks per year. Feel free to give more!)�
�
�
�
�
�
�
 �
�
�
 �
�

�
 �
�
�
 �
�
�
 �
�
�
 �
�
�
 �
�
�
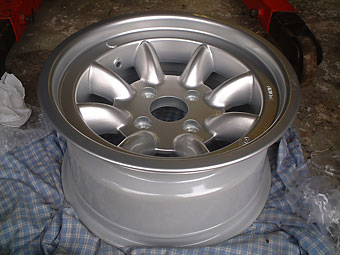
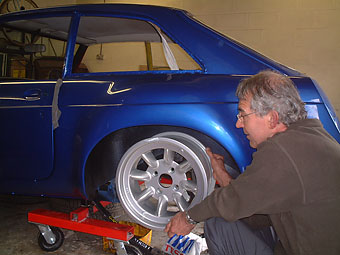
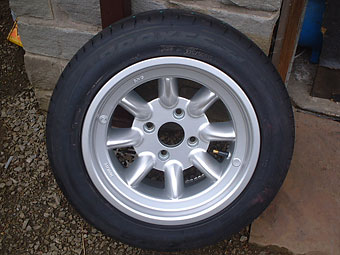
These are the authentic British originals: genuine Minilite wheels!
�
 �
�

�
 �
�
�
 �
�
�
 �
�
�
�
 �
�
�
 �
�
 �
�
�
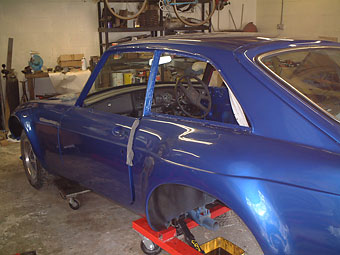
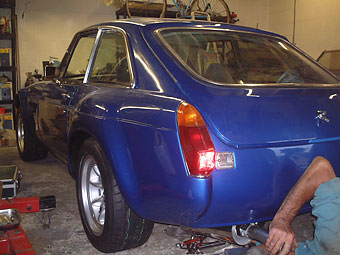
Robin did a sterling job, finishing the bodywork and engine installation, arranging �
the paint job which really finishes the car, and putting his mark on it in the form �
of the 'frenched' rear number plate. That last feature seems a throwback to my �
interest in custom cars as a teenager, but it's also a design feature that looks like �
it should always have been there. �
�
I finished my assignment in summer 2005, which gave me the opportunity to complete �
the car with Robin, and I'm pleased to say, apart from a failed wheel bearing (one of �
the few things I didn't replace) it performed faultlessly on its first trip: a round �
trip of 1700 miles to and including a circuit of the Nurburgring. Two years and three �
times the original budget later, with Robin's help, I now have a bespoke, beautiful �
and quite unusual sports car.�
�
How It Turned Out:
�
�
 �
�
�
 �
�
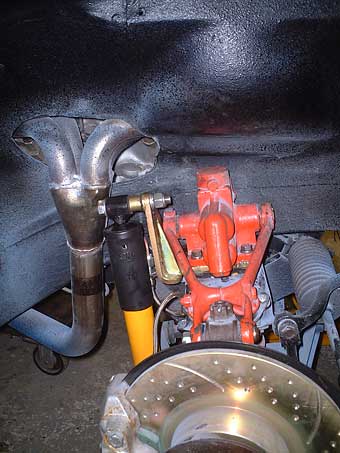
� EBC high performance dimpled-and-slotted brake rotors, and "Green Stuff" brake pads.
�
�
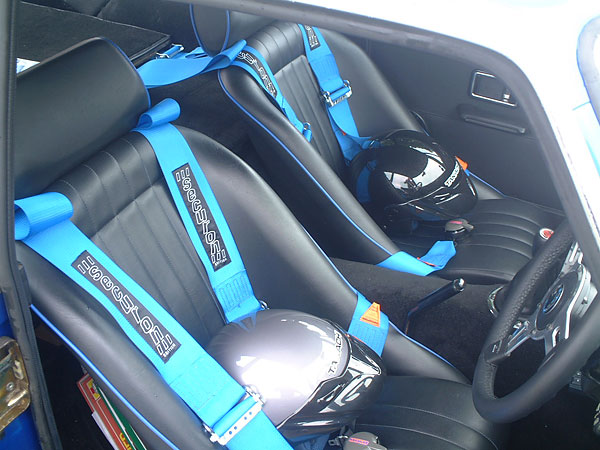
� Cobra Classic seats with (optional) blue piping. These are often used by "classic Mini" owners.
�
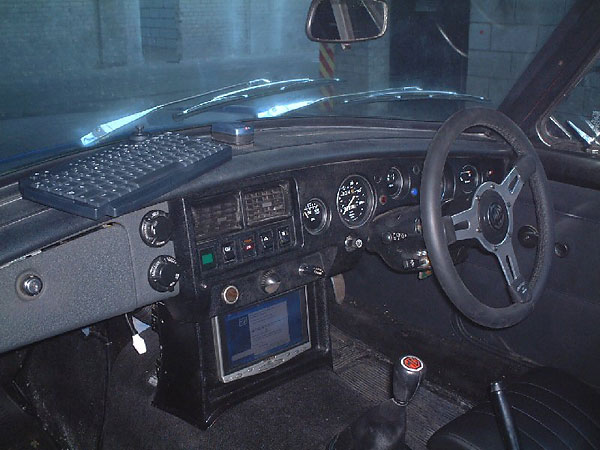
� 1 GHz Mini-ITX computer with 7" touchscreen monitor (mounted in console) and wireless keyboard.
�
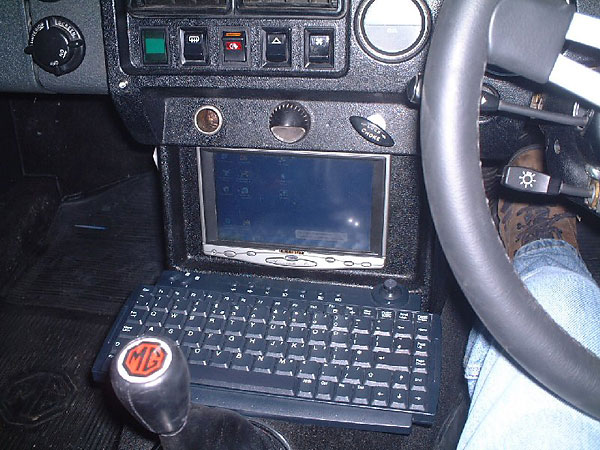
� The computer provides satellite navigation, MP3 audio, and DVD video.
�
�
�
� �
�
�
�
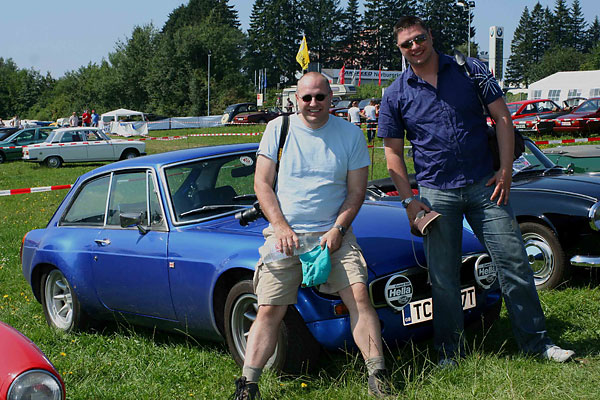
� Finally, the last pic is one of my favourites, my brother and I went to the 'Ring last � August. The car didn't miss a beat, and although we're both over 6' tall we managed to � sleep in it for a few hours in Belgium. We took aviation headsets and connected them to � an intercom and the PC (MP3 player, etc.), which made the motorway's more bearable. � We parked with the Triumph Club, and they were so welcoming. We'd love to get over this � year, but we have a new project to complete: a BMW E30 325 rally car. �
�