 �
�
�
�
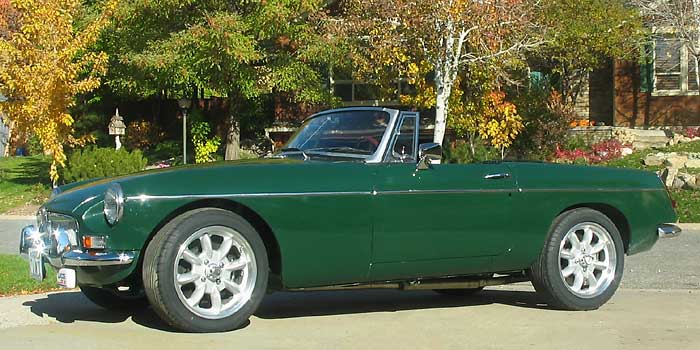
Chris Jones' 1967 MGB Roadster with Buick 215cid V8 engine
� as published in British V8 Newsletter, Volume XV Issue 2, September 2007� (Updated in February 2010 with 13 additional photos.) �
� Owner: Chris Jones
� � City: Denver Colorado
� Model: 1967 MGB roadster
� Engine: 1962 Buick 215cid (from a Skylark)
� Conversion completed by: owner
�
| Intake: | �stock Buick 215 4-barrel intake manifold (match ported), mated to a �
Carter 9400 AFB (400cfm) carburetor. Crower 229 cam (selected for �
mid-range torque and power.) | �
| Electrical: | �Mallory Unilite distributor, Mallory coil. Mitsubishi 55 amp alternator from �
Mazda 323 and mini-starter from TSI Air/fuel ratio meter. | �
| Cooling: | �1964-65 Ford Falcon/Mustang V8 radiator | �
| Exhaust: | �Owner built 4-into-1 2-piece headers, with equal length (38" long) primaries�
in 1-3/8" tubing, collected into a 2" stainless steel dual exhaust system. | �
| Transmission: | �Borg-Warner World-Class T5 from a 1988 Camaro V8, mated to a Mustang �
rear housing. The transmission has a 0.63:1 overdrive ratio. �
Custom fabricated driveshaft. | �
| Clutch: | �Weber clutch from D&D Fabrications with Weber hydraulic throw-out �
bearing ("HTOB"). 5/8" Girling master cylinder. | �
| Rear Axle: | �Dana 44 from a 1976 AM General postal Jeep. Axle has 3.31:1 ratio and �
limited slip differential. Hub flanges were re-drilled to match the MGB �
lug pattern. | �
| Front Susp.: | �Stock MGB with 3/4" roll bar. Polyurethane bushings (in lieu of rubber). | �
| Rear Susp.: | �Stock leaf springs with Moss Nylatron bushes | �
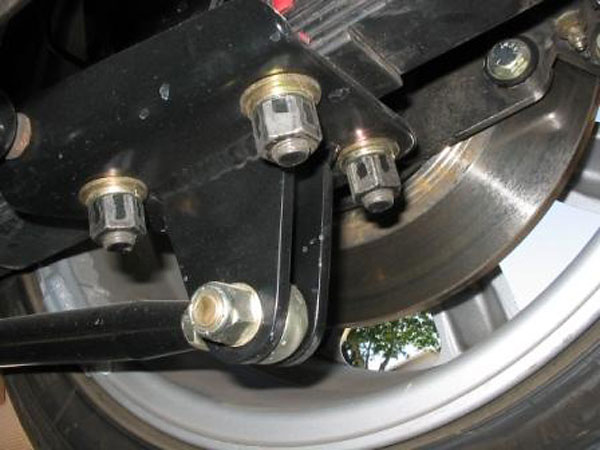
| Brakes: | �(Front) 12.19" Wilwood vented rotors from Bill Guzman � (Rear) 12.19" Wilwood rotors with integral drum parking brake. | �
| Wheels/Tires: | �205/ZR16 Goodyear Eagle F1 GS-D3 mounted on Superlite 16J7 Minilite �
replica rims. | �
| Other (chassis): | �Fuel tank was shifted left by 3-1/2" and the rear bump stops were shaved for additional tire clearance | �
| Body: | �The body looks stock, except for larger wheels and tires and an additional �
exhaust pipe cutout added under the rear valance. Front oil cooler panel �
was removed and replaced with a dropped panel to fit the Mustang radiator. | �
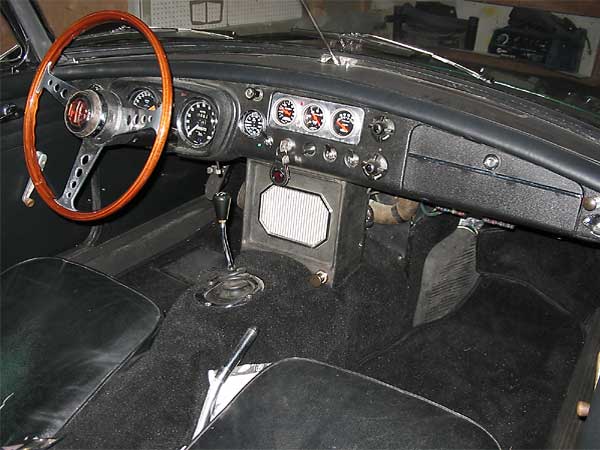
| Interior: | �basically stock (see below) except for an exotic Les Leston steering wheel �
(that came with the car) and an additional three-gauge pod mounted in the �
center of the dashboard for three Auto-Meter gauges. | �
| Electrical: | �Re-wired to incorporate 8 relays, 8 fuses, and many other upgrades.�
All stock gauges are illuminated by LED lamps. | �
| Weight: | �about 2000 pounds (dry). | �
| Completed: | �mostly completed in 2006, although still making improvements. | �
| Miles Driven: | �approximately 1000 miles as of August 2007. | �
| Comments: | �This car project started as a restoration and morphed into a V8 conversion!�
Al Wulf and Larry Hoy of the Rocky Mountain MG Car Club convinced me that a �
V8 was the way to go. My intention was to build a car that would pass as a �
stock looking MGB, but have power for the Rocky Mountain region. After I �
attended the 2001 British V8 convention in Rocky River, Ohio, I was hooked.�
� Chrome bumper conversions add a bit of a challenge for some, but as a skilled � welder, I had no problem. In fact, the whole project doesn't have to be any more � difficult than a full body restoration. � � Building the exhaust headers was a fun challenge. I wanted something different; � equal length headers that hug the block (I thought at the time that cutting � holes in the wheel wells was an inelegant solution). After studying the � information that Headers by Ed has put together, I started to work out the � layout with 1-1/2" plastic flex conduit. I had to add a flanged joint in � order to get them mounted in the car. When finished, I had them Jet-Hot coated. � I built the rest of the exhaust from bends and components provided by � Stainless Specialties (a hot rod supplier from Florida) � � A 3000cfm 16" fan mounted in front of the Mustang radiator blows out the hot � air. It's controlled by a thermostatic switch and dash mounted override switch. � It has kept the car from overheating though 100 degree days here in the Salt � Lake Valley. I also modified the panel that the oil cooler occupied by folding � it down to match the increased height of the radiator. All air flows through � the stock grill, and I've keep the '67 front valance to retain a stock looking � front end.� � I was impressed by Dan Master's work in wiring, and copied much of it when I � re-wired the car. I added the electric braking to the wiper motor, and � converted all the dash lights to red LED illumination, the turn signal bulbs � were converted to ultra-high intensity blue LED's that dim through a relay � controlled resistor when the headlights are on. (I'm no longer one of the � people you see driving MGB's around with the turn signals blinking constantly). � I converted the stock tachometer to positive ground and simply turned the � internal pot to recalibrate. 1967 tachs may be the easiest to convert to � V8 ignition. � � The engine was machined and balanced, and I did some porting and port matching � as well as decking the block to bring the compression up to 10.3 to 1. I hoped � to get around 200 HP, but haven't bothered to check my results. Acceleration � is very quick, as the big Goodyear F1's hook up really well; they don't squeal, � and wheel spin is quiet but evident in first and second gears. The Dana 44 axle � was built up much as the Dan LaGrou article in the British V8 Newsletter � suggested (see archive). I custom built a parking brake cable mount that allows � me to use a stock MGB parking brake cable. One nice aspect of the Dana 44 axle, � (aside from it's very strong construction) is the availability of gear ratios � at dirt cheap prices. Off-road shops pull new sets from axles in order to get � stump pulling sets into off road Jeeps. I bought a 3:31 set for $15 on eBay! � Most of the postal jeep axles I found were 3:71 with Traction Lock.� � I still have some work to do - I don't have the seats recovered and I need a � top in case it rains someday - but it feels good to take it out on the road. � It's by FAR the quickest car in my British car club. � | �
�
�
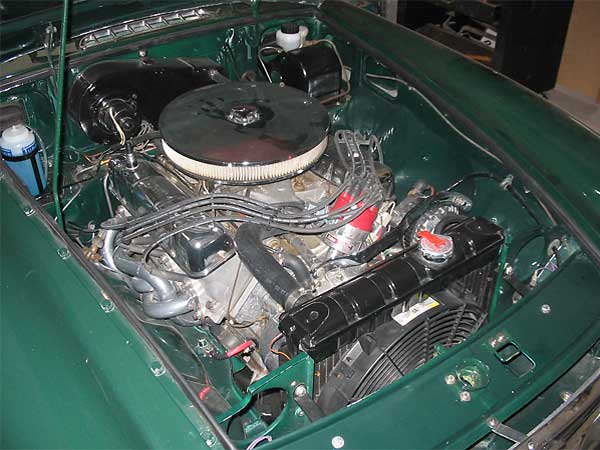
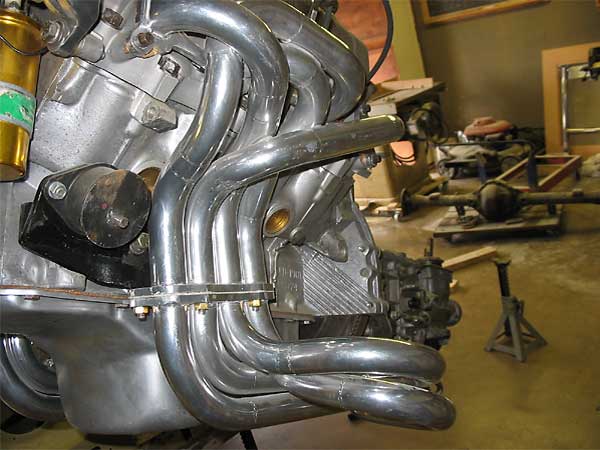
Completed engine installation with Mustang radiator shown.
�
�
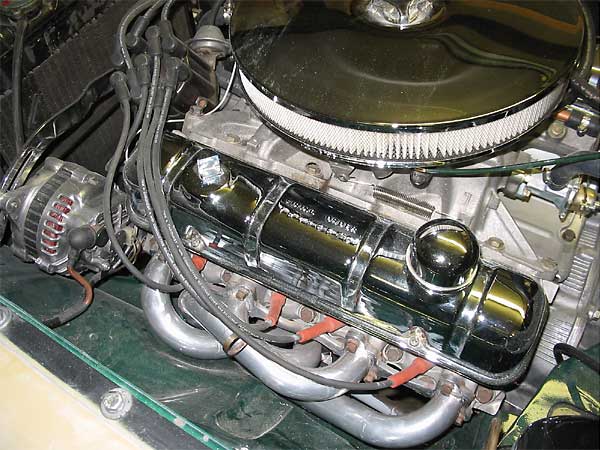
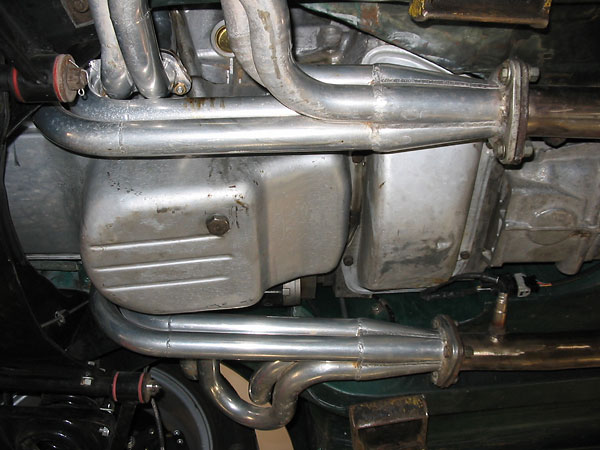
Driver's side exhaust header.
�
�
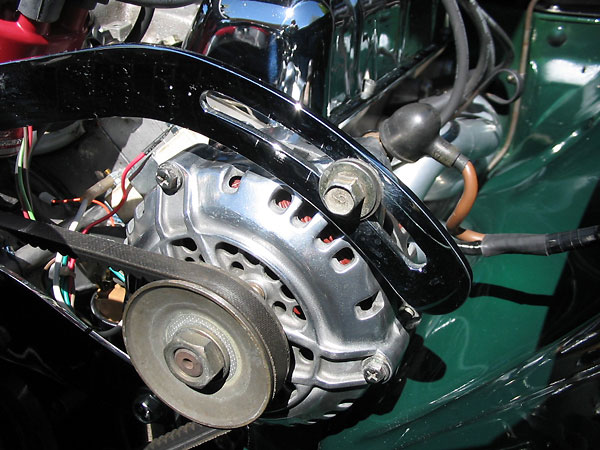
Mitsubishi 55 amp alternator, from a Mazda 323.
�
�
Driver's side header showing break joint that facilitates installation.
�
�
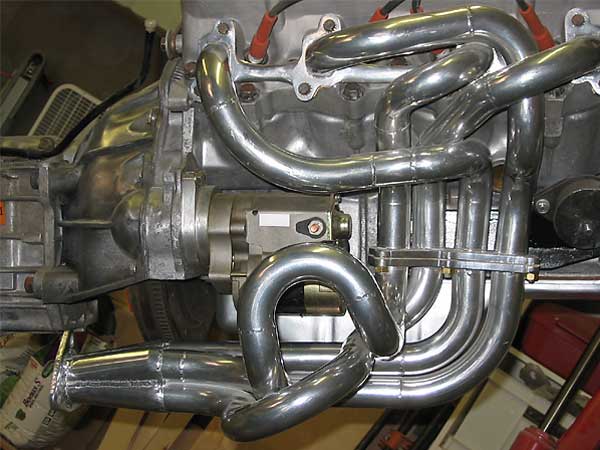
Passenger's side header clearance to mini-starter and motor mount.
�
�
Header extensions in place.
�
�
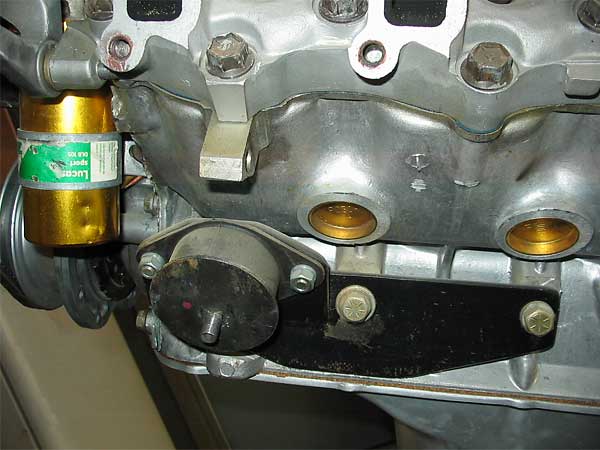
Special motor mounts were built to provide extra space for the headers.
�
| �
Enjoying this article? Our magazine is funded through the generous support of readers like you! � To contribute to our operating budget, please click here and follow the instructions. � (Suggested contribution is twenty bucks per year. Feel free to give more!)� |
�
�
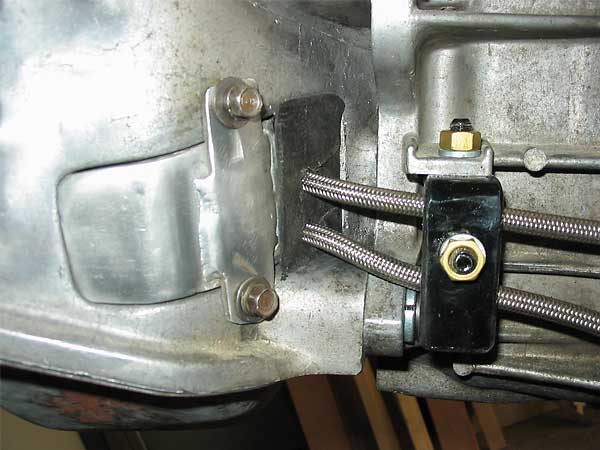
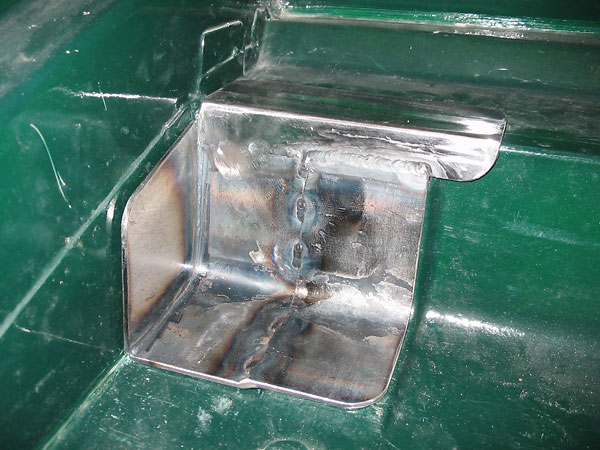
Blanking plate over throw-out lever opening in original Buick bellhousing (around HTOB lines).
�
�
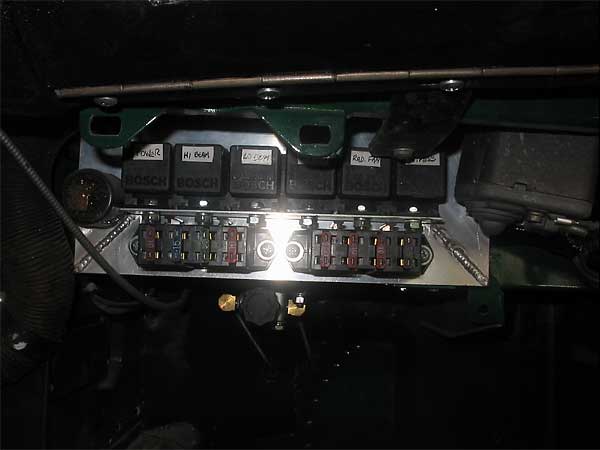
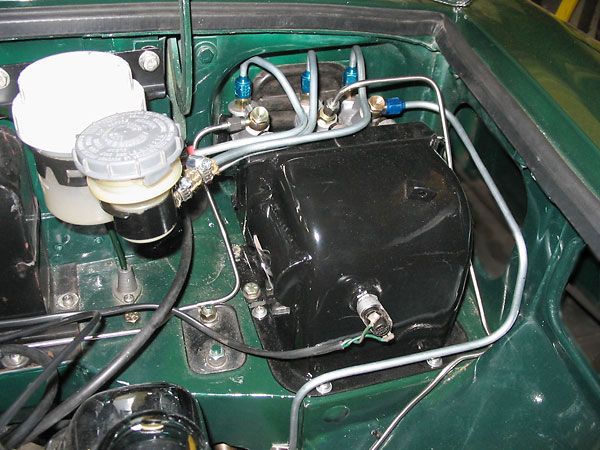
Fuse and relay power-block installed under glove box. The brake proportioning valve is also shown.
�
�
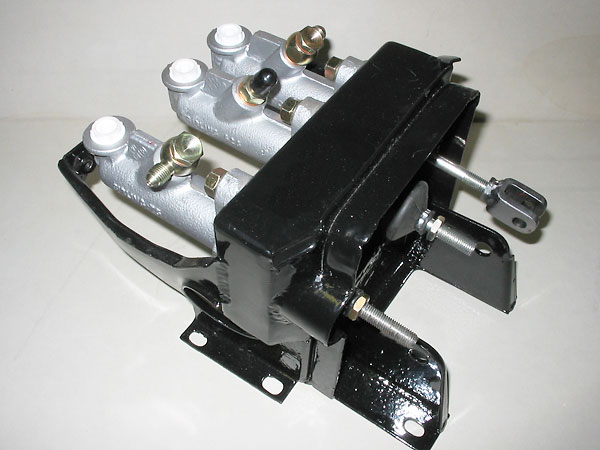
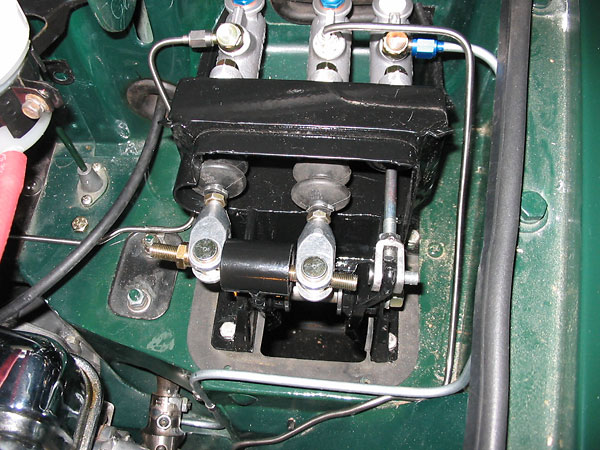
Master cylinder and pedal mounting bracket, modified for dual brake cylinders with bias bar.
�
These are Girling master cylinders that utilize remotely mounted reservoirs.
�
�
A spherical bearing is mounted at the center of the threaded rod. By turning the rod, the bearing (i.e.
�
pivot point) can be adjusted from right to left to proportion pedal force between the cylinders.
�
�
Reservoir mounting.
�
�
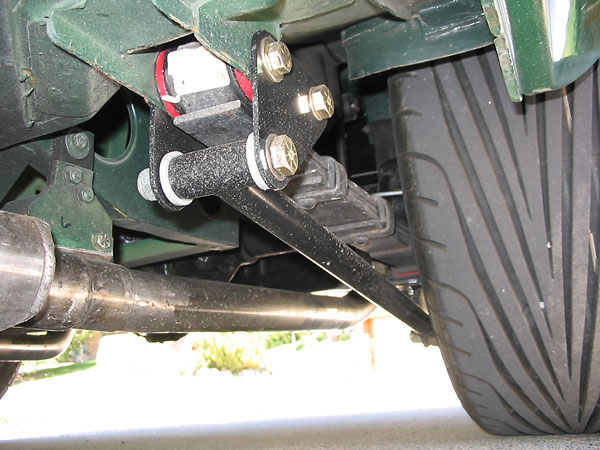
Traction bars are also known as "anti-tramp bars". Their purpose is to restrict the tendency of
�
the leaf springs to momentarily deform into an "S" shape under hard acceleration.
�
�
The Heim joint at the rearward end facilitates fine tuning of their installed length.
�
�
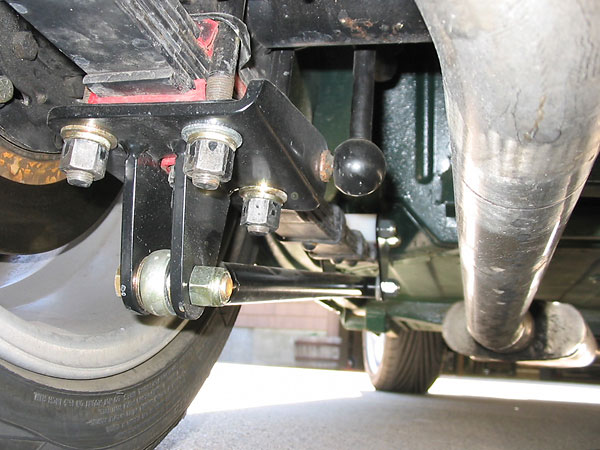
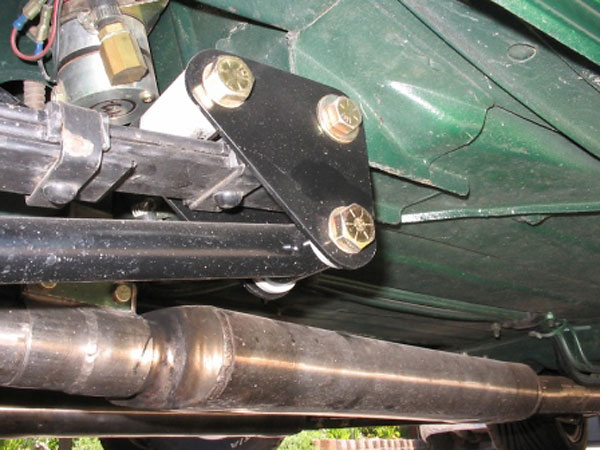
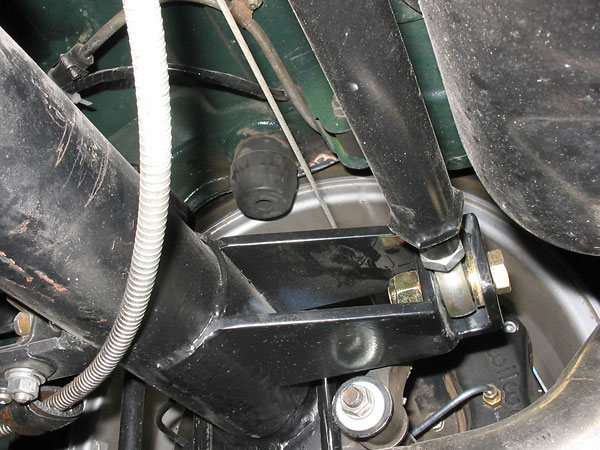
Some traction bars are mounted directly to the chassis at the front end. Chris' are more elaborate; they're
�
connected via a rocking attachment, so they only function on forward acceleration (when the differential
�
pinion tends to rise) and not on hard braking (when the differential pinion tends to rotate downward.
�
�
�
�
�
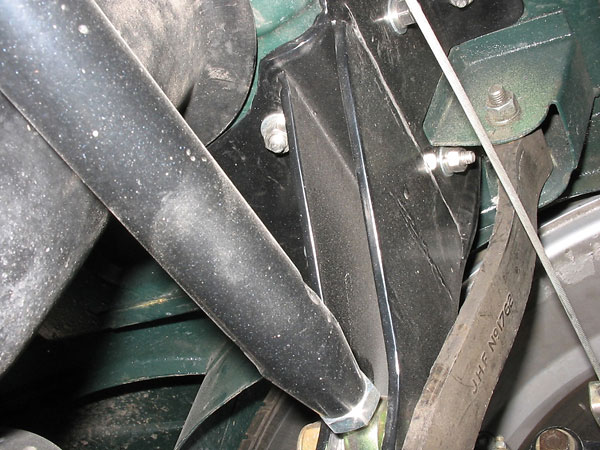
This Panhard bar bracket is on the axle is robust, and it puts the pivot in double shear.
�
Take note: this is the right way to do the job!
�
�
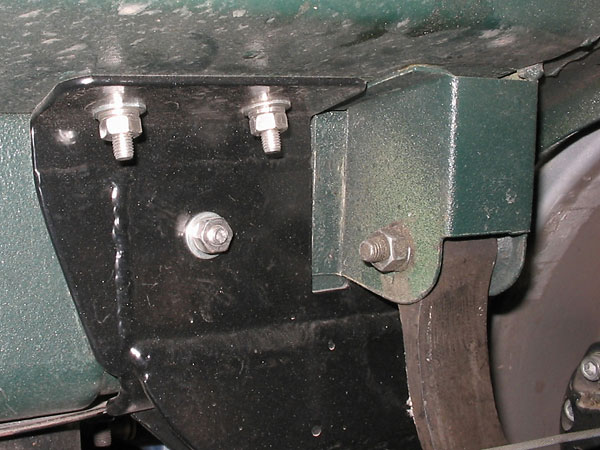
The Panhard rod mount on the body is also quite robust.
�
�
The Panhard rod's body mount features a cut-out to clear the rebound strap bracket.
�
�
Test fit: notice that the doubler-plate has raised sections to match embossments on the trunk floor.
�
�
The shifter lever location in the transmission tunnel looks stock... but it's not!�
