
� Greg Myer takes us along for an inside look at a few local machine shops!�
Machine Shop 101: an introduction to the basic processes
� as published in British V8 Newsletter, Volume XV Issue 3, December 2007�� by: Greg Myer�
�
�
What happens at a machine shop? What do we need to know before we take our parts to �
the machine shop? Does it even matter? Maybe we just want our block bored and to �
get on with the build. Well it depends very much on what your goals are, what the �
intended use of the engine in question is, how much horsepower you intend on �
producing and how long it's designed to last.�
�
The more knowledgeable one is going in, the more intelligent questions you can ask �
and then the result should be a better build when you get all your parts back. We �
will look at a number of areas starting with some very basic information so you can �
see how these things work together. They do work together. Never forget that there �
are relationships, many and varied, between all the functioning and nonfunctioning �
parts of your motor. �
Relationships
��
No, I'm not going Dr. Phil here. First there are mechanical relationships. Piston to �
bore clearance for example measured in thousandths of an inch. Many different dimensions �
need to be considered. Some will be built into the new parts and need to be checked and �
others will need to be machined to specifications. Other relationships are when things �
happen. In engines these are usually measured in degrees of a circle, which has 360. �
Spark timing, for example, might be expressed: in degrees "Before Top Dead Center" �
(BTDC). Some of these relationships are affected by the machine work. A third �
relationship is ratios. An "over-square" bore to stroke ratio for example. These mostly �
fall under the design stage of planning the build rather than the machining process. �
Also included in ratios are volumes. Intake port volume and combustion chamber volume �
come quickly to mind. These are affected by various machining jobs performed on the head. �
Theory and planning will determine the direction of your build. The machine work will �
make it possible.�
�
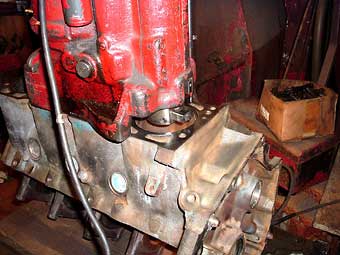
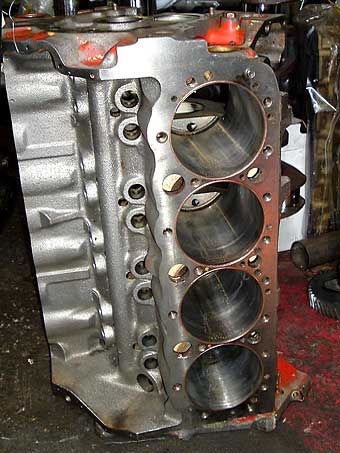
Lets start with the block. We'll use a V8 block for reference. (This is British V8 after �
all!) Buick, Rover, Chevy or Ford; doesn't matter to the machinist. We'll talk generic �
here as it makes little difference. The block has eight cylinders, composed of two banks �
of four in a 90 "V" pattern, as viewed from the front. The crankshaft rides in the �
journals at the bottom of the block and the heads are bolted to the "decks" above the �
two cylinder banks.�
�
First, you disassemble your engine. If there's little wear on the cylinder walls, and �
little or no ridge at the top, pulling the pistons should be easy. If there is a bit �
of a ridge, use your ridge reamer to remove it so the piston rings won't get caught. �
If it's not worn much, you can use a glaze breaker and just put new rings in it, using �
the same pistons. You should thoroughly clean everything and use new bearings, etc. �
Look at the lifter bores too. If they're glazed from high mileage you can use a brake �
cylinder hone to make a finish that the new lifters will work with better. You are �
using new lifters, aren't you? Here's a law: always use new lifters on a new cam. Even �
if you have what appears to be a good used cam, you will be miles ahead if you install �
new lifters on it. (Besides, lifters are relatively cheap.)�
�
When the bores are worn and new pistons are needed, the bores need to be enlarged. �
Pistons come in "oversizes" and the block needs to be bored to match. If the new �
pistons are 0.030" inches larger in diameter, then the bore size needs to be �
increased by a like amount. The new pistons will come as a matched set. The machinist �
needs them in hand to bore your block. He will also need the old ones to press the �
old pistons off and the new ones on. This calls for knowledge as the pistons may �
have different valve relief notches to match the pattern in the head. Some piston �
sets also have the pin bore offset to the thrust side of the engine. Your machinist �
will know how all that needs to be put together. The rods should be marked by number �
and need to go back together on the crankshaft in the same sequence and same direction.�
�
� At the shop the block will be inspected and the cam bearings removed, as well as the � freeze plugs and galley plugs. Then it's into the cleaning solution. These vary. Hot � tank with strong chemicals or a high pressure cleaning using a strong soap that's � bio-friendly are two of the most common. (Aluminum can't be hot-tanked!) The cleaning � is for more than aesthetics. There will be a build up of crud that needs to be removed � from the oil galleys as well as water passages. Since the freeze plugs and pipe plugs � will be removed before this process begins, you'll need new ones.�
� �
�
�
�
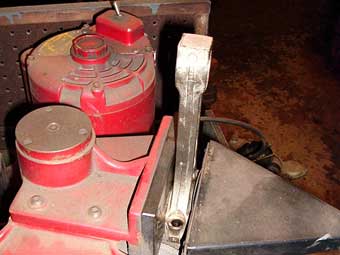
Boring bars vary in design. A small local shop may have what's know as a portable boring �
bar, this type is less expensive and it mounts off the block's deck. This is acceptable �
if the deck is square and parallel to the crankshaft bore. If, however, the deck is closer �
to the crank at the front of the block than the rear, the new bore will start right but �
end up angling towards the rear of the block. Bad news! If assembled this way, there may �
be excessive loading on the top front of the piston and lower rear skirt as well as the �
rods riding on the crank pins. This type of bar is fine as long as the operator does all �
the checking he needs to first.�
�
A boring bar that mounts off the crankshaft bore prevents this problem. That's the second �
type. It's also known as a portable boring bar. It may not look portable, but the one in �
Bill Cannon's Garage was recently taken on board a work boat and used to bore a large �
diesel engine. Not an easy task, but less complicated than pulling that motor. There �
are many of these types in use around the country. They can provide a good, consistent �
job. Again, the operator needs to be familiar with his equipment and make all the checks, �
but the boring bit is always at a 90 angle to the crankshaft. That's a good thing!�
 �
�

�
 �
�
�
�
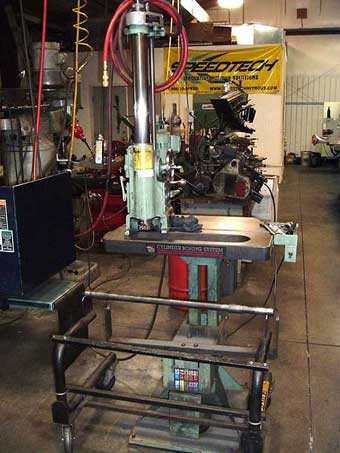
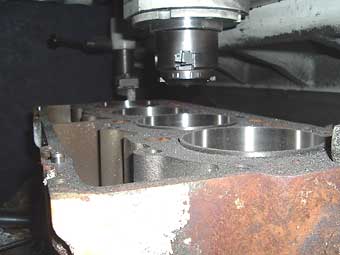
The third type is a boring machine. It's not portable, no matter how large you are. �
The Rottler unit at the local NAPA Machine Shop is a good example. These are large �
units that are designed for a long life of heavy use. With periodic maintenance and �
sharp cutting bits they can do a fine job for many years. These mount the block off �
the crank bores too and are quite accurate. This is what most of us can hope to find �
in the local machine shop. If that's what you see, you're in good hands.�
�
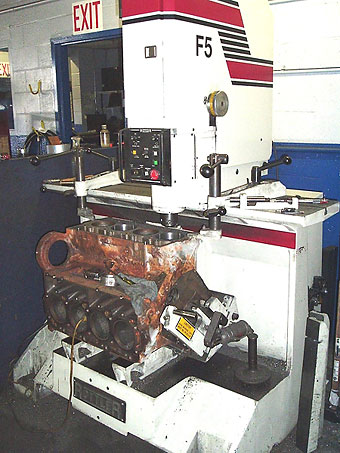
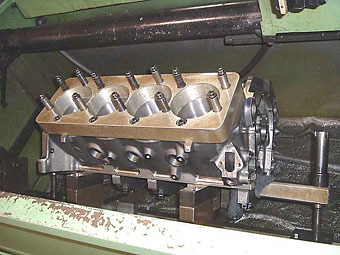
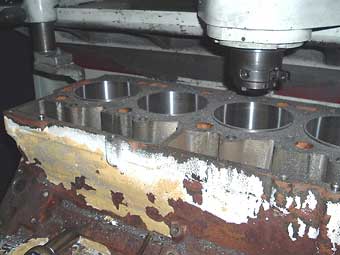
The fourth type of machine used for boring is a CNC Machine (CNC stands for: �
"Computer Numeric Control") and they are state-of-the-art! This is the one that �
all the fuss is about. The example in the photo is at Bill Cannon's Awesome Engines. �
It's a four-axis, computer-controlled machining center. It can perform a multitude �
of tasks, not just bore a block. While it's doing these complex jobs it holds tighter �
tolerances than is possible with the other types of equipment. That's great! It's �
also a very expensive piece of machinery. It requires software and/or someone very �
astute with both computers and machinery to program it. You will understand if the �
charges for this type of machine work are above and beyond other, more common shops. �
You get what you pay for.�
�
Do you need this amount of accuracy? Well, there's no such thing as being too accurate! �
On the other hand, if you're building an average, daily-driver type motor, your local �
plain-Jane machine shop will probably work just fine for you, at an affordable cost. �
Going racing? Planning to use nitrous or a turbo? You'll need higher dollar parts to �
begin with, and top-quality machine work could very easily be exactly what's needed �
for all those pieces to live together and retain their performance edge longer.�
 �
�
�
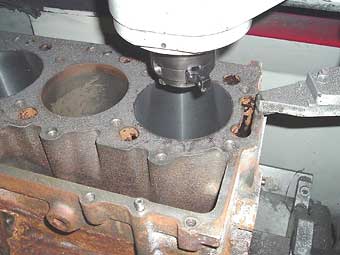
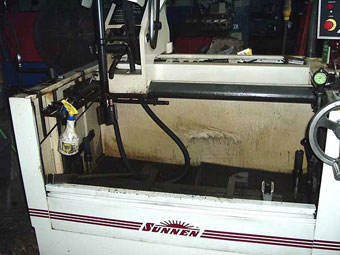
� Whichever machine does the boring, it won't open the cylinder all the way up to � the specified diameter. Rather, it stops short and a honing machine is then used � to take the cylinder to the correct size and crosshatch finish. This is for seating � the rings. There are several types of machines to do this task. There are several � approaches to the job too. The honing machine at my local NAPA is a good example of � what is used in many shops. High performance machine shops carry this operation one � step farther by using a deck plate bolted to the deck to simulate the stresses the � head will exert on the block after assembly.�
� �
�
�
�
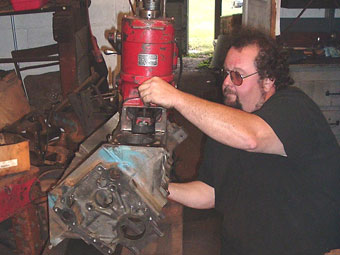
One point we need to understand is that whatever equipment is used, the machinist �
needs to be familiar with it and know its proper set-up. My local machine shop is �
Bailey's, in Pittsville, MD. The owner, Kevin Bailey, has been a friend of mine for �
years. He's done a lot of my machine work and I've done some porting for him. It's �
a one man operation, and he gets friends he knows well to help out when needed. The �
shop doesn't look like the ones you'd see in the magazines like "Engine Masters" or �
"Hot Rod". It might even scare newcomers, if they didn't know what they were looking �
at. Don't be put off. It's organized in Kevin's own way... and it works! He knows �
what he's doing. In fact he built the engine for the 2006 NHRA Summit Pro Bracket �
World Champion, Phillip Truitt of Parsonburg, MD. Things like that don't happen by �
accident!�
�
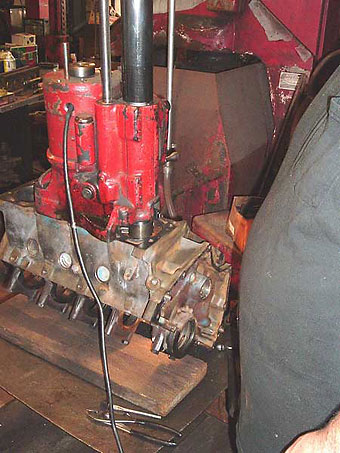
Let's watch him as he performs some routine jobs. First the block is hot-tanked in �
a 180 chemical solution. After removing and flushing the chemicals off, the machine�
work can start. Kevin sets the block on a work stand and checks it. The deck is �
important as the boring machine squares off of it.�
 �
�
�
�
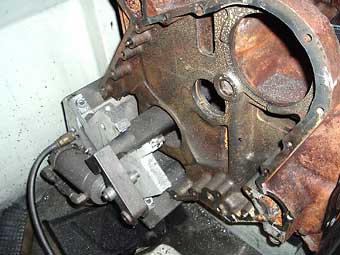
The machine anchors to the main bearings so nothing changes position once the boring �
starts. He begins by using a micrometer to set the diamond dressing tool for the �
correct diameter. In this case, an Olds 425 that has a stock bore of 4.125" is being �
opened up 0.030", so the tool is set for 4.155". In reality it's slightly less as �
Kevin will finish the final dimension by power honing. �
�
Often, we read about certain skirt clearances for racing pistons, etc. that sound �
like a trick set up. Don't ask for your machinist to give your pistons skirts that �
clearance. He can't. The piston skirt clearance is built into the piston. The bore �
is for the top of the piston and the rings should match.�
Honing
�� This can vary. In Kevin's shop almost everyone is using Moly rings so he finishes � the bore with a 300-400 grit stone in his Sunnen 4 blade hone. The hone has 2 stones � and 2 wipers to maintain it square at all times. Honing oil is used for this process.�
��
Enjoying this article? Our magazine is funded through the generous support of readers like you!
�
To contribute to our operating budget, please click here and follow the instructions.
�
(Suggested contribution is twenty bucks per year. Feel free to give more!)�
� Your machine shop will need to know what type of rings you are going to use so they � can properly finish the bore surface to make it so the rings seat. This is important. � Many racing engines using the latest technology in the ring package need little or � no time to seat. They are ready when assembled. For example, the crew at Bill Cannon's � Awesome Engines Machine Shop run new engines on the dyno to check how everything � functions together for the first time and to run them through a heat cycle to temper � the metals. The only problem he's run into recently is with roller lifters. They need� oil with zinc in it, and without it they can have problems, which is easy to � understand considering the high valve spring pressures that racing profiles need to run.�
 �
�
�
� Another phase of the machine work that involves boring and honing is sleeving. If a � block has damage to a cylinder wall, it may be able to be saved by boring the cylinder � in question oversize so a sleeve can be pressed in. Usually a step or lip is left at � the bottom of the bore for the sleeve to butt up against so it can't move. This may � differ if the block is aluminum and had sleeves in the first place. Once in, the sleeve � needs to be finished to the size of the piston and rings.�
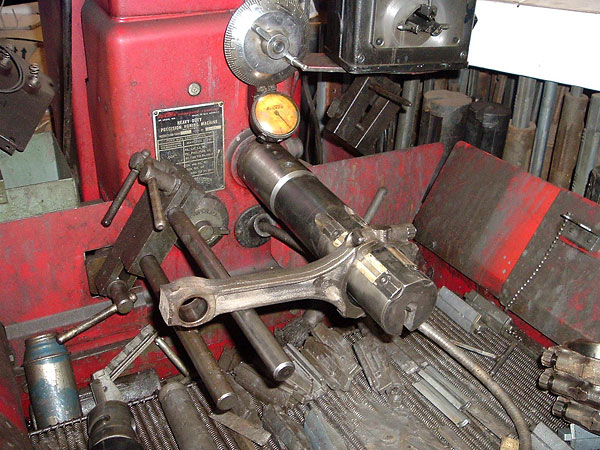
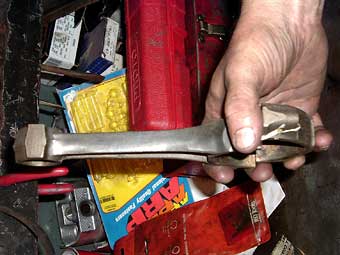
�Rod Preparation
��
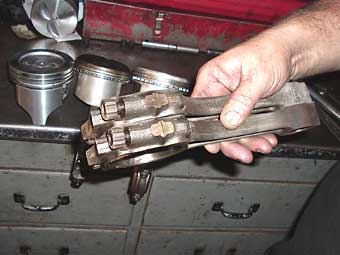
Back to Kevin's for the next step: the rods. Kevin uses a Sunnen Rod Machine. First, �
the old pistons are pressed off the rod. Then the rod is checked to see if the big �
end is out-of-round. If needed, it is resized. The bolts are pressed out and the �
mating surfaces on both the rod and cap are ground down 0.001" each. The new bolts �
are pressed-in and torqued to spec. Then the machine hones the opening to the proper �
size. This machine has several mandrels for various applications. Each mandrel uses �
one stone and 2 "shoes" for alignment. Rods can have the casting lines ground off �
their beams and then polished to reduce stress risers and improve their fatigue life. �
Rods can also have the side clearance on the big ends opened slightly. This can be �
done on a belt sander. It reduces drag without any oil pressure loss. For stock engines �
about 0.010" can be removed when measured with both rods that mount on the same journal �
are stacked side by side. For performance motors up to 0.040", measured the same way.�
�
�
 �
�

�
 �
�
�
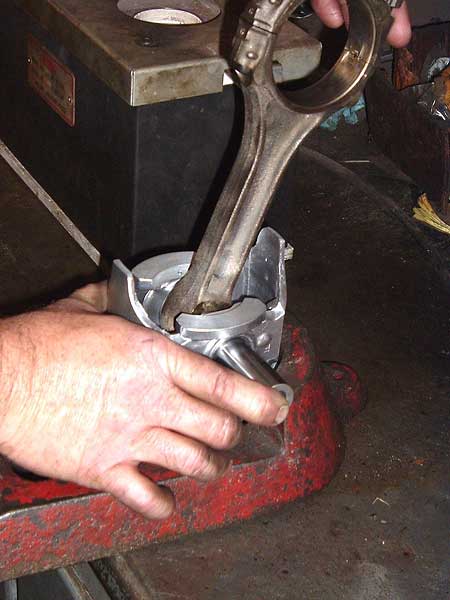
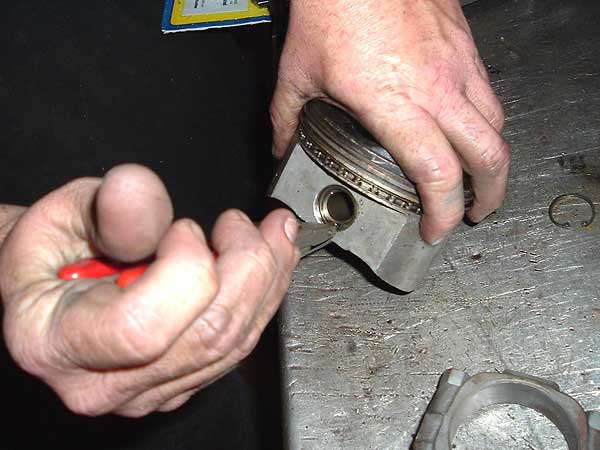
� Once they're ready, the small end is put into an oven or heater and warmed up to � 1100. The pin which goes into it has an interference fit. That means it's too � small for the hole. When up to temperature Kevin can now mount the piston and pin � into the rod by hand. Yes! The pin slides in that easily, and when it is cool, � seconds later, it is locked in place.�
�
�
�
�
� Depending on your piston choice, you may want full floating rods. That's where � the pin slides in the rod and uses C-clips, rings, or circlips in grooves in the � piston to keep it in place. To do this with press fit rods, the small end needs � to be bored to the proper size and bronze bushings with an oil hole are pressed � in. After this you could assemble the pistons and rods at home. However, if you � decide to try that, please make sure you know what you're doing! The rods have � different faces on the sides of the big end. One to mate to another rod and one � that's beveled to fit the fillet of the crank throw. Also to be considered is � the orientation of the piston. The valve notches, if there are any need to match � where the valves are and even if you are using dished pistons, the pin will be � offset as the pistons have major and minor thrust sides. Your machinist will mount � them correctly. Just make sure you fit them in the correct position when reassembling � the engine. (I once bought a set of 'almost new' TRW pistons inexpensively because � a young man had put then in the block wrong and bent most of the brand new intake � valves in his 302 Chevrolet.)�
� �
�

�
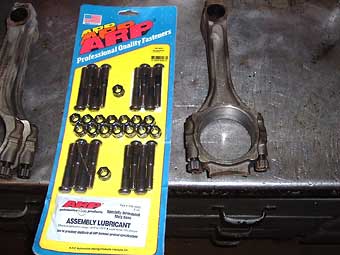
� One more important note about the rods: use new bolts! Many times these are � overlooked. They can cause very rapid destruction of the crank if they fail. � One long time drag racer I knew said he never saw a rod bolt break. Well, they � do break, but mostly they fatigue and stretch. Then what? The clearance on that � rod bearing opens up. More oil rushes past and oil pressure drops. That's the � first sign of trouble. It won't last long as the rod bearing will soon spin � because there isn't enough crush to hold it in place. The crank and rod will � be destroyed very swiftly thereafter. If the rod breaks, it can hole the block. � Stock replacement bolts are better than old fatigued ones, and aren't too pricey. � There are many others to choose from too, and no matter what the cost, it's cheap � insurance in the long run.�
� �
�

�
Other Machining Processes
��
There are other things to consider while the block is undergoing its surgery. �
How about grooves for o-rings in the deck? Depending on the compression you �
plan to run, or if a turbo or nitrous is to be used, it may be a very important �
step. Turbos and nitrous oxide use create extreme cylinder pressures and can �
overpower the head gasket if everything isn't exactly right. O-Ringing the block �
(or head in some cases) and using the proper gasket, and following the �
manufacturer's recommended torque specs and sequence can go a long way to �
keeping the motor together.�
�
While we are discussing the deck, there a few points to note. If, for example, �
the block needs one or more sleeves, or there was warping or for some other �
reason the deck was in question, it will need resurfacing. (This is also the �
case when you want to "Zero Deck" your motor during the build.)�
�
Usually, with most cast iron blocks, the machine shop is all set to "shave" the �
deck. They've done it often and know what's needed. However, with some aluminum �
blocks, using either iron or aluminum heads, and many late motors, there are �
special considerations. Check the instructions on the headgasket! You may find �
that a certain roughness average (Ra) in microinches is specified. The old "iron �
block, iron head" combination with a composition soft-face gasket needs 60 - 120 �
microinches Ra, while an aluminum head on iron block with the same type of gasket �
calls for 20 - 50 microinches Ra. Some newer OEM engines with multilayer steel �
head gaskets require even smoother finishes (perhaps 20 - 30 microinches Ra) and �
there are even a few that recomend 7 - 15 microinches Ra. Check with the �
manufacturer before scheduling the work. Do not assume the shop knows what type �
of gasket you are going to use.�
�
New cam bearings will be driven into their respective positions. If you've seen �
a cam bearing driver and are tempted to try it yourself, remember; the bearings �
get smaller as they go from front to the back of the block. The size difference �
isn't great so you need to pay attention or you could damage one. Also, I like �
to 'clock' the bearings. That is rotate them in reference to the bottom of the �
block. Looking at the cam from the front of the block, I like the oil holes at �
about 4 o'clock. That way the oil is heaviest where the pressure is the greatest �
on the bearing.�
�
�
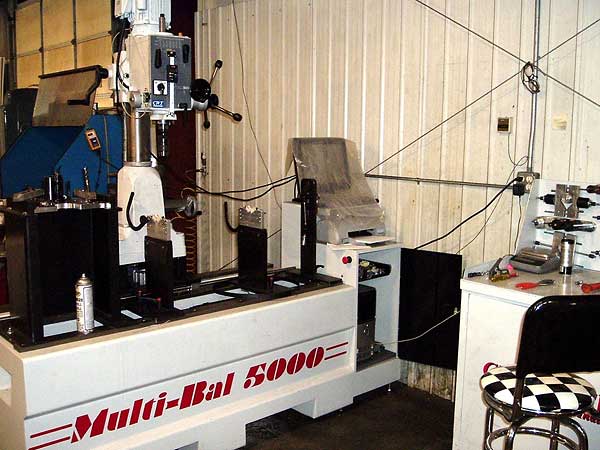
Balancing is something that needs to be done here too. New pistons weigh a bit �
different than the old ones. That calls for changes somewhere. Resizing the rods �
changes their weight too. All of the pieces need to be weighed individually, and �
matched to the lightest in the set by removing material. The crank is then spun �
with bob weights on the rod journals that equal the combined weight of the rods �
and pistons to determine how much needs to be added or removed from the crank �
throws. Removing weight is done by drilling. Adding weight requires putting a �
heavy metal ("Malory metal" is denser than steel) in the throws. This is a critical �
step for high-revving engines, whereas components that are similar-to-stock put �
into a stock motor may not always need balancing. Ask your machinist if you have �
any questions.�
�
Align boring is when the main caps are treated in a similar fashion as the rod �
caps were. Material is removed from the mating surfaces and then the caps are �
torqued in place and bored the length of the engine, assuring a straight seat �
for your crankshaft. This has to be done if you bought a new set of 4-bolt main �
caps for your 2-bolt block. The other 2 bolt holes will need to be bored and �
tapped on each cap at this time too.�
�
Crankshafts are part of this shortblock package that we've been discussing. The �
machine shop can check yours for straightness, and straighten it if necessary. �
The main and/or rod journals may have wear and need to be turned undersize. When �
that is done most shops supply the properly sized bearings when the crank is �
returned. Polishing the journals will help it move smoothly on the oil film layer �
between the crank and bearing. Getting the crank "indexed" can be helpful with �
some factory cranks. That's where all the throws are checked and offset ground �
as needed to be 90 or 180 from the others. I know, that's the way they should �
come from the factory, but it ain't necessarily so. If the throws are off by a �
few degrees, well, there all sorts of relationships will be messed up too! �
Where will the piston be when the intake valve opens or the plug fires at what's �
supposed to be 36 BTC at 5500 RPM? What effect will it have on exhaust scavenging �
if the piston is several degrees late getting to TDC compared to camshaft events? �
Go ahead Dr. Phil, just try to answer that one.�
�
That about wraps up the machine work on the short block. Oh, there are other things �
that can be done, but this is just to cover the basics. If you want to get even �
deeper into machine work and engine building, you might like to check out some �
of the books or magazines out there that specialize in just that.�
�
Editor's note: We would like to thank Bailey's Machine Shop, on Main Street �
in Pittsville Maryland (phone 410-835-2241) for their help with this article.�
� Disclaimer: This page was researched and written by Greg Myer. Views expressed � are those of the author, and are provided without warrantee or guarantee. Apply at your � own risk.�
� Photos by Greg Myer for The British V8 Newsletter. All rights reserved. �
