
�
�
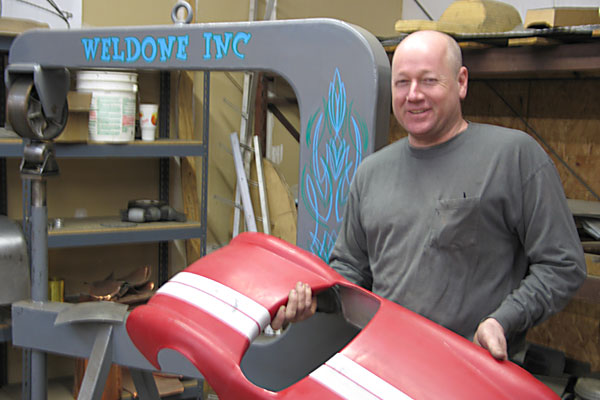
James Bowler holds a one-eighth scale model of his own custom hand-made all-aluminum sports car.
�
Metal Shaping 201: Hammerforming and Planishing Techniques
� as published in BritishV8 Magazine, Volume XVIII Issue 1, December 2010� �� by: Curtis Jacobson�
�
�
This article was inspired by a visit with James Bowler at "Weldone" in Richmond�
Virginia in February 2009. I was already familiar with James' work on two cars: �
the MGB GT V8 race cars of�
Les Gonda and�
Keith Burnett�
respectively. (James had just completed�
a third MGB GT V8 racecar�
too.) Weldone provides pretty much any �
metal fabrication, race car construction, or automotive welding service you might �
need. During that first visit, I was particularly impressed by James' scratch-built �
work: James is skilled in the traditional arts of turning flat sheetmetal into elaborately �
formed automobile panels. James has built whole cars from scratch. So, on my way �
home from BritishV8 2009, I stopped by Weldone for a second visit and James kindly �
gave me a quick lesson in metal shaping. �
�
Hammerforming and planishing are two of the most important and fundamental techniques �
of custom sheet metal fabrication. �
�
�
�
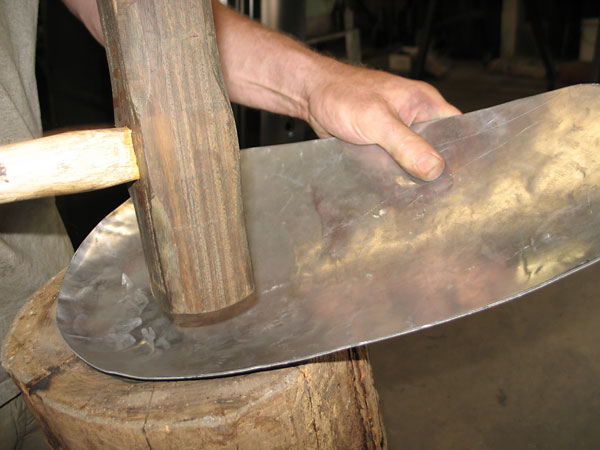
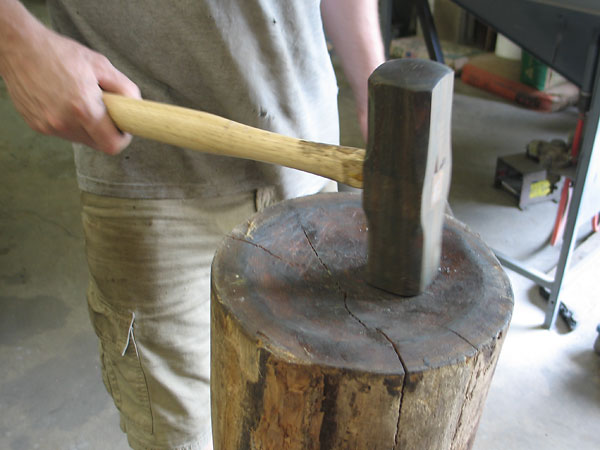
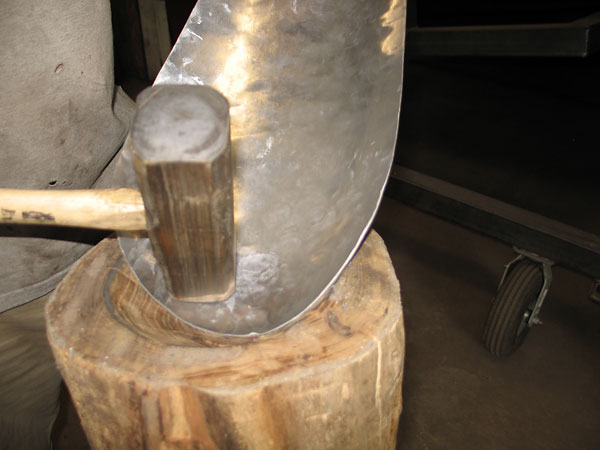
Hammerforming aluminum with home-made wooden tools.
�
�
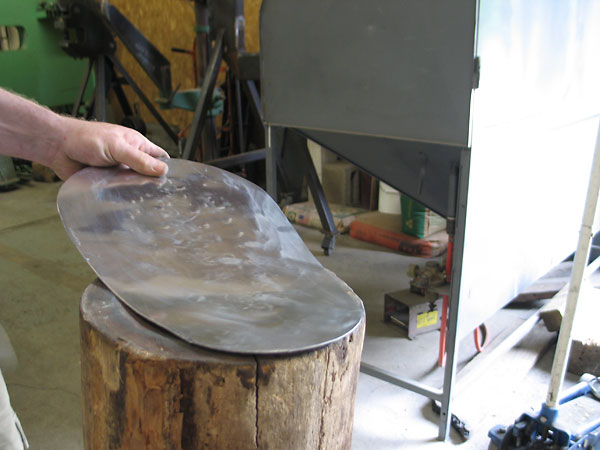
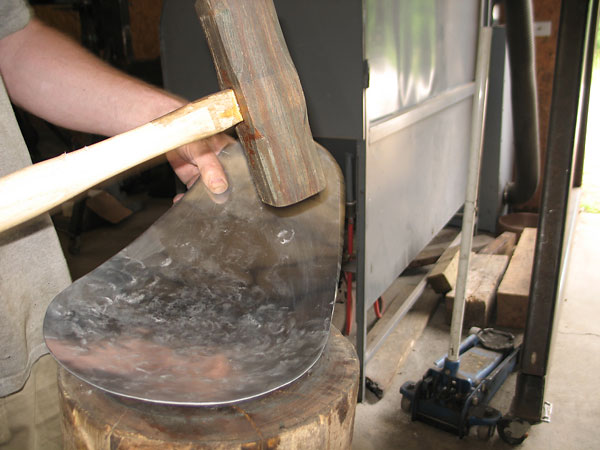
Hammerforming involves shaping sheetmetal with a relatively soft mallet against a concave surface.�
For hundreds of years, hammerforming has been done over tree stumps or logs which have been carved�
out to feature bowl-shaped tops. More elaborately shaped concave surfaces can be used for specific�
jobs, but the basic round bowl shape remains supremely useful. A variety of bowl diameters and�
depths facilitates more varied work.(Another traditional method of hammerforming uses a leather bag�
filled with sand or lead shot.) �
�
�
�
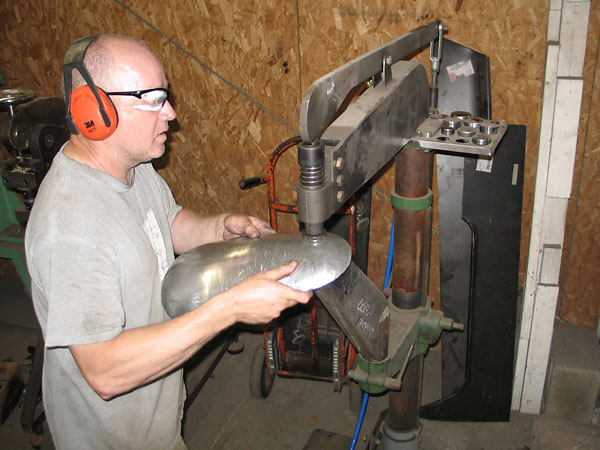
Planishing with a shop-built pneumatic hammer.
�
�
Planishing is a technique for smoothing out small irregularities. The formed sheetmetal is held�
between a smooth, flat, and relatively hard hammerhead and a hard dolly that matches the contour�
of the part. Planishing a sheetmetal part for a hot rod car or motorcycle might involve many�
or even many thousands of small hammer blows depending on the size of the part, so mechanized�
planishing hammers have been devised to save time and to keep the force and alignment of hammer�
blows consistent. The fundamental technique is the same, regardless of how elaborate the tools�
are. �
�
Over the last five decades, as molded composite materials like fiberglass and carbon-fiber have�
became increasingly popular for bodywork on performance and racing cars, classic materials and�
techniques continue to work just as well as they ever did. For one-off and very low volume parts,�
there remain many applications where hammerformed metal still beats composites in terms of cost,�
timeliness, strength, stiffness, appearance, and/or lightness. Of course, sheetmetal work does�
require specialized skills but usually a craftsman can go right to making a part instead of first�
having to construct a mold. Many of the low volume fiberglass-bodied cars of the late fifties�
and early sixties (e.g. Lotus, Elva, Peerless, Turner, etc.) were originally constructed from�
hammerformed aluminum. Only as production volume grew were the designs duplicated by laying�
fiberglass over original aluminum bodywork. In the late sixties, when MG needed flared fenders�
for their Sebring MGC GT racecars, the originals were hammerformed from aluminum. �
�
Please support the sponsoring companies who make BritishV8 possible, including:
�
 �
�
The Project...
��
Without a project to work on, we wouldn't have much of a story so I suggested we make a performance�
blister for an MGB bonnet. I imagined that if I ever get around to replacing my Buick intake manifold�
with an Edelbrock manifold and replacing my Edelbrock carburetor with a Holley, I'll surely need to�
raise the roof above them. That project isn't currently on my to-do list, but it seemed like an�
interesting enough premise.�
�
Layout and Making a Blank
��
�
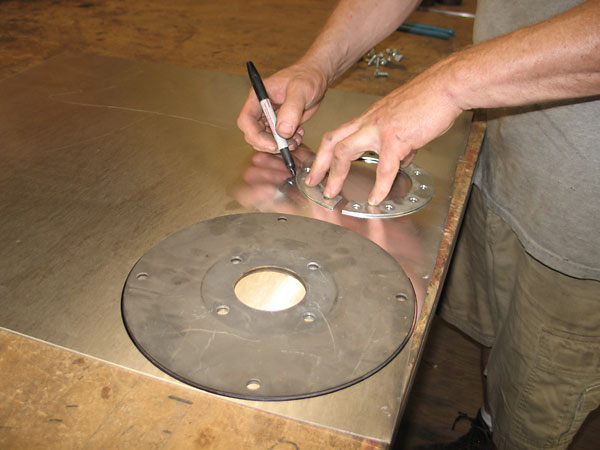
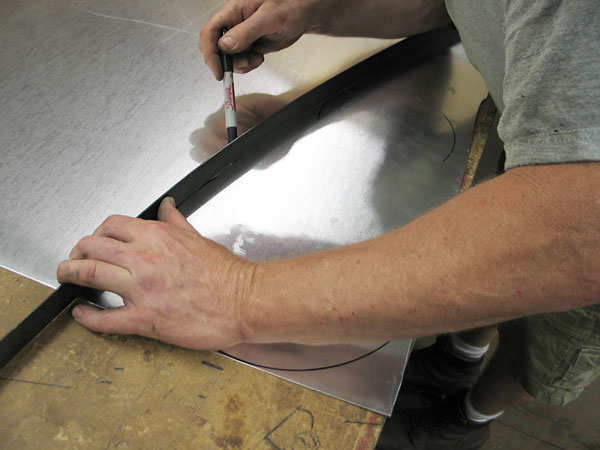
James selects some material, marks out a blank, and cuts it to shape.
�
�
The material chosen is a soft, readily formable aluminum called "3003-H14". 3003 designates the
�
alloying metals, and H14 designates that this alloy has specific work-hardening characteristics.
�
(Anticipating how the metal will stretch, James draws curved lines where I'd have put straight ones.)
�
�
When you sharply fold 3003-H14, the creased area hardens. The material also hardens if your strike it
�
hard with a hammer. Before continuing with shaping, you must soften the hardened area by an annealing
�
(heating) process. In our project the material will be treated gently and no annealing will be necessary.
�
�
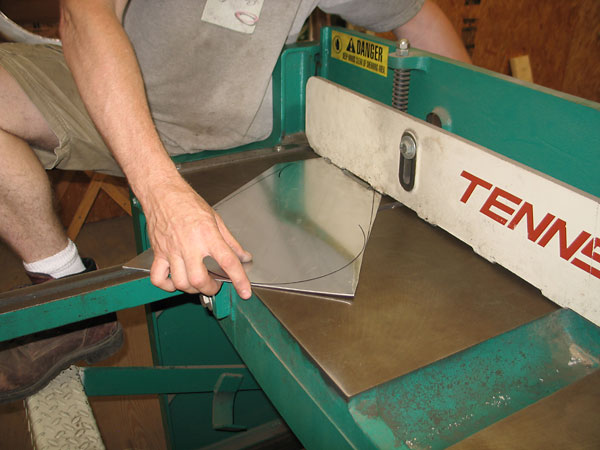
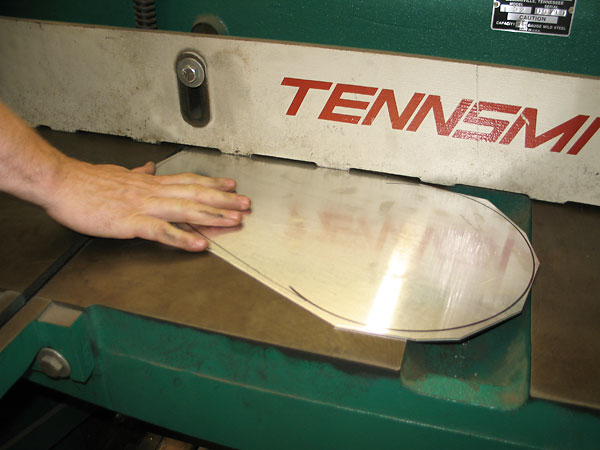
This 52 inch Tennsmith foot operated shear is particularly convenient and handy for small projects.
�

�
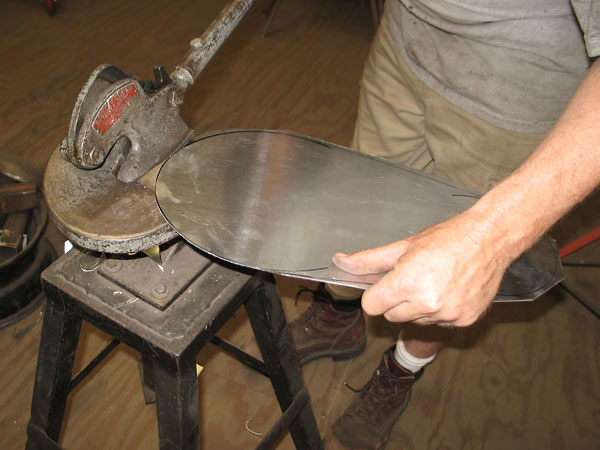
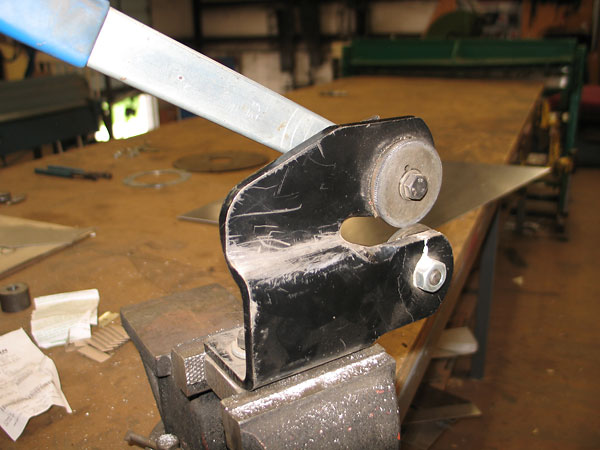
This little Beverly Shear cuts flat sheetmetal along a curved path without leaving marks or burrs.
�
Beverly Shears are still made in U.S.A., in two versions: the 18# model B-1 and the 35# model B-2.
�
(Don't kid yourself that a cheap imitation will work as well.)
�
�
James rotates and guides the workpiece with his left hand as his right hand lowers the shear's lever.
�

�
Of course he has to take multiple cuts to work his way around the piece.
�
Initial Shaping with Wooden Hammer and Stump
��
�
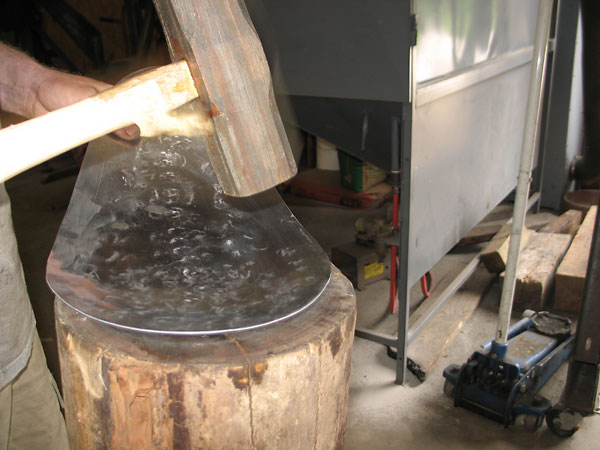
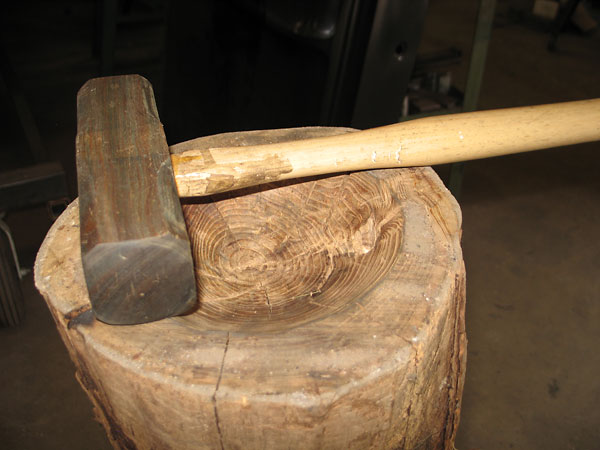
The striking face of the mallet is radiused to match the concave shape carved into the end of this
�
old hardwood log. No matter where you set the head of the mallet against the bowl, it won't rock.
�
Small irregularities in the bowl surface, such as the cracks in the wood, usually don't transfer to
�
the metal. Even if they do, they'll be ironed out later by the planishing hammer.
�
�
The general approach is similar for most bowl shapes. You start with a few relatively hard hammer
�
blows in the center of the workpiece, then spiral outward toward the edges. However, its not
�
practical to form our part in one pass. Instead, we'll try for a controlled and gradual stretch.
�
�
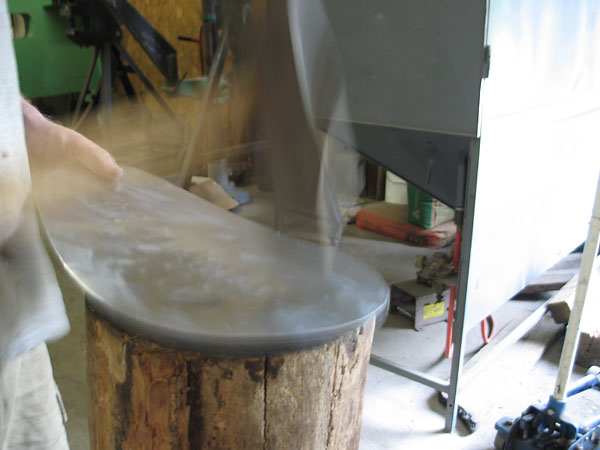
And so James proceeds...
�
�
...bang, bang, bang, bang, bang...
�

�
...bang, bang, bang, bang, bang.
�
�
Pause to look at the work.
�
�
After another fifteen or twenty hammer blows...
�
�
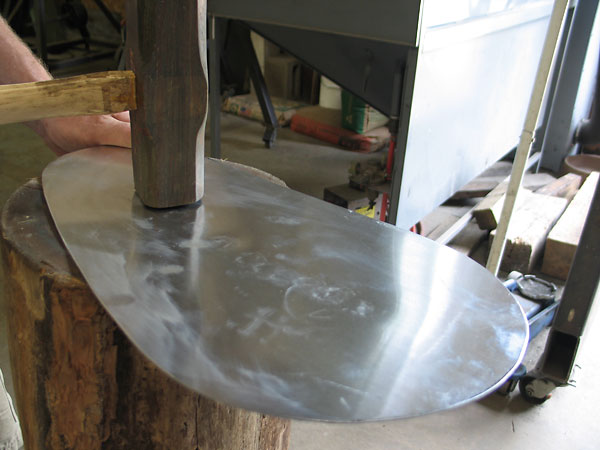
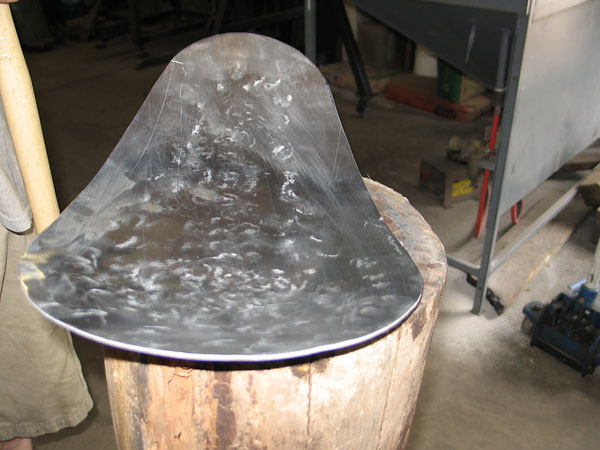
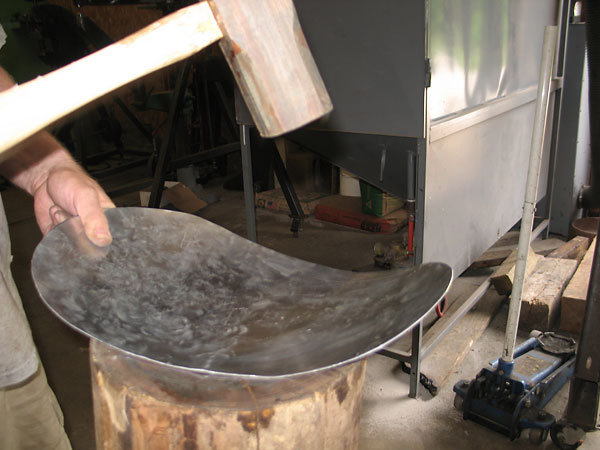
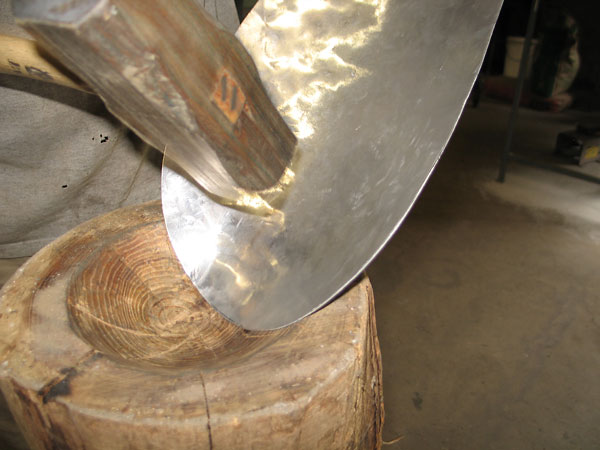
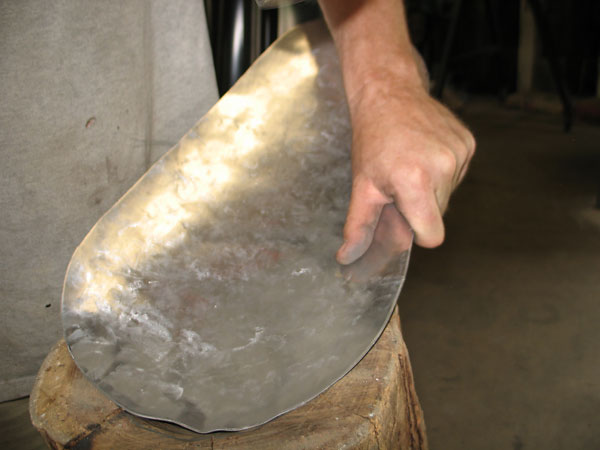
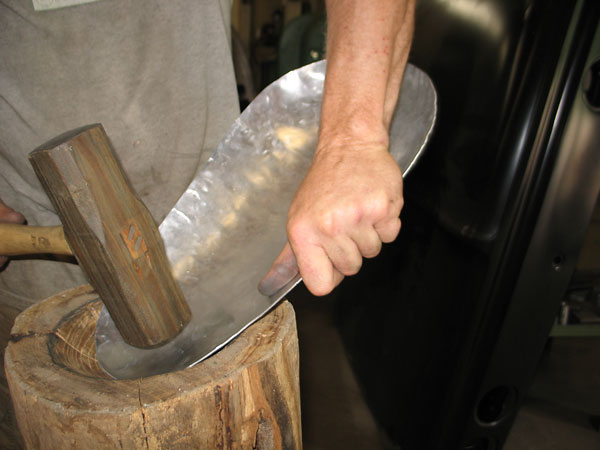
As you can tell, the workpiece is continuously moving over the round bowl-shaped contour of the
�
stump and it's nowhere near deep enough to touch bottom yet. Notice though that the hammer blows
�
aren't exclusively aimed into the center of the stump. He's intuitively working the metal along.
�
�
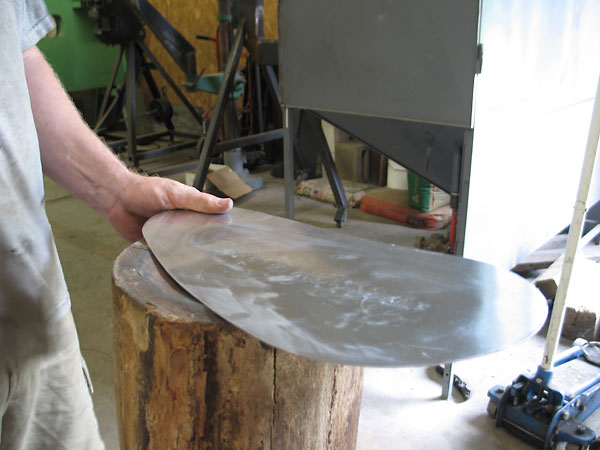
Our part is stretching too much in its longitudinal center and it obviously won't lay flat on an
�
MGB bonnet, but James can manage that for now by flattening it by hand.
�
�
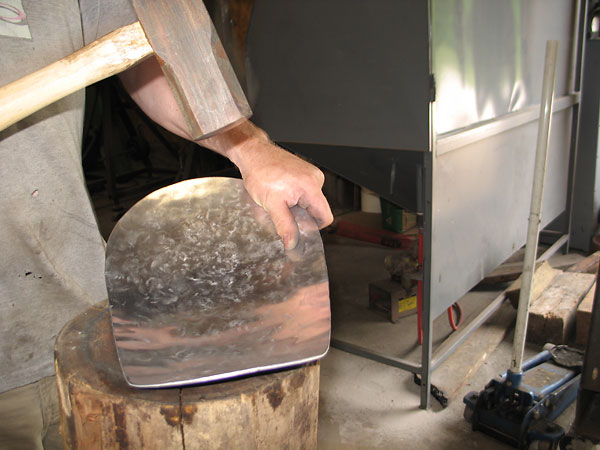
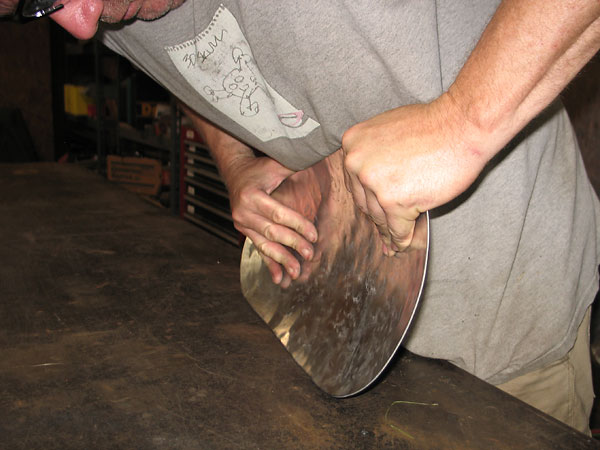
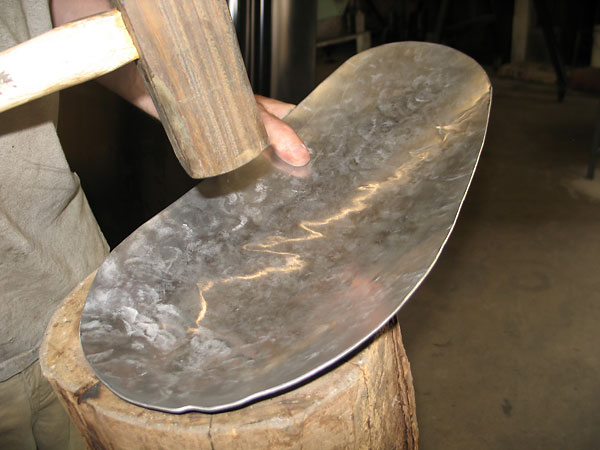
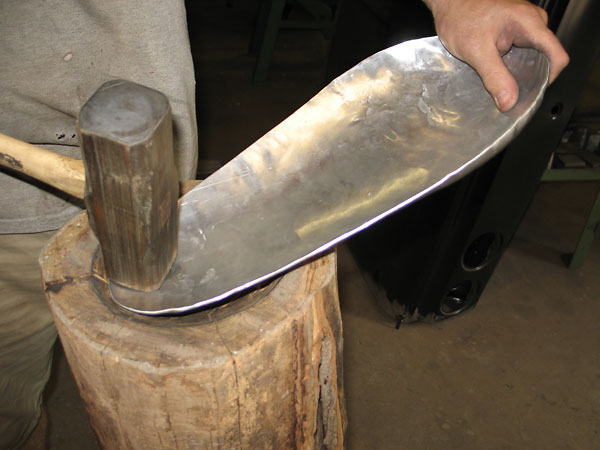
James has continued working the wider end of the part with the confidence of a true craftsman.
�
Gradually it's approaching the contour of the stump...
�
�
... so he begins working that depth across the workpiece.
�
�
He's now holding the wide end and hammering the narrow end to depth.
�
�
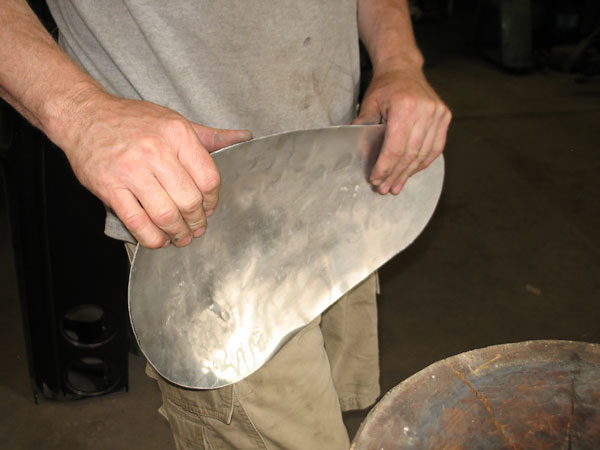
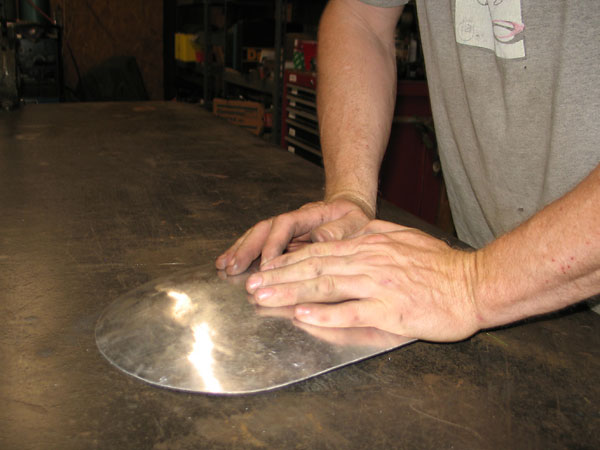
At this point we step away from the stump and over to James' thick steel surface plate (table).
�
At a glance it's clear that the part doesn't lay flat, so James leans on it a bit...
�
�
... then flips it around and leans on it a little more. Now the edges are straighter,
�
so we walk outside and lay the part on my MGB's bonnet.
�
�
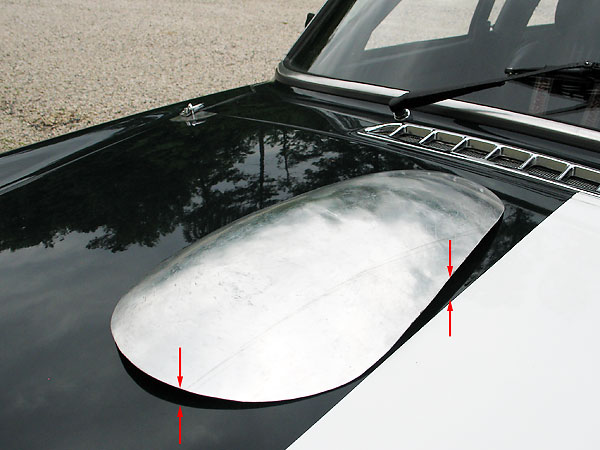
Now we can really see where we stand. We want the bulge a bit taller, and we also need
�
to eliminate gaps along the side edges and front end of the workpiece. Back to the stump!
�
�
Enjoying this article? Our magazine is funded through the generous support of readers like you!
�
To contribute to our operating budget, please click here and follow the instructions.
�
(Suggested contribution is twenty bucks per year. Feel free to give more!)�
Phase II Hammerforming: Deeper Profile and More Refined Shape
��
�
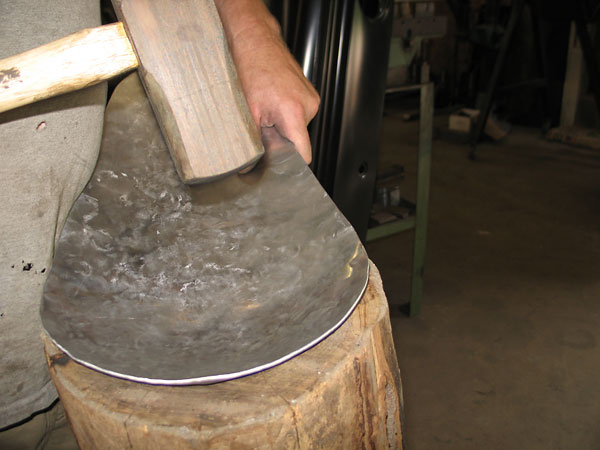
Here, the log is flipped 180 degrees to expose a deeper bowl section.
�
The opposite end of the hammer head is contoured to match this bowl's radius.
�
�
The next order of business is to bring the tip of the wide end of the workpiece down. This technique
�
is a combination of stretching and shrinking. The stretching aspect is obvious. At the same time,
�
some wrinkling occurs at the edge, is smoothed out, and the material thickens in that local area.
�
�
James continues making the bowl section deeper and deeper.
�
�
The same basic strategy applies: hammer first in the center of the concavity,
�
and then work outward in concentric circles of overlapping hammer blows.
�
�
(This may seem like a long series of photographs. Trust me on this: I took a lot more photos
�
than I'm publishing here. Actually though, the part was quickly changing before my eyes.)
�
�
We pause for a moment and have another look at the part in its ultimate context.
�

�
Flatten the sides down again...
�
�
Work on the big end a bit more...
�
�
Work on the little end a bit more...
�
�
Smooth everything up...
�
�
Back to the car again...
�
�
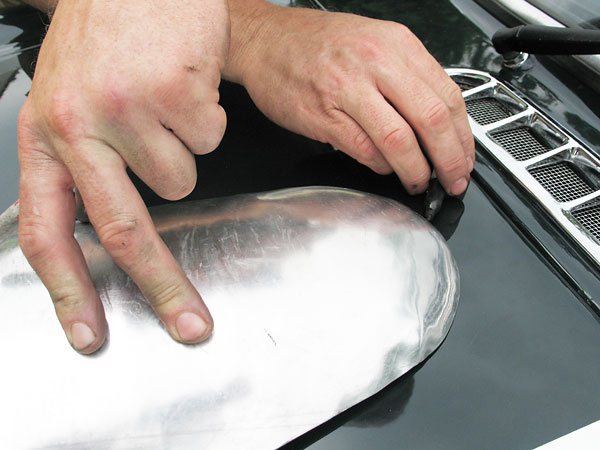
James lays a black magic marker on the MGB bonnet and gently pulls the marker along the edge
�
of the workpiece to trace where it needs to be trimmed.
�
�
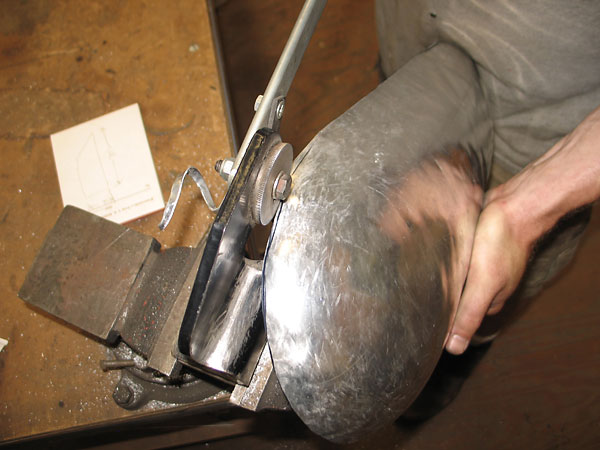
This Sykes-Pickavant rotary shear is a simple but high quality British tool.
�
(Regrettably, it's been discontinued. Don't kid yourself that Chinese copies are as good.)
�
�
The Sykes-Pickavant rotary shear neatly trims the edges of compound-curved sheetmetal parts.
�
Working with a Pneumatic Planishing Hammer
��
�
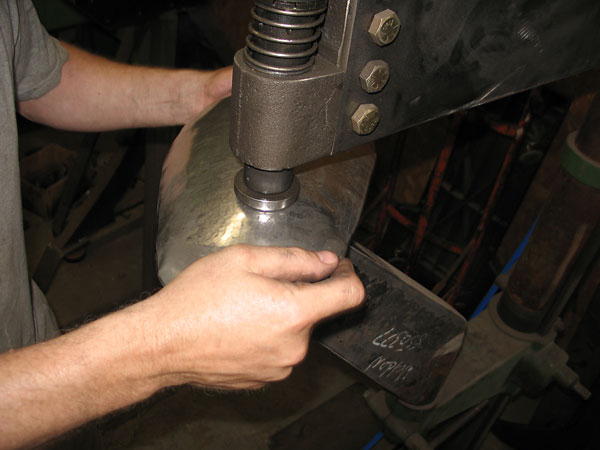
A pneumatic planishing hammer is a stationary tool that facilitates smoothing a hammerformed sheetmetal
�
part with relative speed and ease. The workpiece can be held in both hands and moved carefully and
�
accurately relative to the dies while a foot operated switch controls the machine. James Bowler built
�
this machine, using the column from an old drill press and a basic (hand held) pneumatic hammer.
�
�
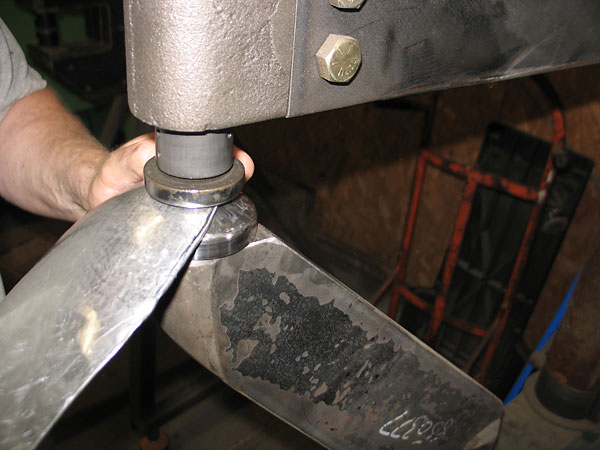
Both upper and lower dies of the hammer are easily replaceable. Upper dies are always flat, and the
�
only difference between them is their diameters. Lower dies are crowned to match the contour of the
�
part being worked.
�
�
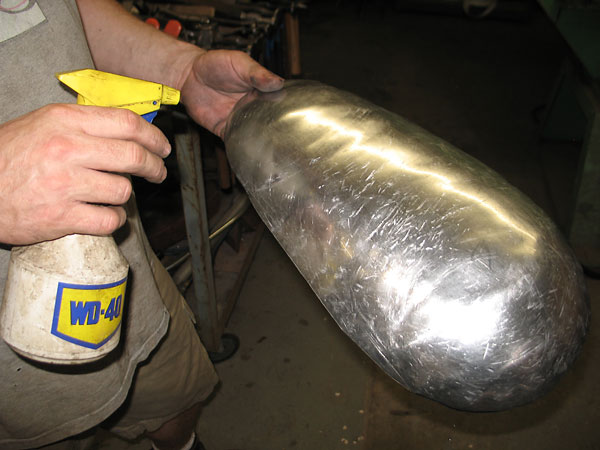
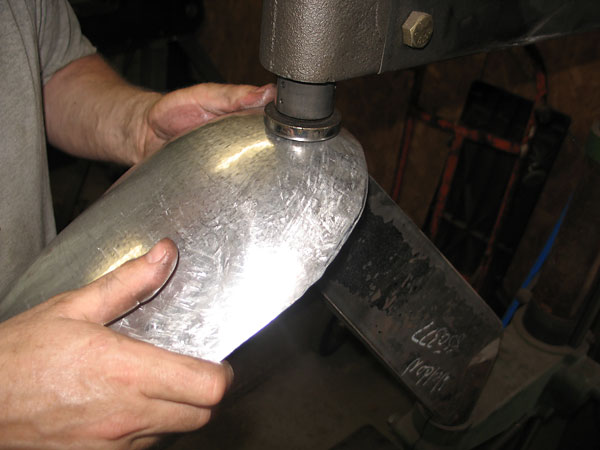
Silicone lubricant (such as WD-40 as shown here) is very helpful when planishing, but not necessarily
�
for its lubricity: the film makes it much easier to identify visually what areas have been worked.
�
�
Here you can see some trails of hammer blows, in parallel rows, in silicone lubricant film.
�
�
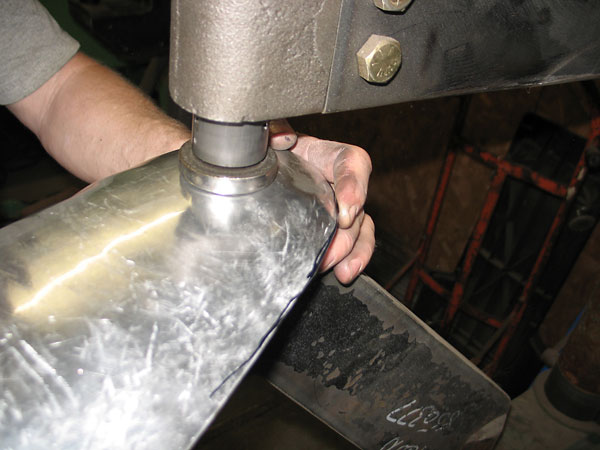
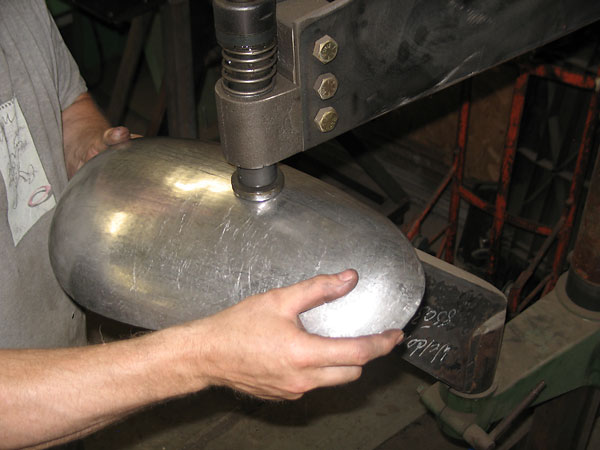
Here James is working the middle of the workpiece using a relatively flat bottom die.
�
�
Back and forth, back and forth, until the whole middle section of the workpiece is smooth.
�
�
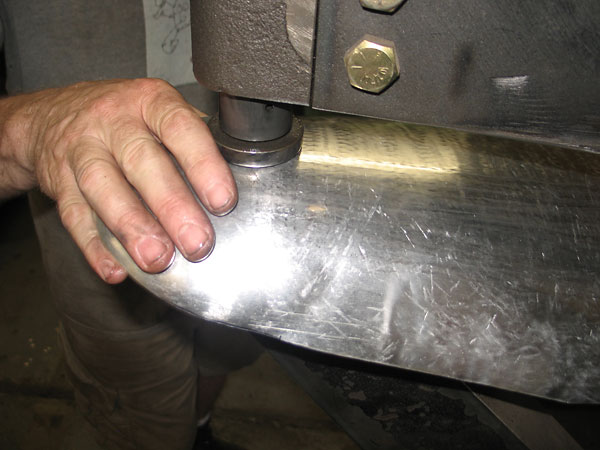
Now we pause to change to a more highly curved lower die and James quickly checks that
�
it suits the outer edges of the workpiece where the inside radii are smaller.
�
�
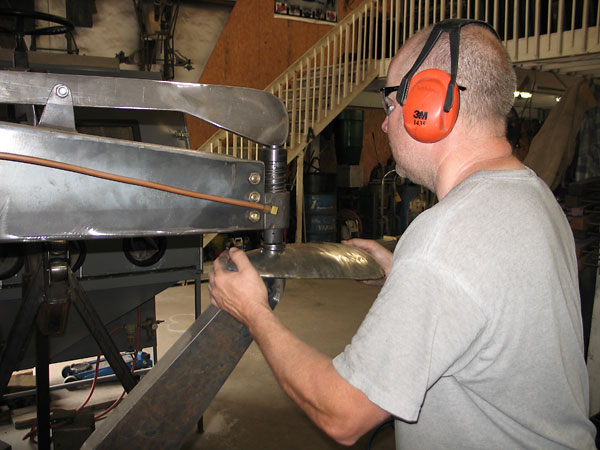
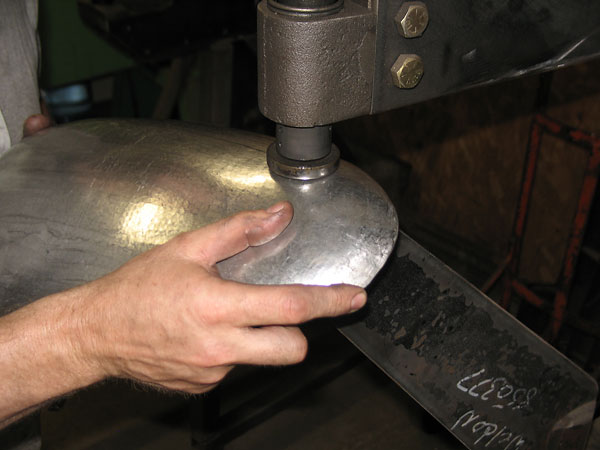
Press the foot pedal and go. The pneumatic hammer answers with a quick: bam bam bam bam bam bam.
�
�
Even though it doesn't really seem all that loud, you should still wear hearing protection.
�
�
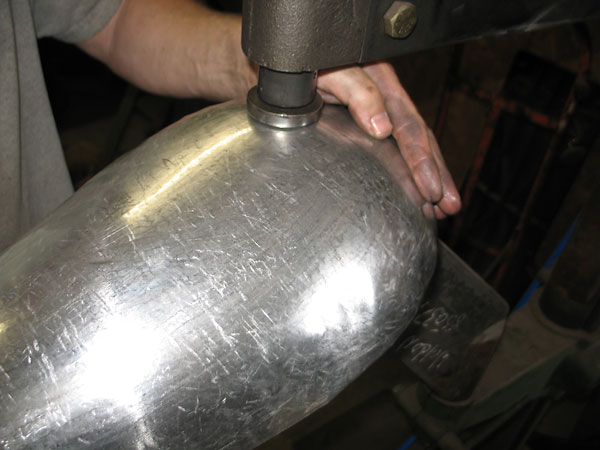
Back and forth, back and forth. Planishing is a process of many, many light hammer taps.
�
�
The part seems to get smoother and smoother, but at some point you must call it quits.
�
�
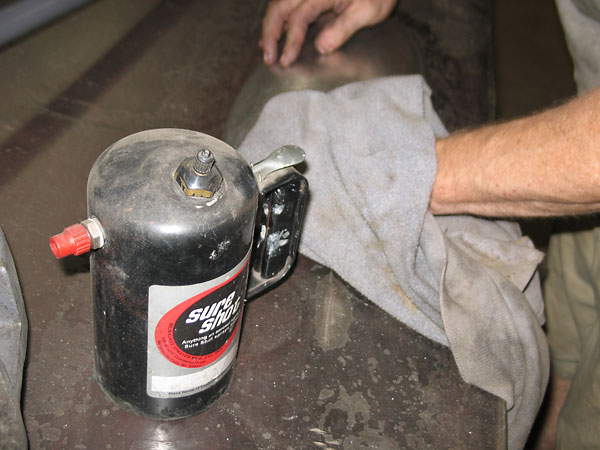
This handy Sure Shot dispenser has a little lacquer thinner in it. James uses it to remove the WD-40.
�
�
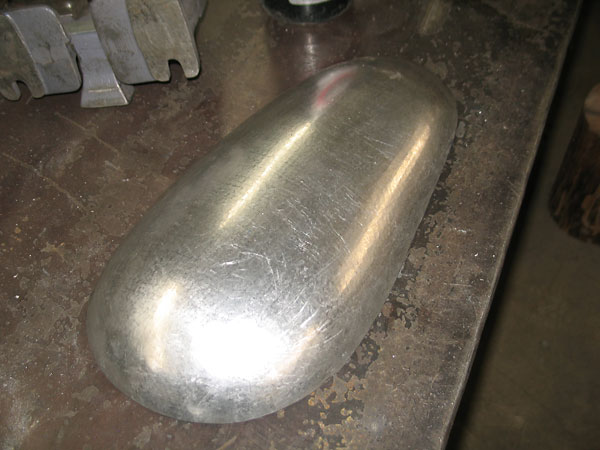
There are a few light scratches on the part, but they could be removed with steel wool, sandpaper, etc.
�
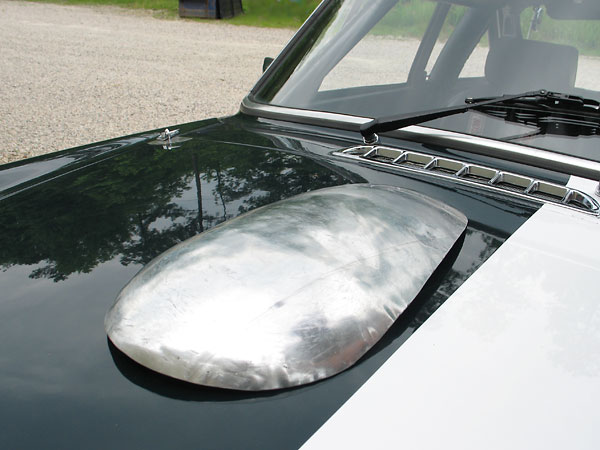
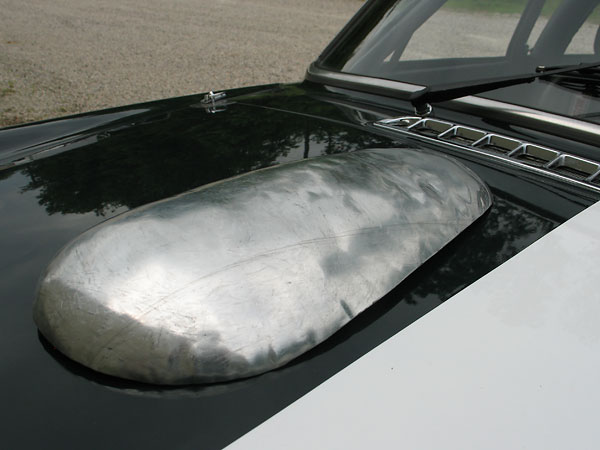
Our custom aluminum hammerformed bubble is ready to install. Perhaps for a future article we'll repair
�
a sprung aluminum MGB bonnet, then turn on the TIG welder, and...
�
�
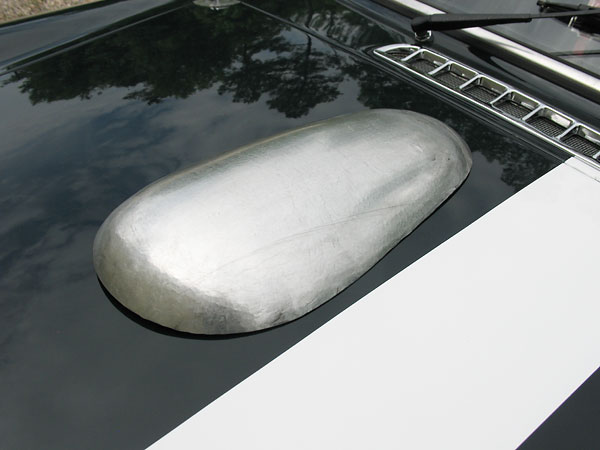
From the moment I entered James Bowler's shop until we walked outside and took this photo, only
�
1.5 hours passed. Of course James would have been much quicker without me getting in the way and
�
asking questions. I hope this article will inspire readers to carve up some old logs and start making
�
their own metal bowls. Perhaps it will even inspire a few readers to fabricate their own pneumatic
�
planishing machines. If the article inspires you to commission custom aluminum or steel bodywork
�
for your project car, please remember James Bowler and his shop: Weldone Inc. of Richmond Virginia.
�
�
Would you like to see more examples of James' work? Check out these articles!
�
James Bowler's MGB GT V8 Race Car (For Sale!)
�
Bill Thumel's 1961 Elva Courier Race Car
�
�
Disclaimer: This page was researched and written by Curtis Jacobson. Views expressed �
are those of the author, and are provided without warranty or guarantee. Apply at your �
own risk.�
�
Photographs by Curtis Jacobson for BritishV8 Magazine. All rights reserved.�
�
