
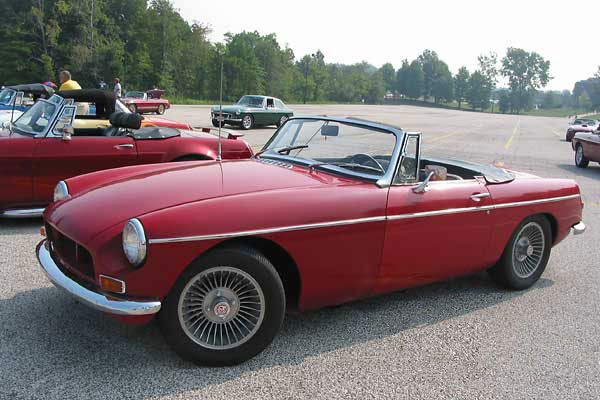
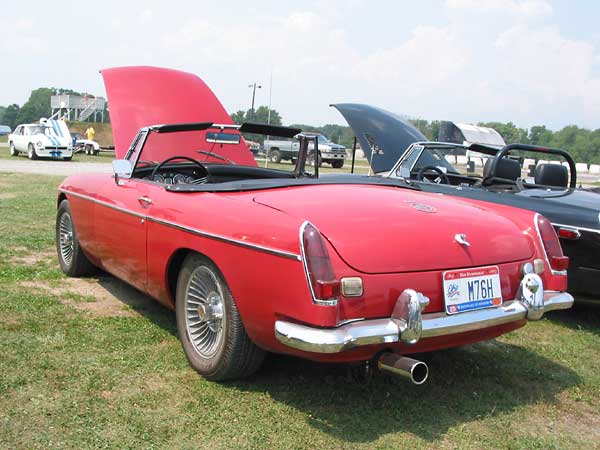
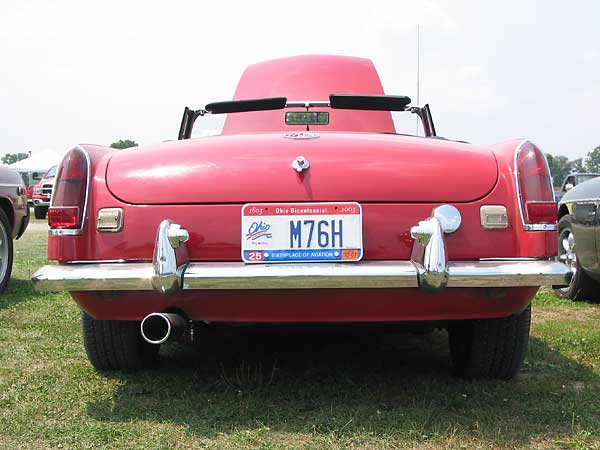
Scott Costanzo's 1968 MGB with GM 3100 SFI V6
as published in BritishV8 Magazine, Volume XVII Issue 1, July 2009Owner: Scott Costanzo
BritishV8 UserID: Scott68B
City: Dublin, OH
Model: 1968 MGB
Engine: GM 3.1L (FWD) V6
Conversion by: Owner
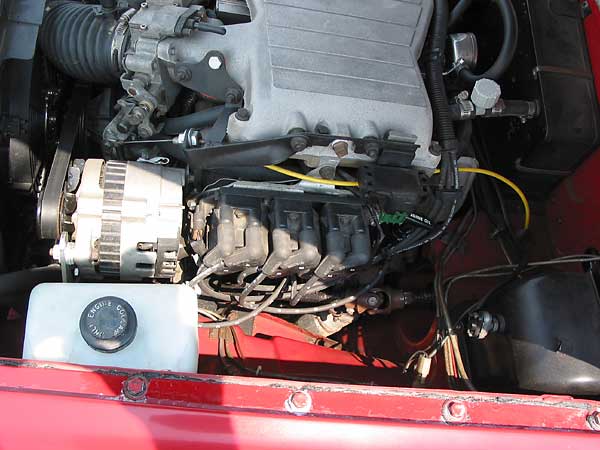
| Engine: | GM 3.1 FWD V6 (from a 1989 Buick Regal donor car), upgraded with "Generation 3"
cylinder heads and both upper & lower intake manifolds (from a 2001 Chevy
Malibu 3100). Stock cam has been reground by Delta Camshaft (to 260 duration,
0.469" lift, 1.6 roller fulcrum rockers, and 112 LSA.) GM OBD1 "MPFI"
multi-point fuel injection system (1227727 ECU). GM Generation 3 injectors.
Jeep 4.0 throttle body (60 mm). Volkswagen submersible fuel pump. GM direct
ignition system. |
| Cooling: | stock MGB radiator, 180 degree thermostat, 10" puller fan, controlled by engine ECM. |
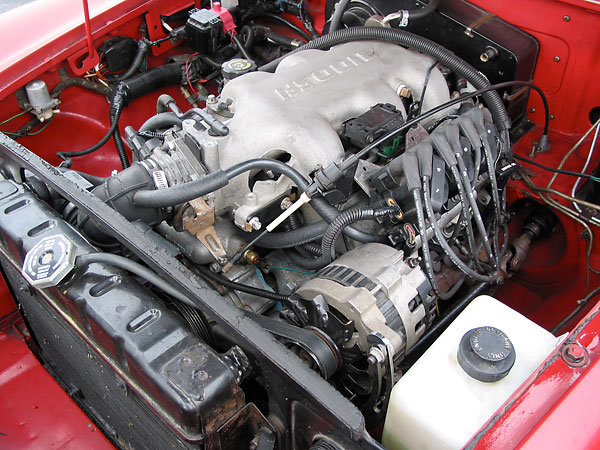
| Exhaust: | using stock GM F-body V6 manifolds for now. Equal length headers are planned. |
| Transmission: | Borg Warner T5 (non "world class"). Stock GM V6 F-body clutch/pressure plate.
Howe HTOB. Custom driveshaft with up-rated u-joints. |
| Rear Axle: | stock MGB (3.91:1 gear and open differential). |
| Front Suspension: | stock, upgraded with polyurethane bushings. |
| Rear Suspension: | stock, upgraded with polyurethane bushings. |
| Wheels/Tires: | aftermarket ("Western") Datsun 240Z alloy wheels, 195/60/14 BFG Comp TA tires. |
| Brakes: | stock MGB. |
| Electrical: | stock MGB gauges. The tachometer has been rebuilt with a Theo Smith circuit board
to suit the V6 engine. |
| Other: | "Special Tuning" spoiler (from Moss). |
| Weight: | 2020 lbs. (measured with a half tank of fuel and an empty trunk.) |
| Completed: | driveable since May 2004, but not yet "completed". Driven about 4500 miles
as of December 2008. |
| Comments: | Mike Maloney's MGB V6 (converted by Dann Wade) was the original inspiration
for my conversion. The conversion process has been a blast and has transformed
the car for the better.
The FWD (front wheel drive) version of GM's 60-degree V6 was selected for several reasons. It's lighter and has a performance improvement due to a better breathing "top ends" (heads and intake manifolds) than the RWD (rear wheel drive) versions... plus it's different! I originally used what is known as a "Generation 2" FWD engine, but I have since updated to Generation 3 top end for even better breathing. It has been a very cost effective choice and there is plenty of technical and parts support available for it. I've been tuning the ECU for the more efficient Gen 3 top end. Here's a summary of how that's done: I plug into the ECU's "ALDL" (Assembly Line Data Link) connector with a cable that goes to the serial port on my laptop computer. Then I use a free computer program called "TunerPro" to take data logs. Using TunerPro, I make changes to the binary code programming that's stored on the engine ECU's chip. I download the revised programming onto a new chip with a computer chip burner. It's an iterative development process: read the data logs and burn a new chip, then test drive. (You can repeat until you're totally satisfied with the tuning.) Besides changing the fuel injection map, I've also used TunerPro and the ECU chip burner to change the engine's cooling fan "on" and "off" temperature settings, to disable the engine's speed limiter, to adjust the ECU to correctly read my vehicle's speed sensor input, to disable the EGR ("exhaust gas recirculation" system), to adjust fueling for idle and part throttle operation, and I've modified the ignition timing. This winter I'm going to hopefully complete my custom headers and get them on the car. At that point, I'll retune the engine ECU to optimize based on the effect of better exhaust flow. My MGB V6 is still a work in progress. Future plans include a 7/8" sway bar up front, updated rear axle, and possibly another engine upgrade. Budget has been and will continue to be an issue. Most parts came from junkyards and many others have been fabricated by owner. |
Please support the sponsoring companies who make BritishV8 possible, including:

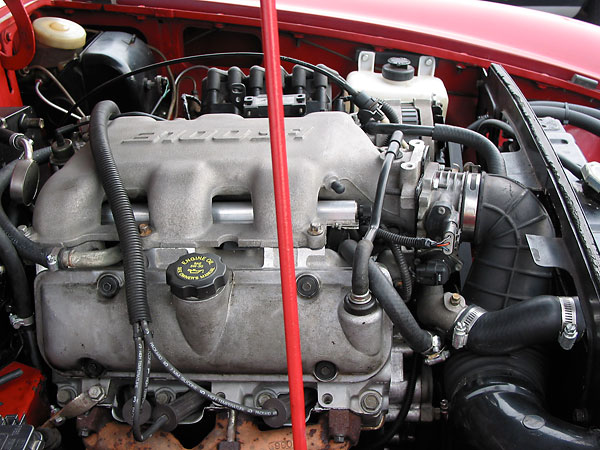
"Generation 3" Top End, as Currently Installed
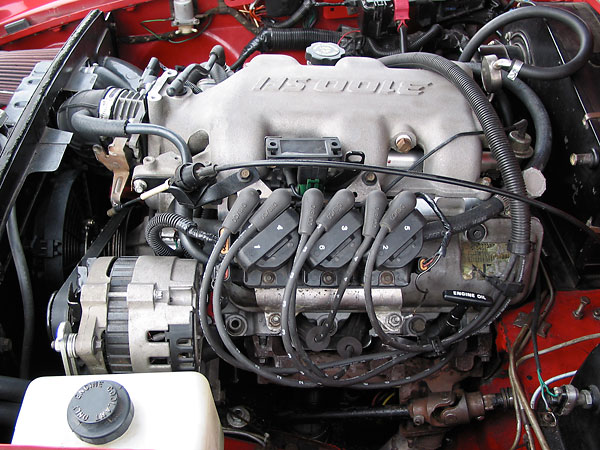
GM 3100 SFI (sequential fuel injection) V6 as currently installed
GM direct ignition system.
Jeep 4.0 throttle body (60 mm).
Until custom headers are completed, these iron manifolds will do.

Aluminum heads are a desireable feature of the "FWD" GM 60-degree V6 motors.
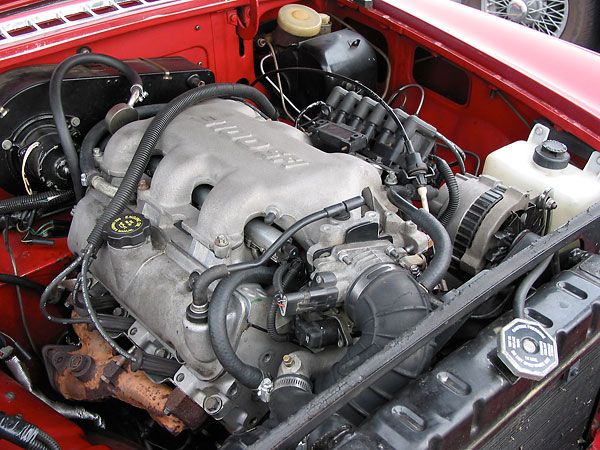
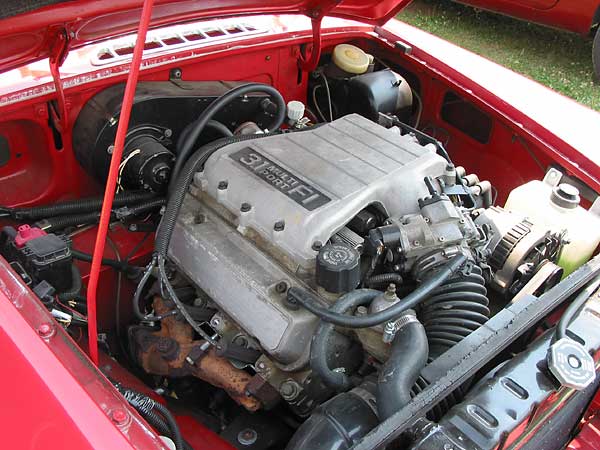
"Generation 2" Top End, as Previously Installed
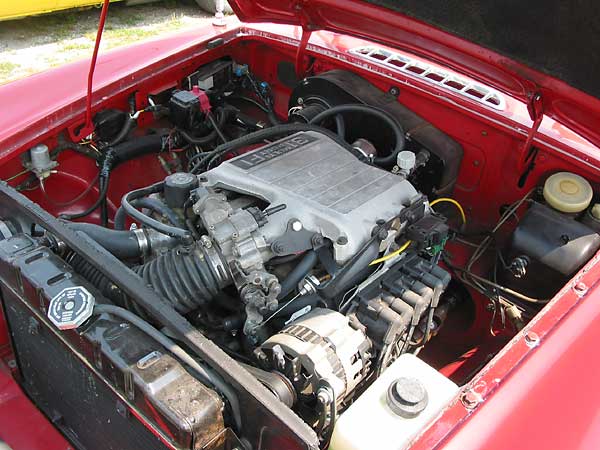
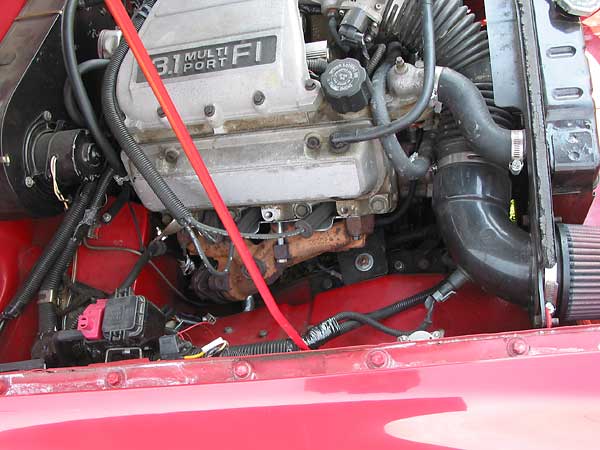
GM 3.1L "Multi Port" V6 as previously installed.
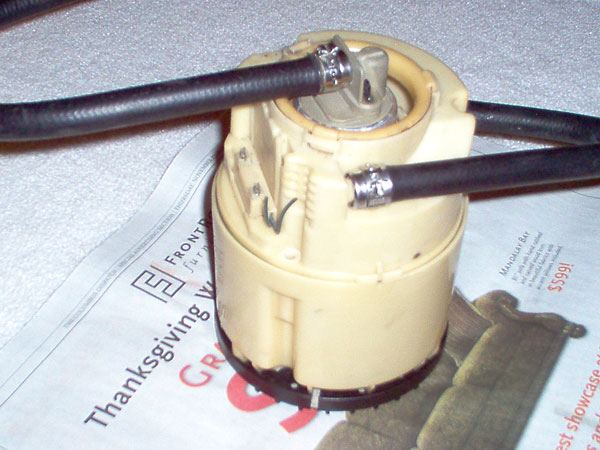
An Important Upgrade: In-Tank Fuel Pump!
When I initially set up the fuel injection system, I used an external fuel pump. However, I wasn't very satisfied with that pump because it was noisy. Also, I was always concerned about potential reliability and durability problems. In-tank pumps are generally better in those respects. But how to install one? The following photos illustrate my approach.
Cutting the MGB trunk floor didn't seem to be a good option, so I looked for a very
compact pump that would fit entirely within the tank - not stick out the top.
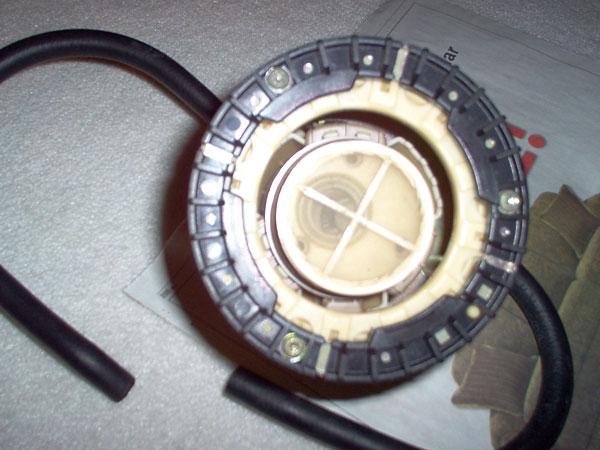
I selected a 1990's VW Jetta fuel pump. A nice feature of this pump is its built-in "swirl pot".
The pump is designed to be held in place by a mounting ring at its bottom.
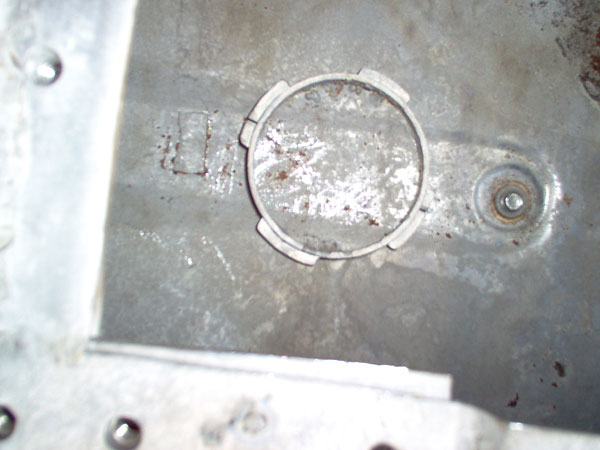
A local radiator shop "boiled-out" the MG fuel tank for me; then I cut an access hole in its top.
Next, I welded a mounting ring to the bottom of the tank. The fuel pump will twist onto this ring.
I fabricated the ring out of 3" exhaust tube, with some tabs welded onto it.

The pump fits very nicely into the tank (height wise), with about 1/2" clearance to the access cover.
The access cover is a very simple fabrication. It works in conjunction with two sets of 1/8" thick
steel strips. I welded nuts to one set of the strips and then in turn welded the strips to the tank.
The cover itself is sandwiched between the tank and the second set (as you can see better below.)
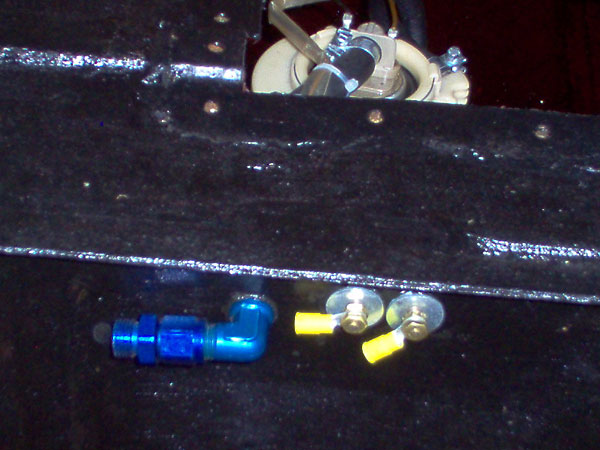
The fuel supply line and power go through the front of the tank. For the electric connections,
I searched all over for appropriate Teflon-shouldered washers to seal the screws and protect
them from grounding to the tank. I couldn't find any I liked, so I fabricated my own.
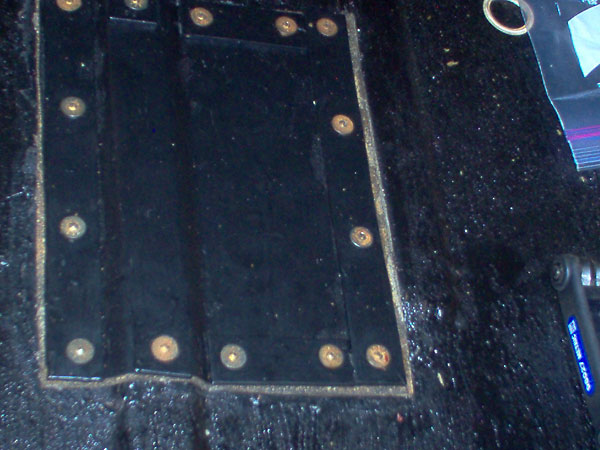
The access cover is clamped down tightly with flat-head socket head cap screws. The second
set of reinforcement strips (as described above) spread the bearing area. I haven't had
any problems with leaks in the two years I've had the tank installed.
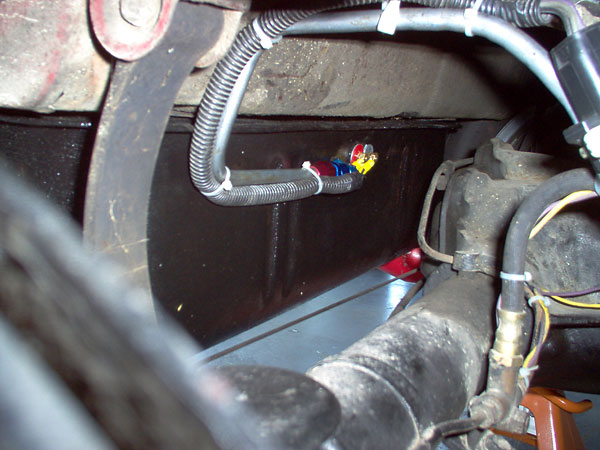
The fuel supply fitting is a standard bulkhead fitting. I ran 3/8" plumbing all the way forward.
I used the original (5/16") MG fuel lines as my return. I've been very happy with this in-tank
fuel pump system, and I've had no fuel related issues since installing it. It's also very quiet!
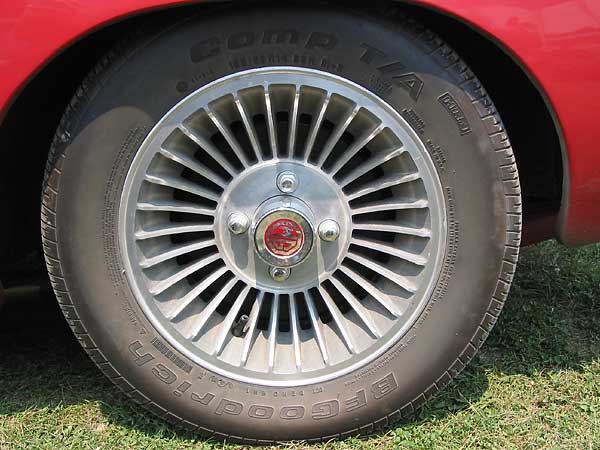
Western alloy wheels (aftermarket for Datsun 240Z), 195/60/14 BF Goodrich Comp TA tires.
